
Call sentiment analysis and BigChange logging
In this guide, we'll build a workflow in Build Concierge that:
Automatically analyzes completed calls;
Detects customer sentiment;
Logs the results as a Contact Note in BigChange; and
Flags notes where manager escalation is required.
1. Introduction to example use case
Greenshield Pest Control are a company that provides pest control services to domestic customers across the South of England.
2. Current process
Every day, their team handles calls from customers, reporting pest issues, booking visits, or asking for follow-up support.

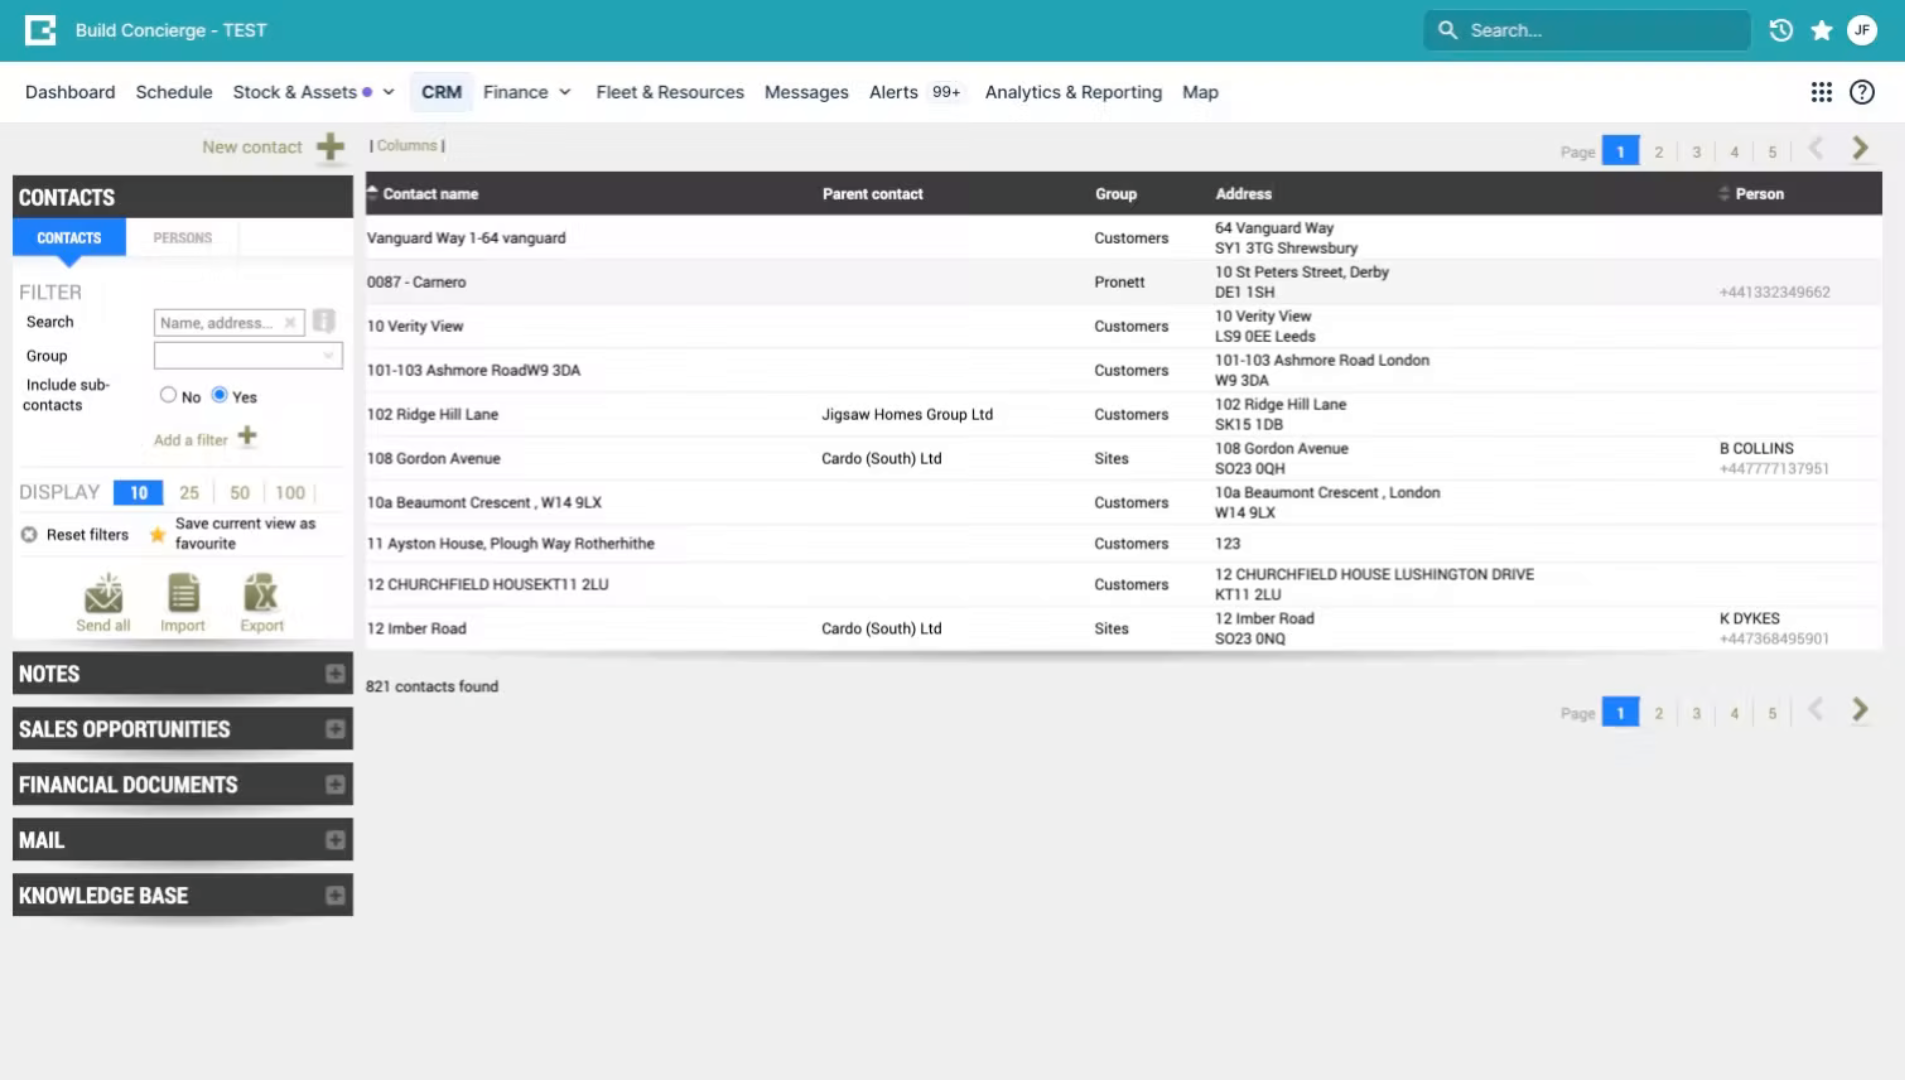
3. Manual note entry
Currently, when a call ends, the team manually reviews the call notes and logs a summary as a Note in BigChange so there's a record against the Contact.
If a customer complains or is frustrated, the Note must also be manually flagged for a manager to review it.
This process takes time and relies on the team remembering to flag important conversations.
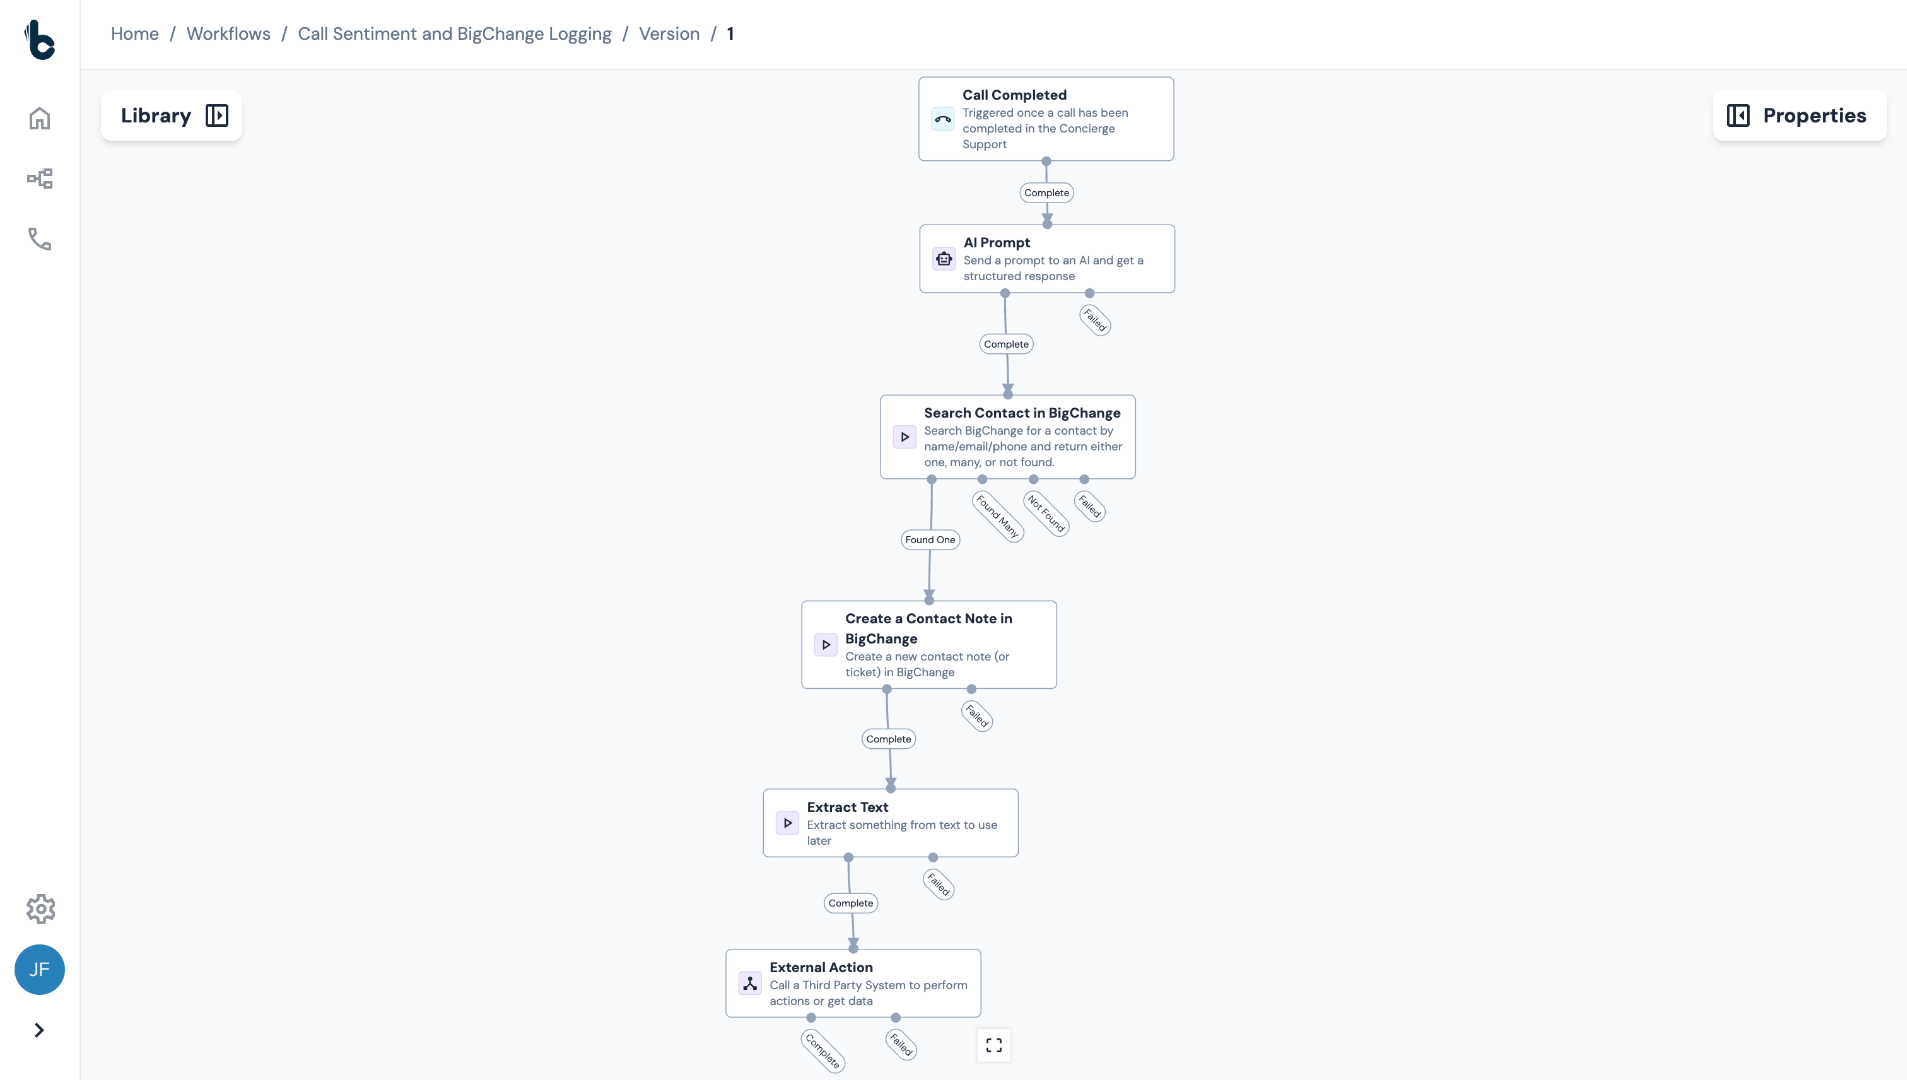
4. Build Concierge workflow intro
By building this workflow once in Build Concierge, every completed call is automatically analyzed by AI, logged against the correct Contact in BigChange, and tagged if escalation is required.]
Let's see how to build it!
5. Log in to your account
Log into your Build Concierge account.
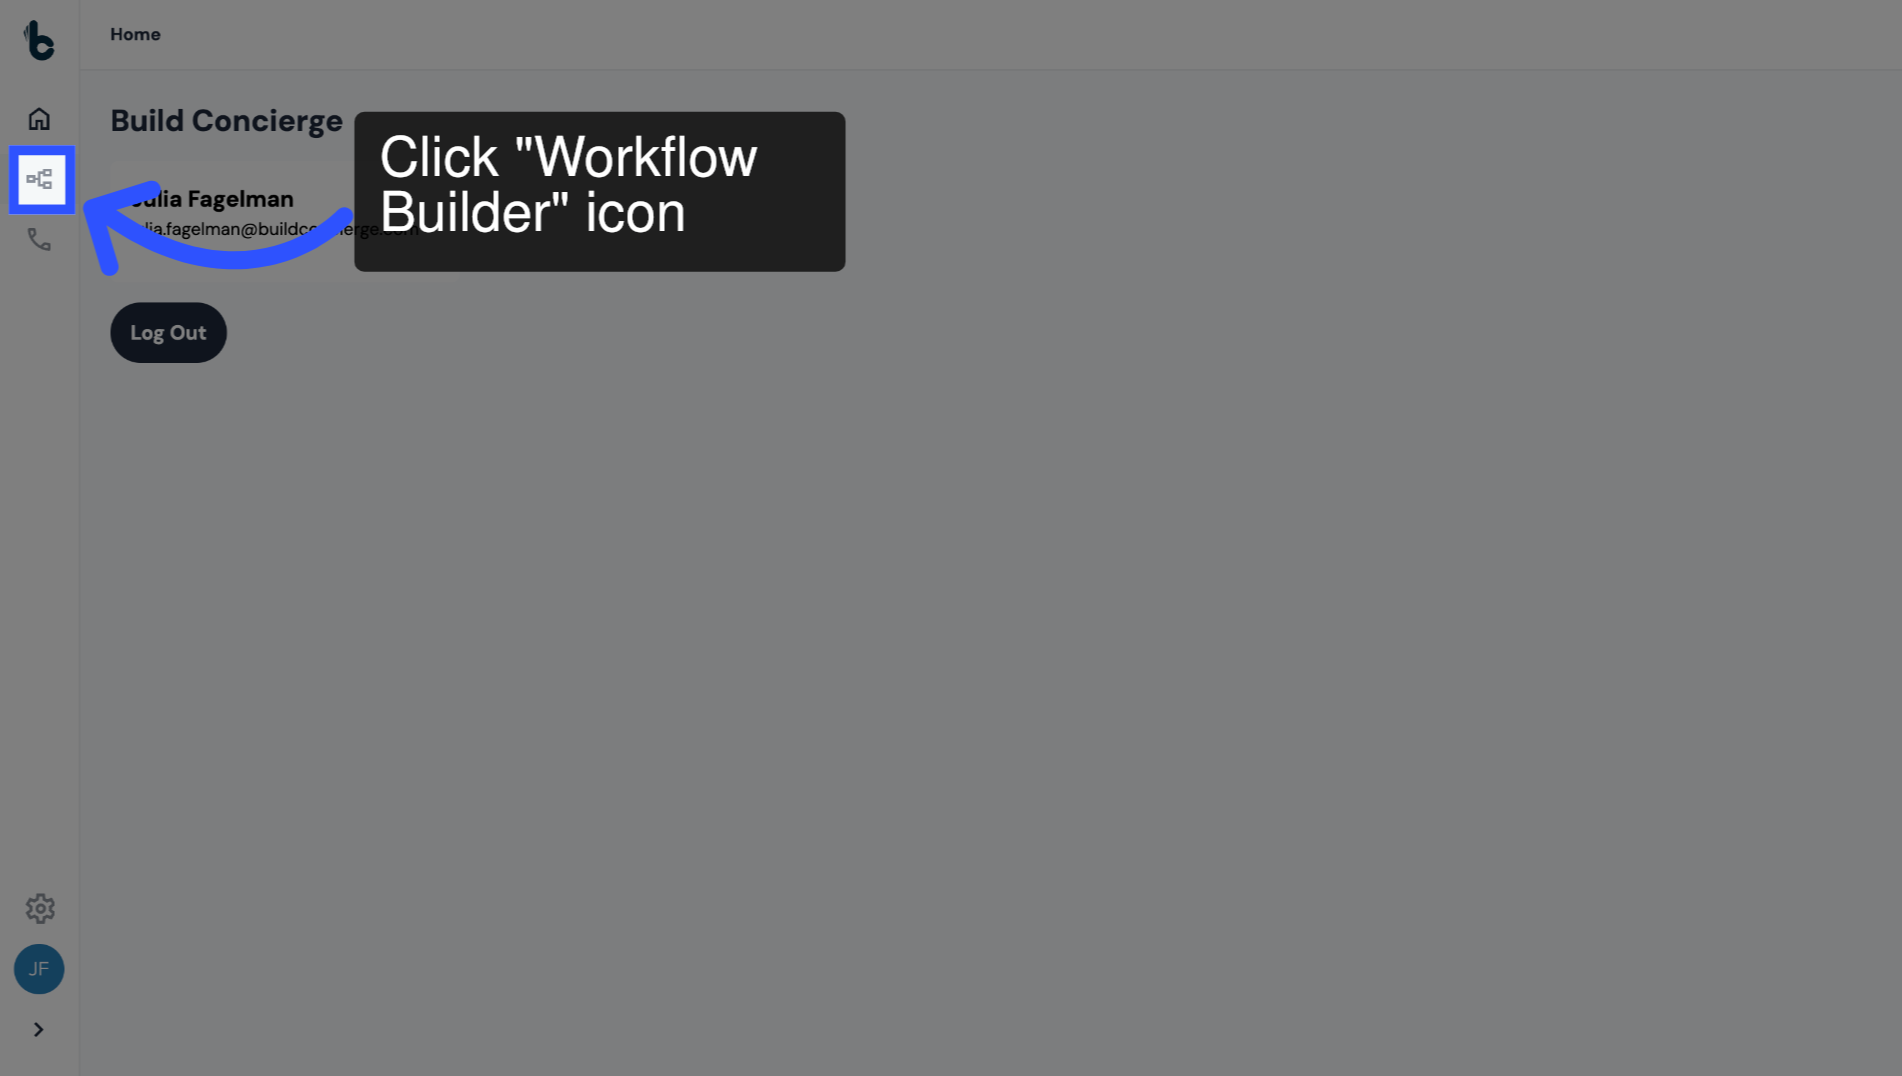
6. Open Workflow Builder
Click on the Workflow Builder icon.
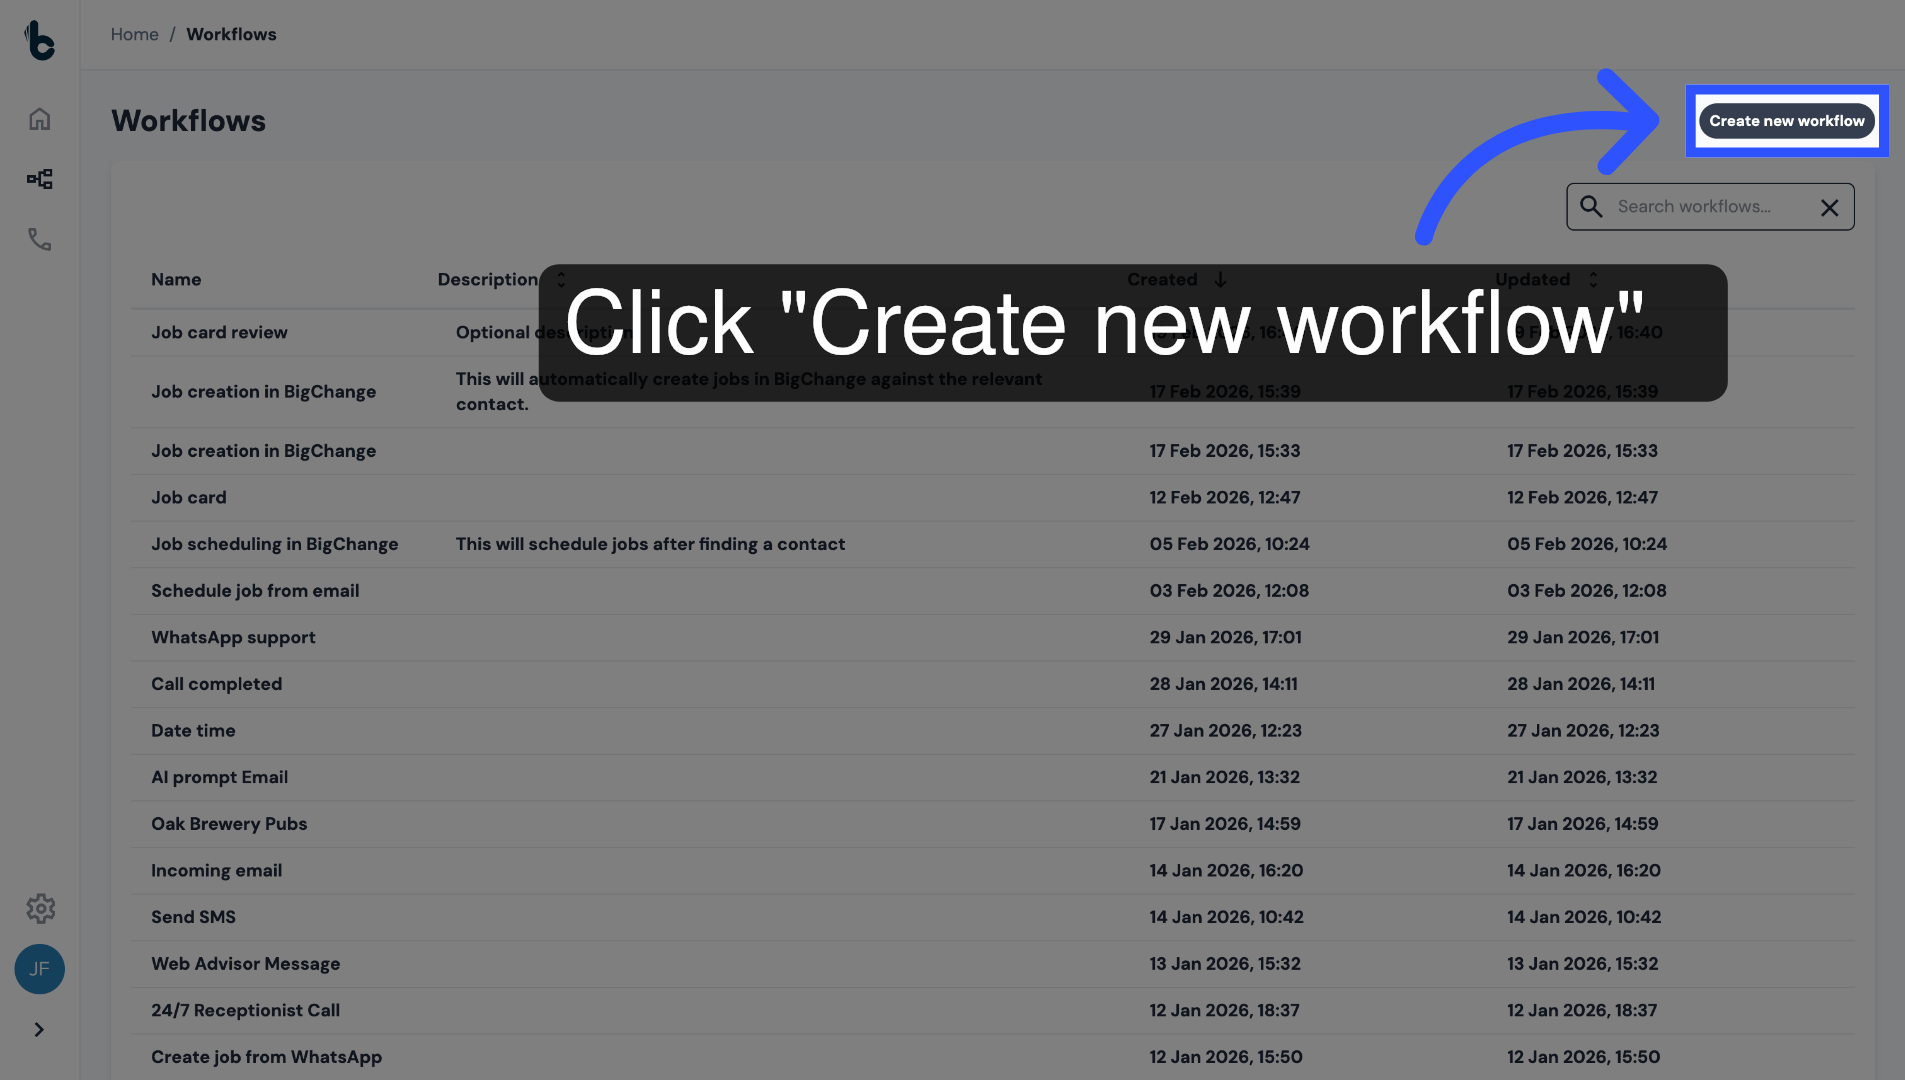
7. Create a new workflow
Click Create new workflow.
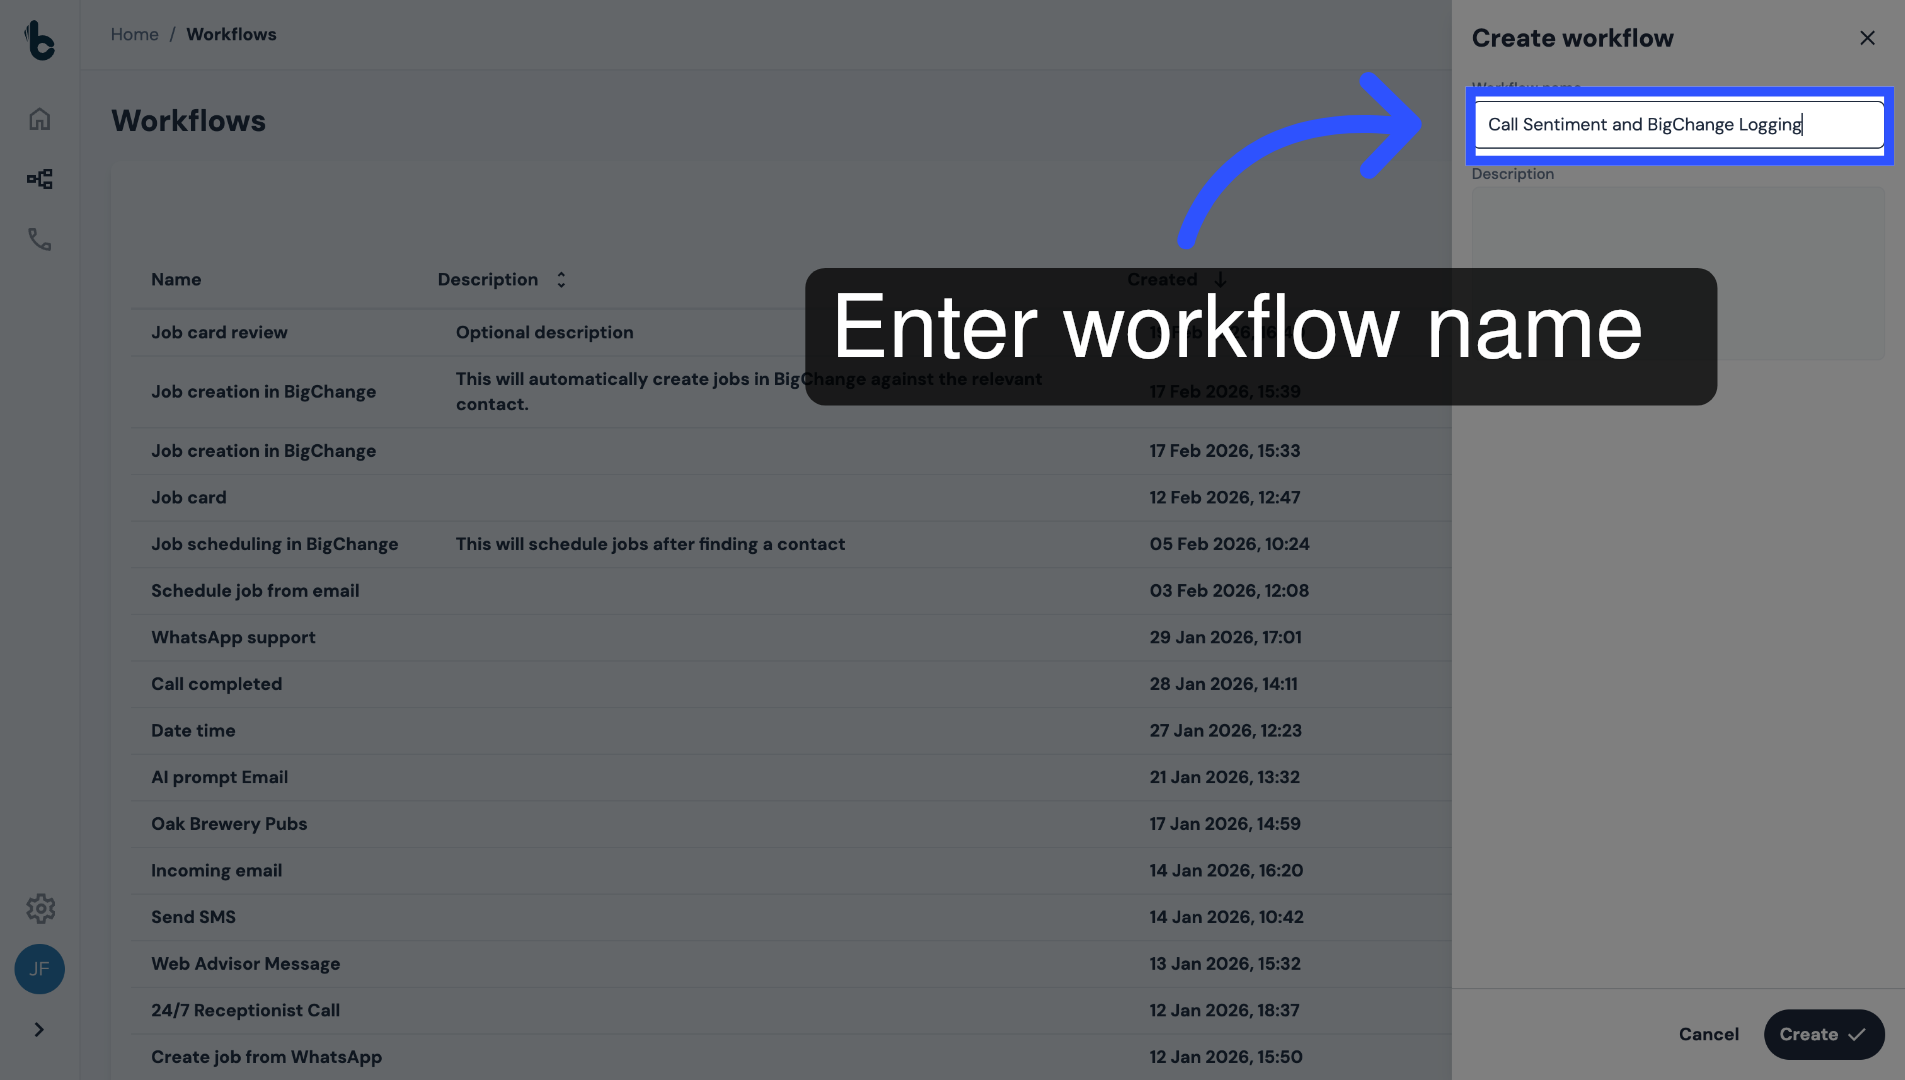
8. Name the workflow
Give the workflow a name like "Call sentiment and BigChange logging."
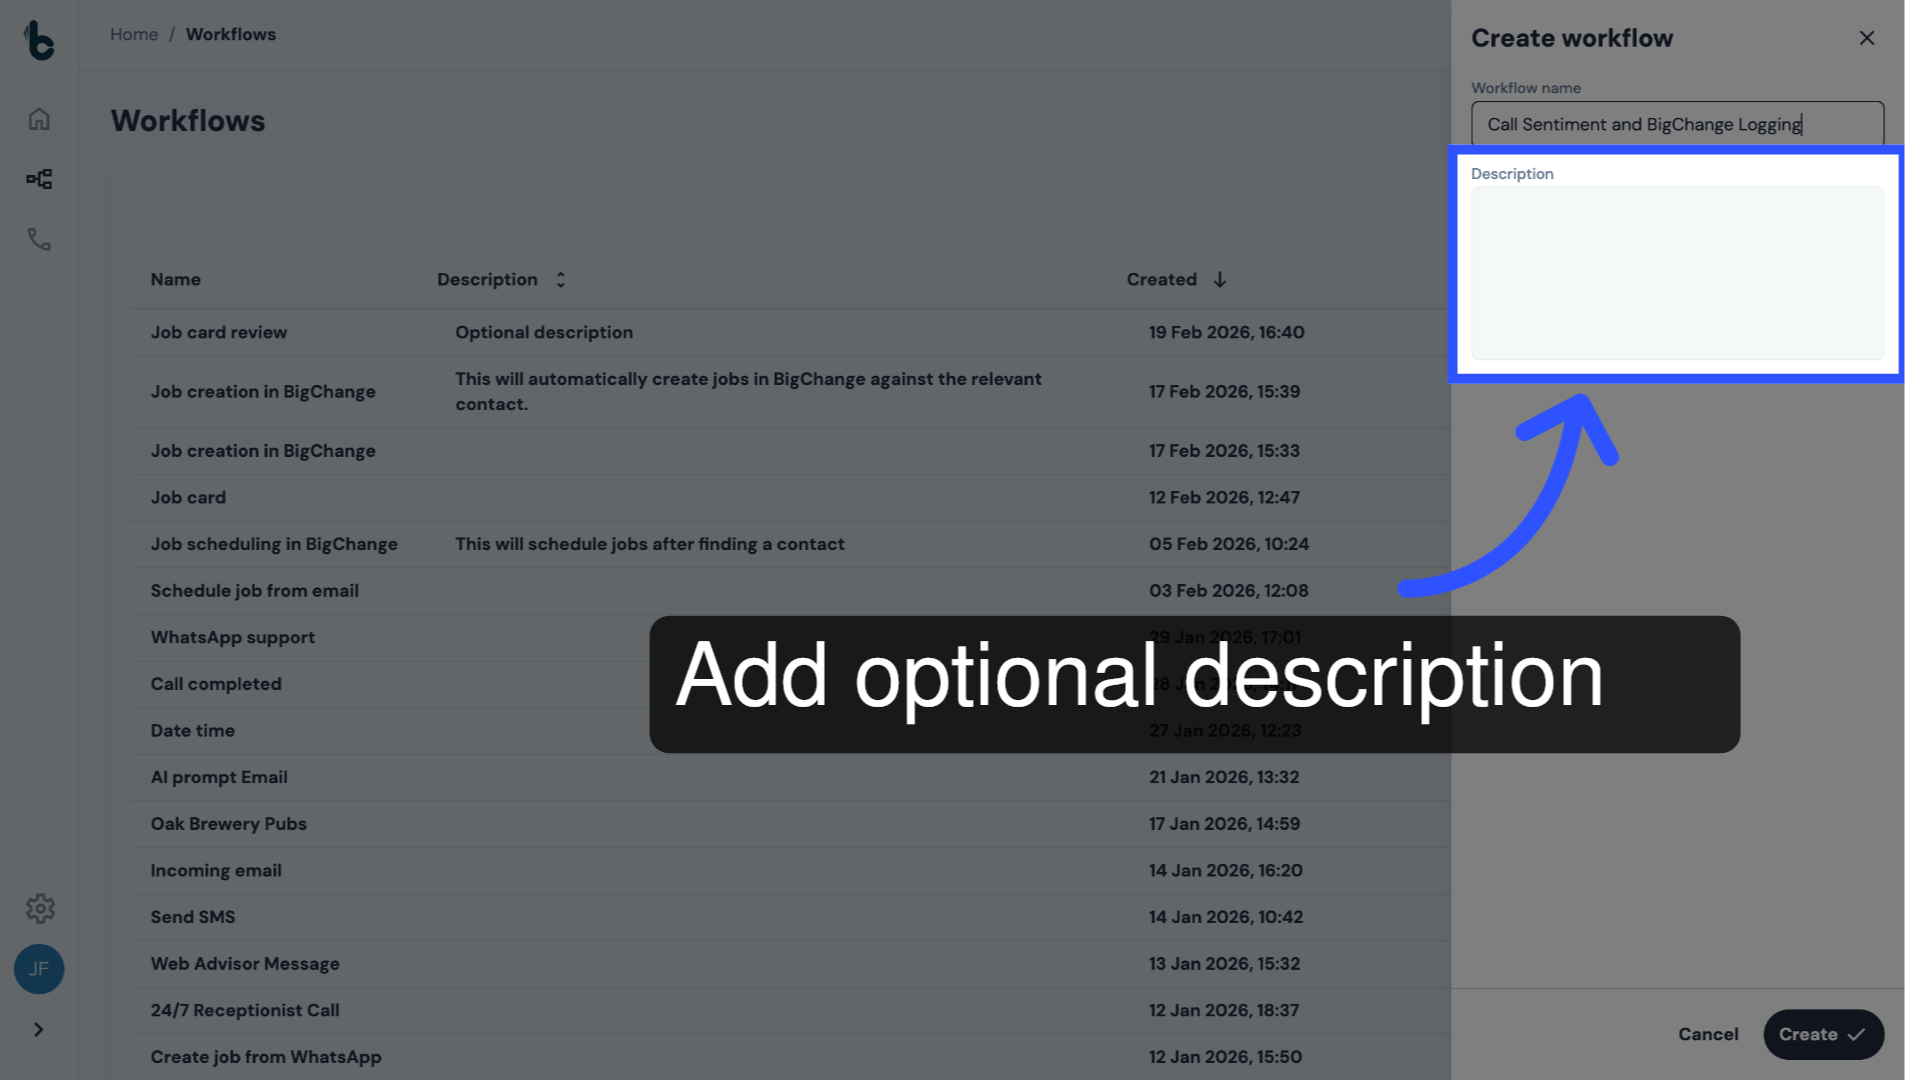
9. Add description (optional)
Add an optional description to give more context.
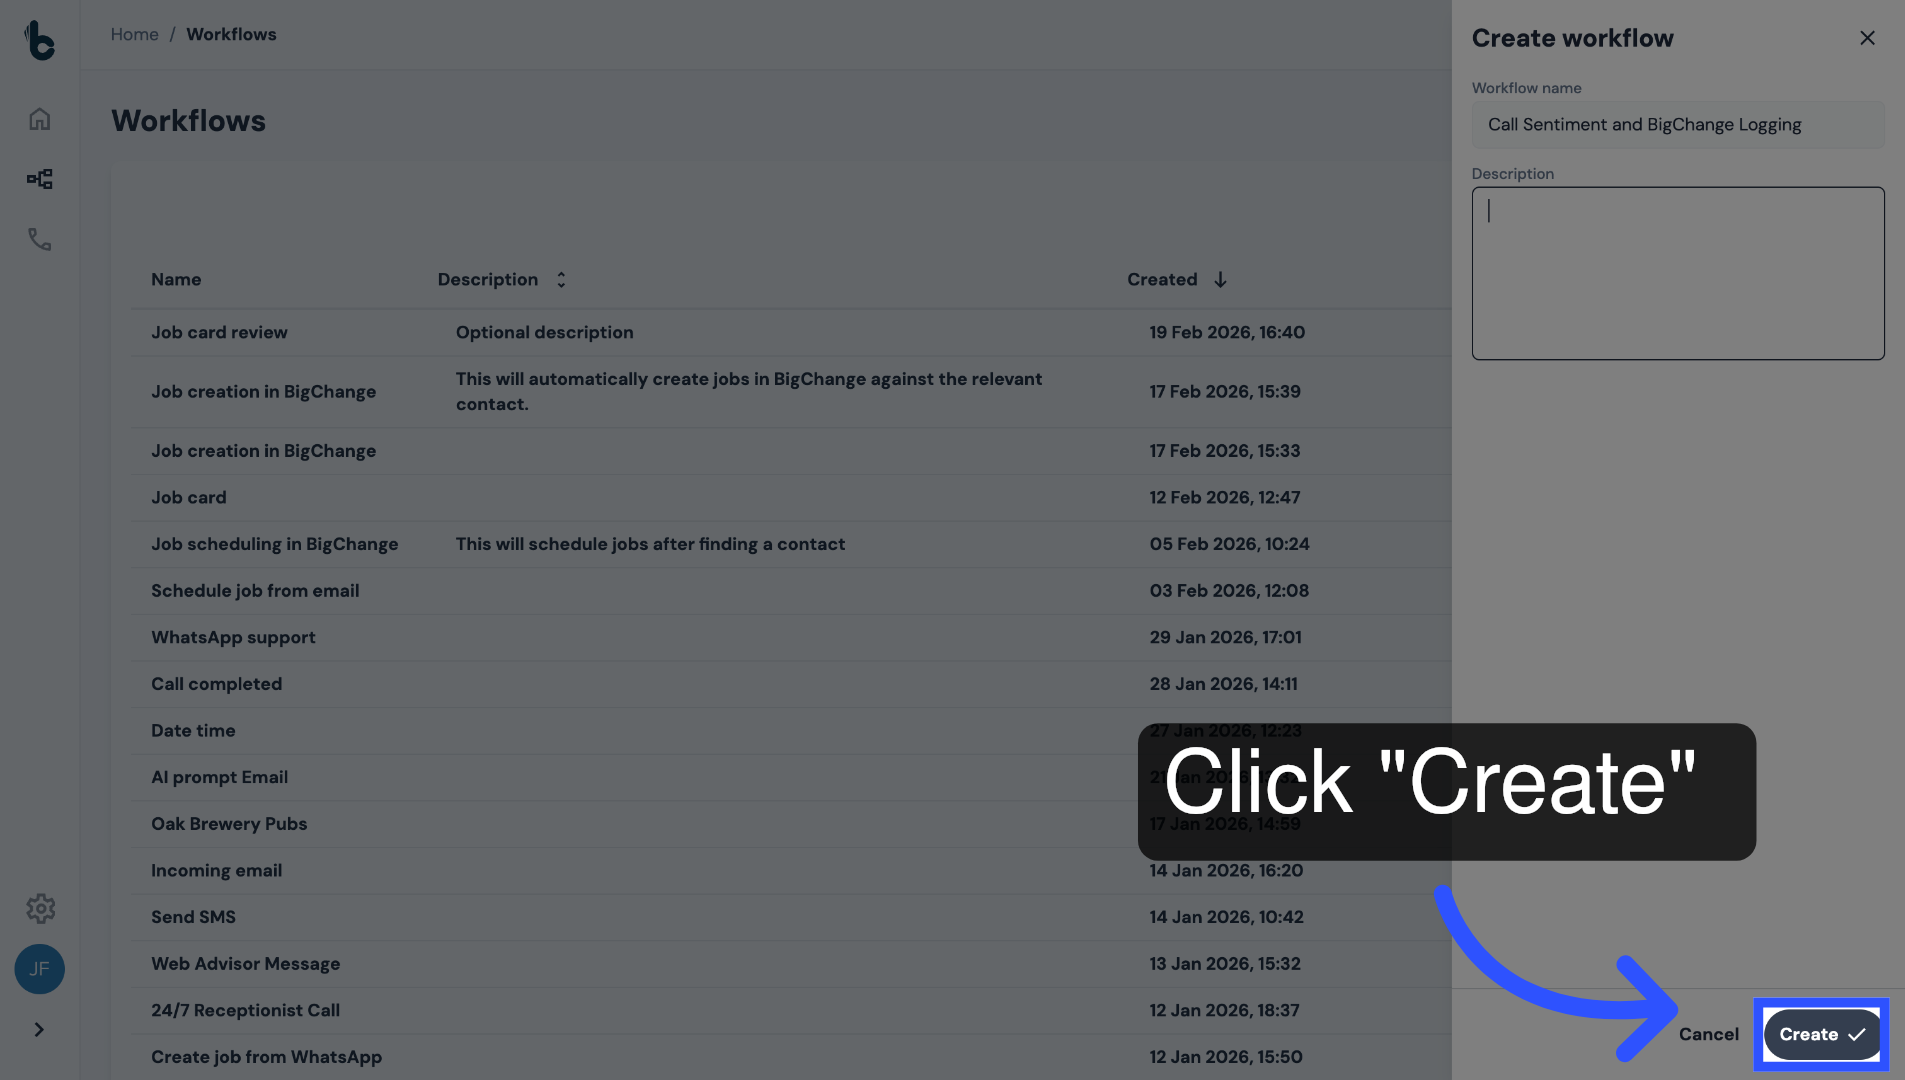
10. Create workflow
Click Create.
11. Add Call Completed Starting action
Add a Call Completed Starting action to the Workflow Editor.
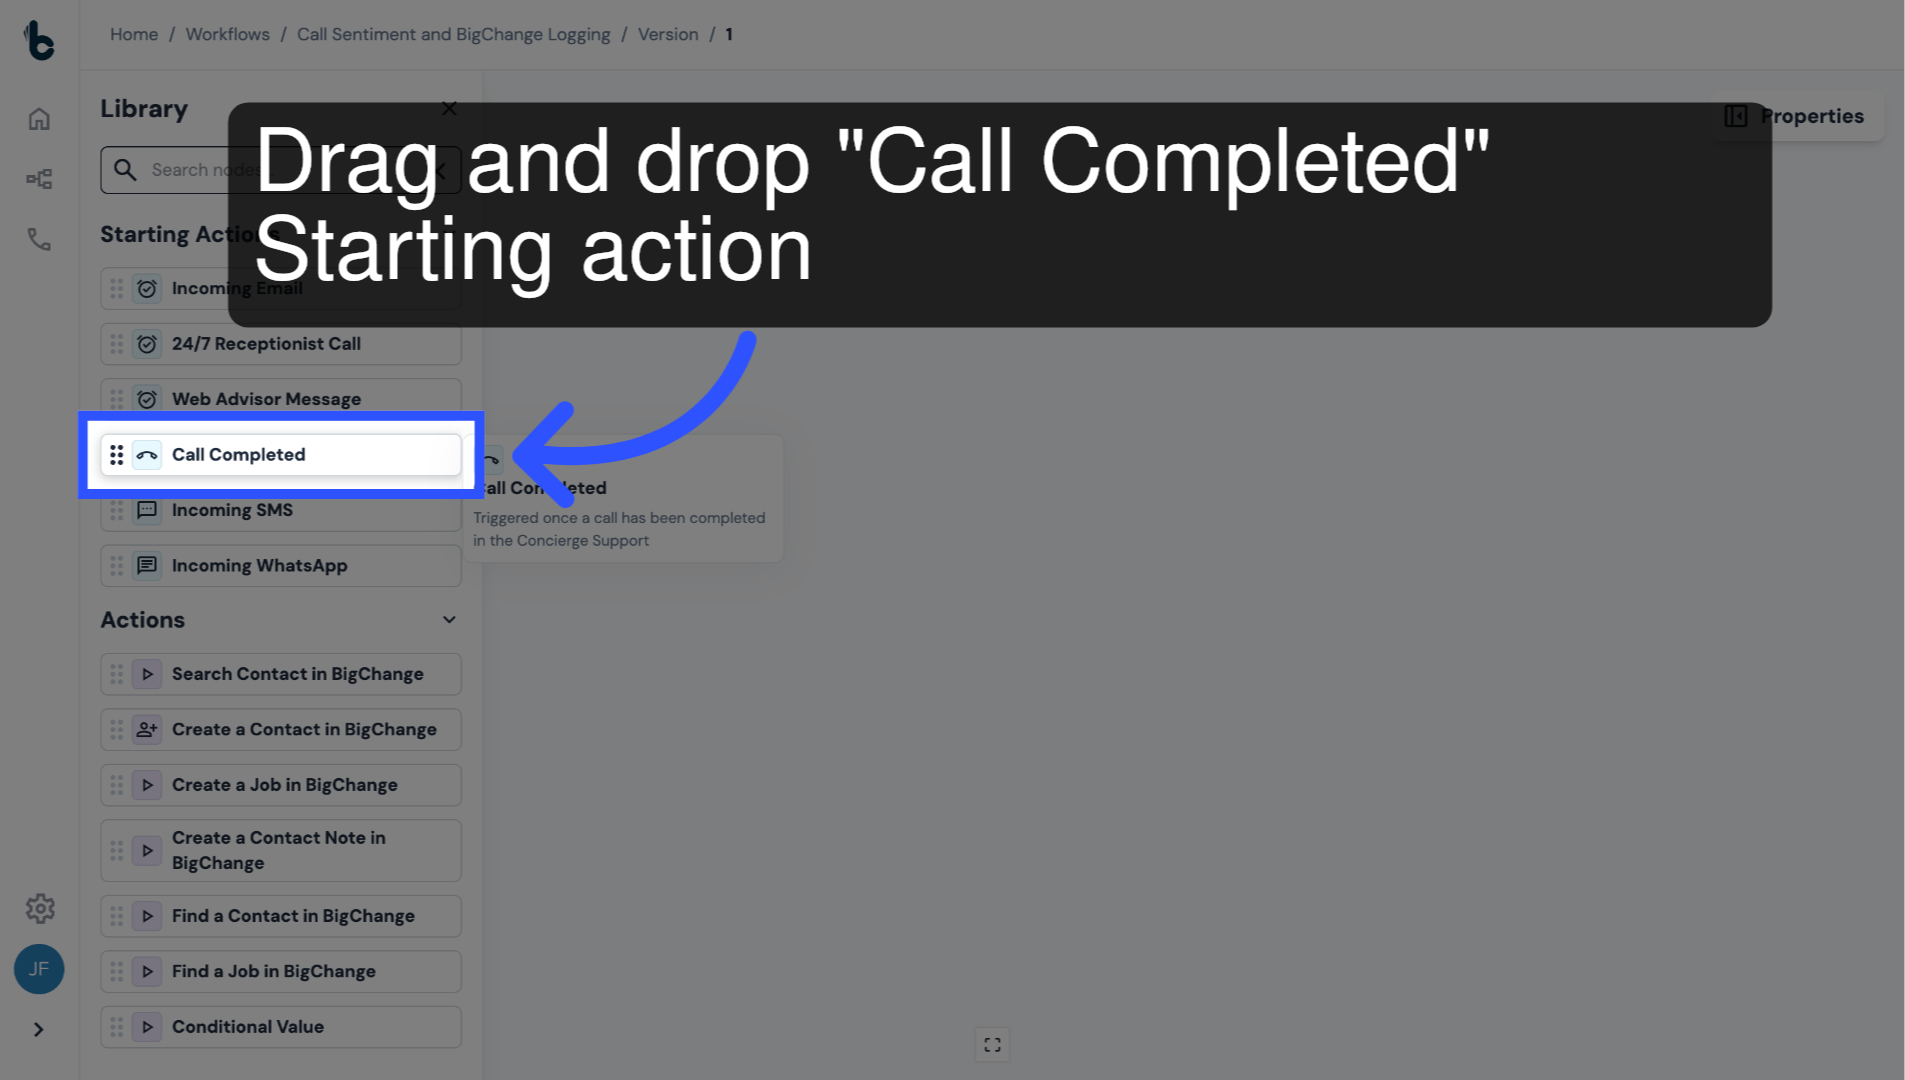
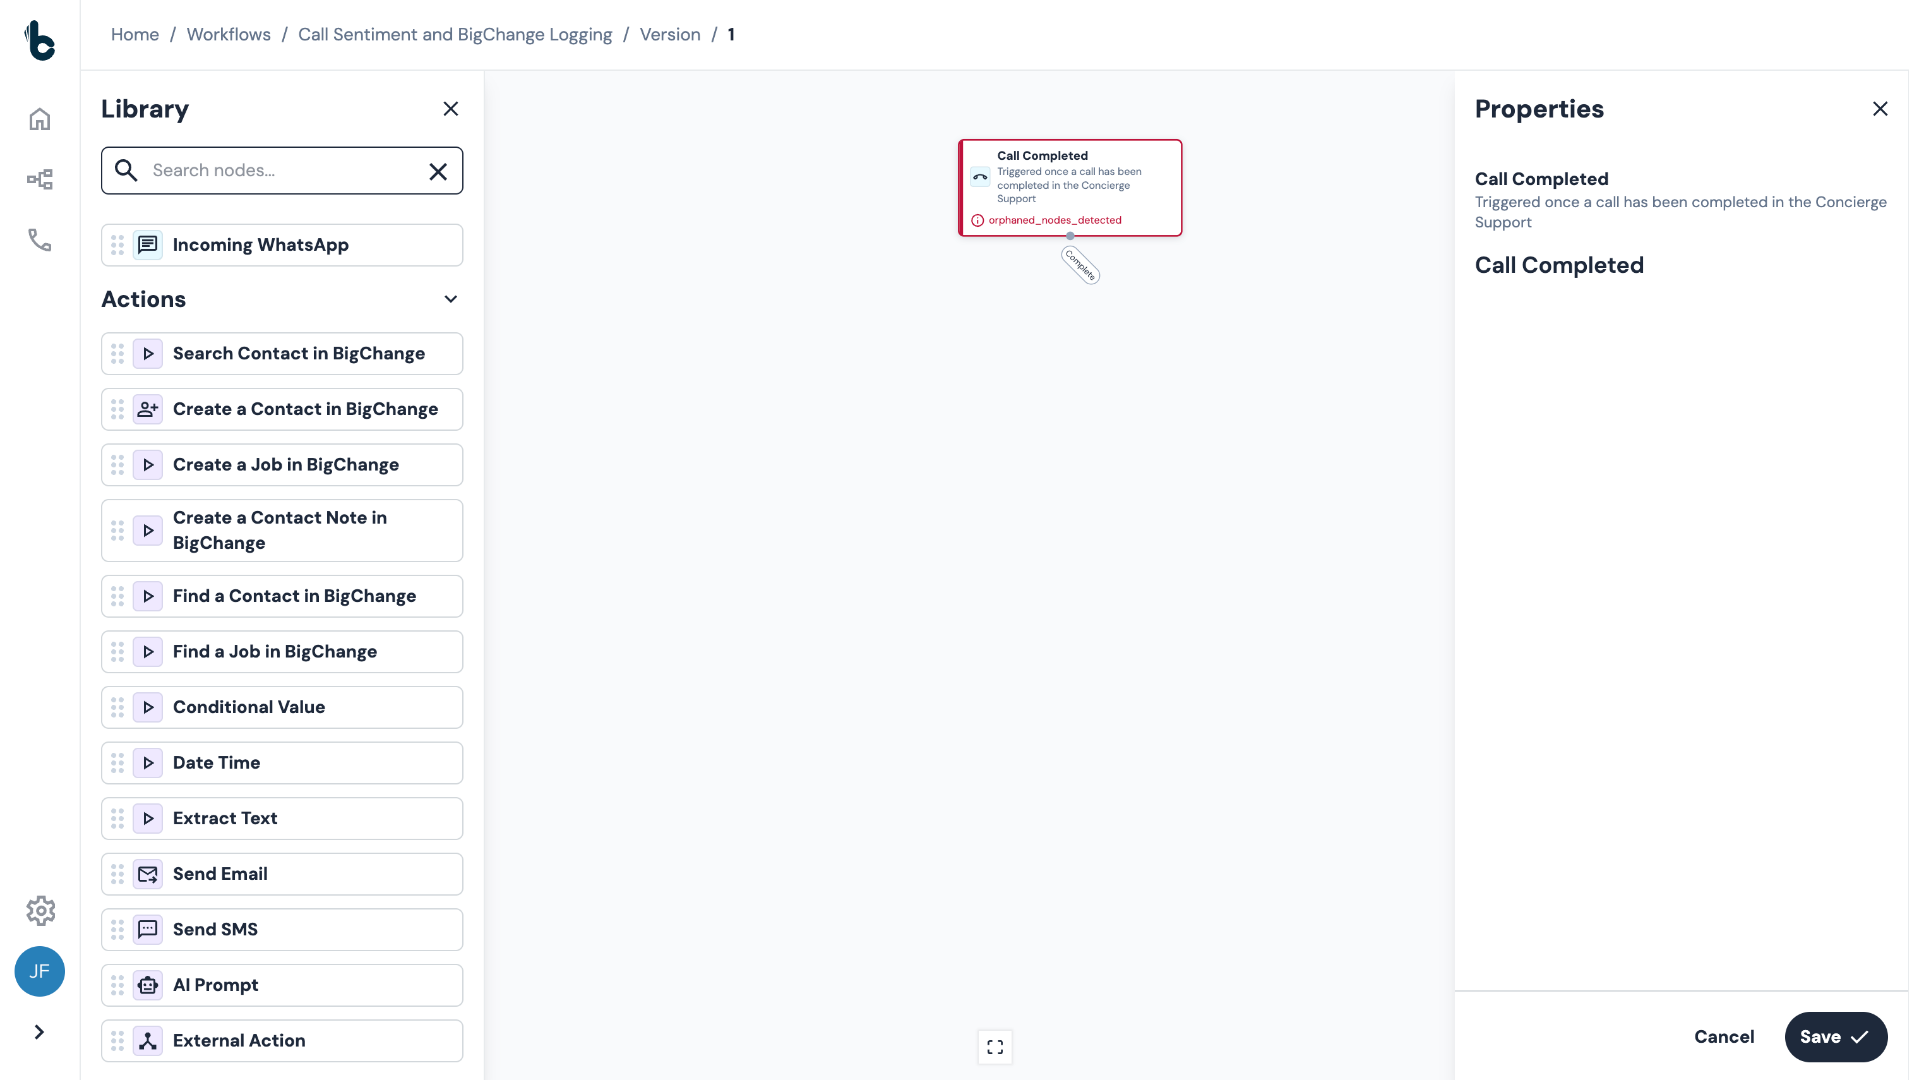
12. No configuration required
This Starting action requires no configuration.
It will automatically output:
Call transcription;
AI summary;
Contact name; and
Direction of the call.
13. 📚 Learn more
Learn more about the Call Completed node in the guide entitled Call Completed Starting action.
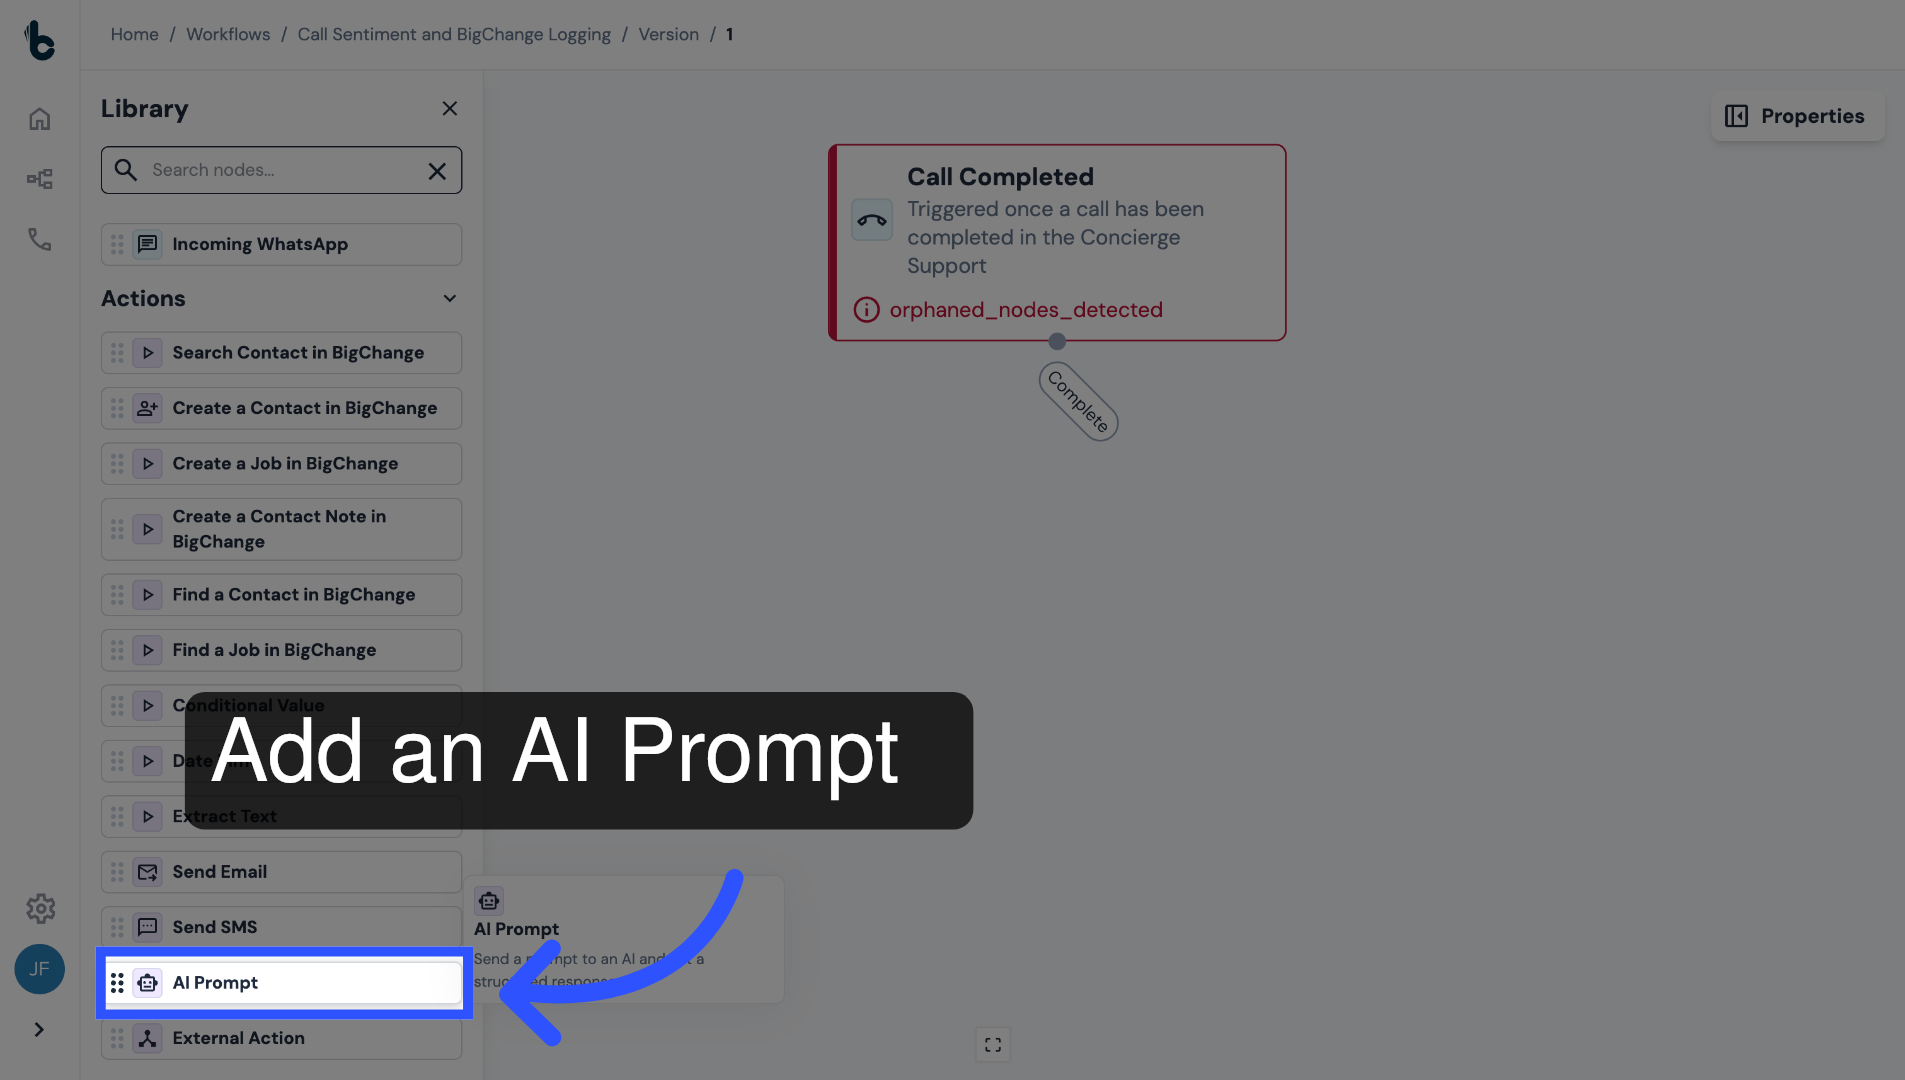
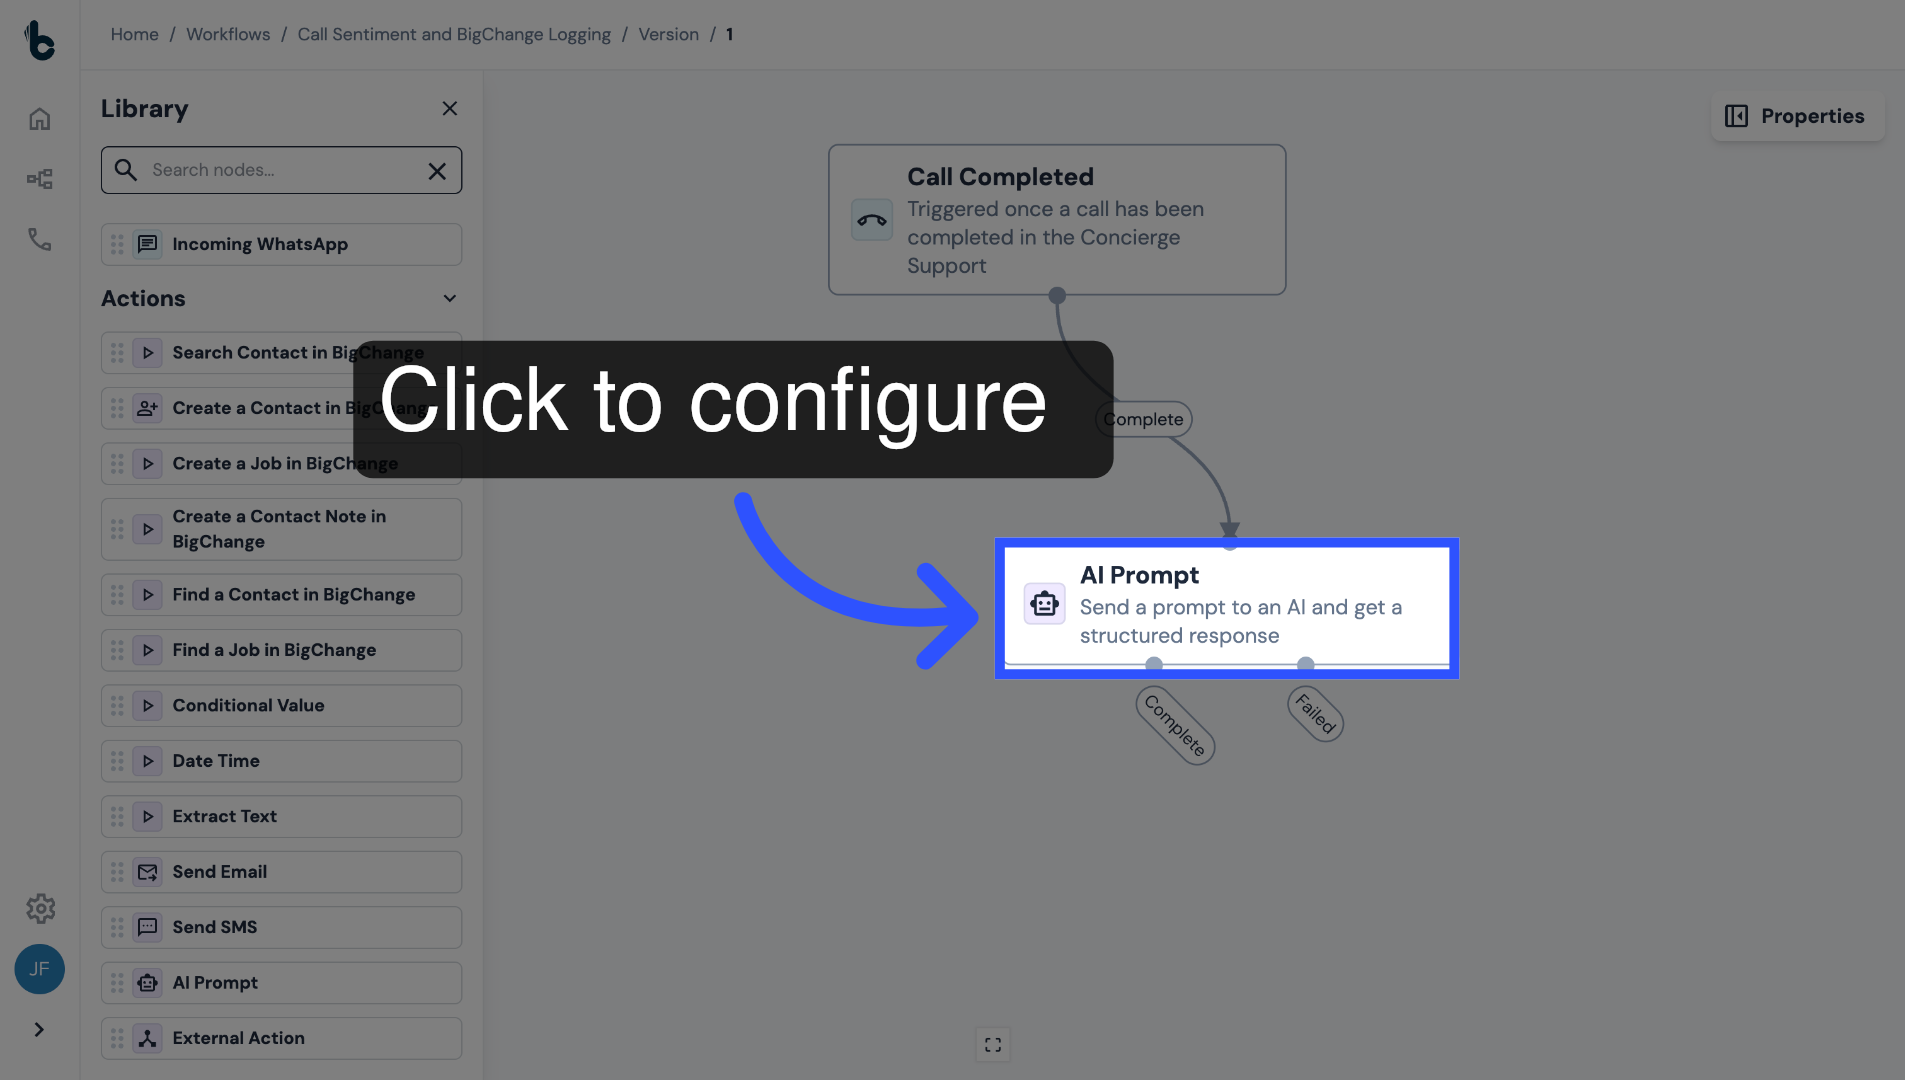
14. Add AI Prompt node
Drag and drop an AI Prompt node into the Workflow Editor.
This step of the workflow will analyze the call transcript and return structured outputs related to sentiment and any required escalation.
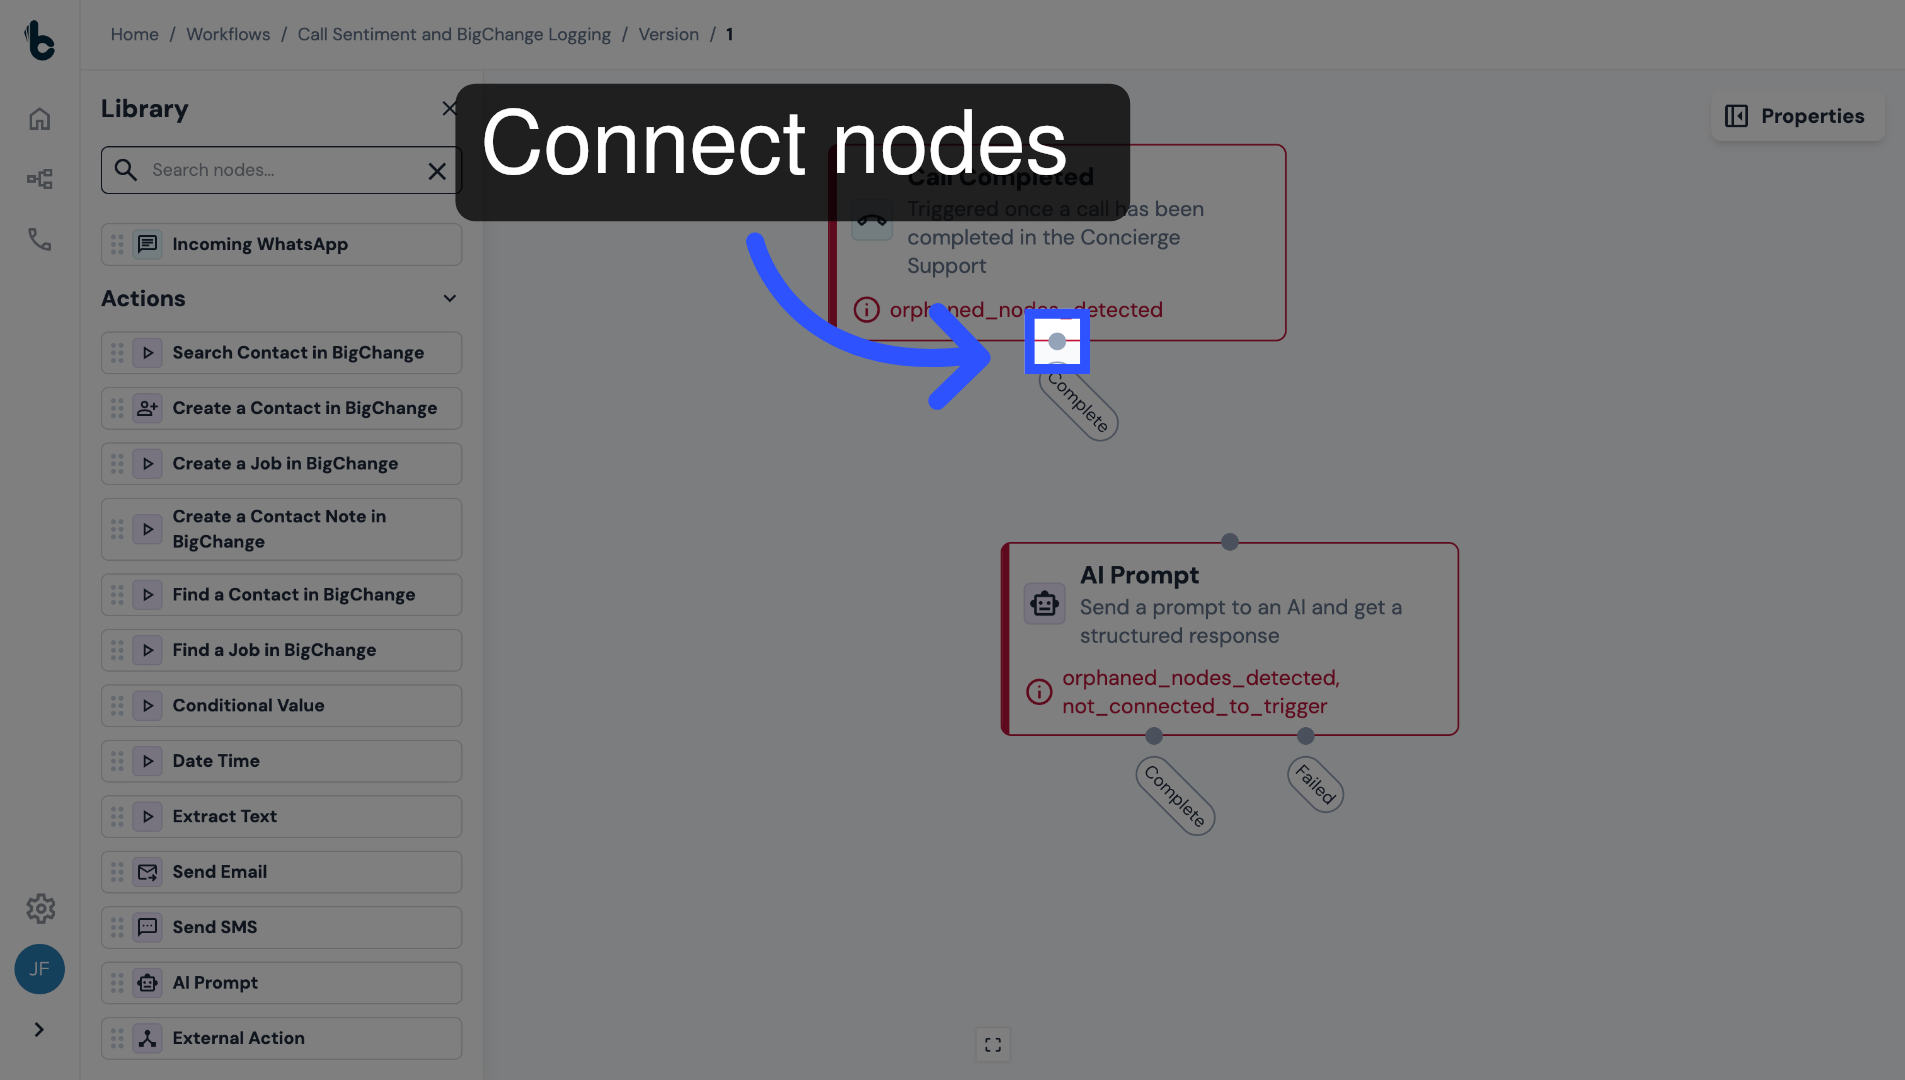
15. Connect the nodes
Connect it to the Call Completed starting action.
16. Click node to configure
Click on the node to open the Properties panel.
17. Add your prompt
Paste in your sentiment and escalation prompt.
Make sure to include the Call transcript variable as part of the input.
You can copy and paste the example prompt below and tweak it to fit your own needs:
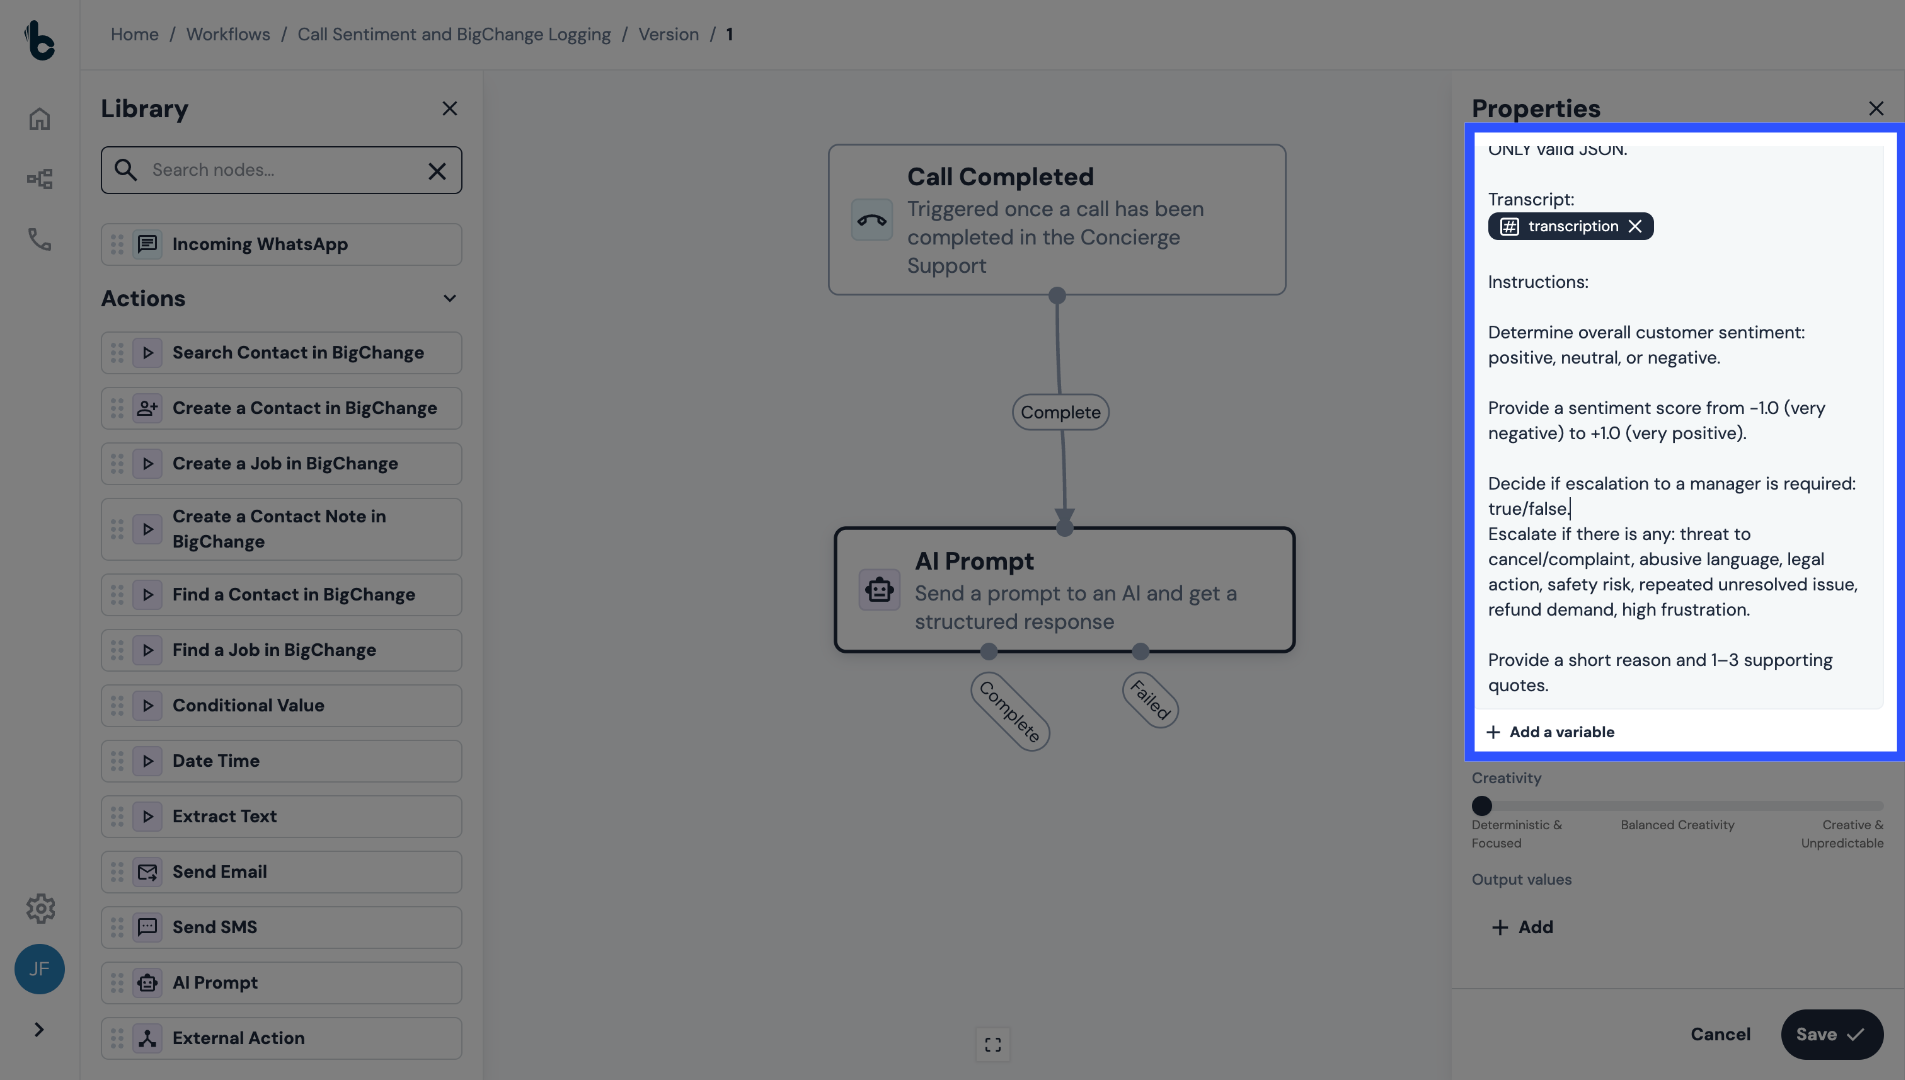
Analyze the following call transcript. Return ONLY valid JSON.

Transcript:


Instructions:

Determine overall customer sentiment: positive, neutral, or negative.

Provide a sentiment score from -1.0 (very negative) to +1.0 (very positive).

Decide if escalation to a manager is required: true/false.
Escalate if there is any: threat to cancel/complaint, abusive language, legal action, safety risk, repeated unresolved issue, refund demand, high frustration.

Provide a short reason and 1–3 supporting quotes.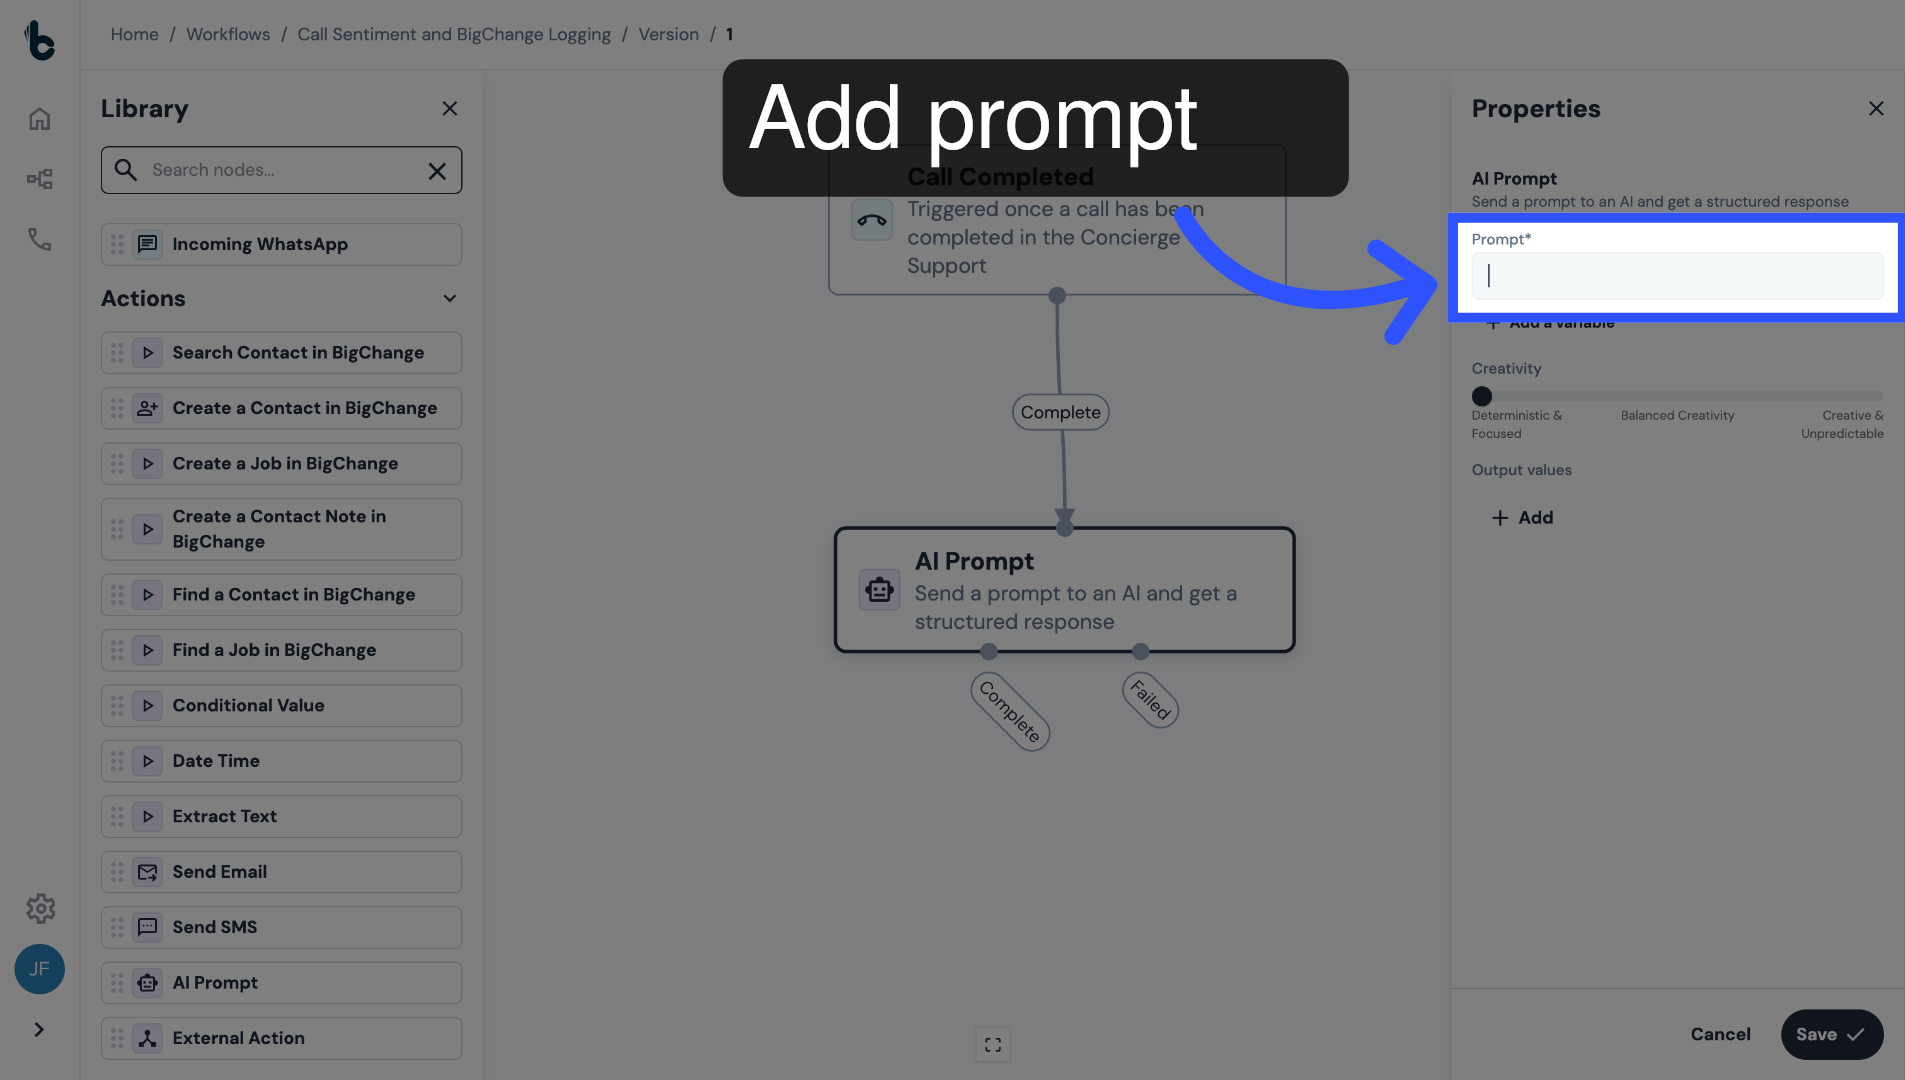
18. Example prompt summary
The example prompt asks that the AI:
Determine the customer sentiment as positive, neutral or negative.
Provides a sentiment score from -1 (very negative) to +1 (very positive).
Determes if escalation to a manager is required: True or False; and
If yes, provides the reasons for escalation.
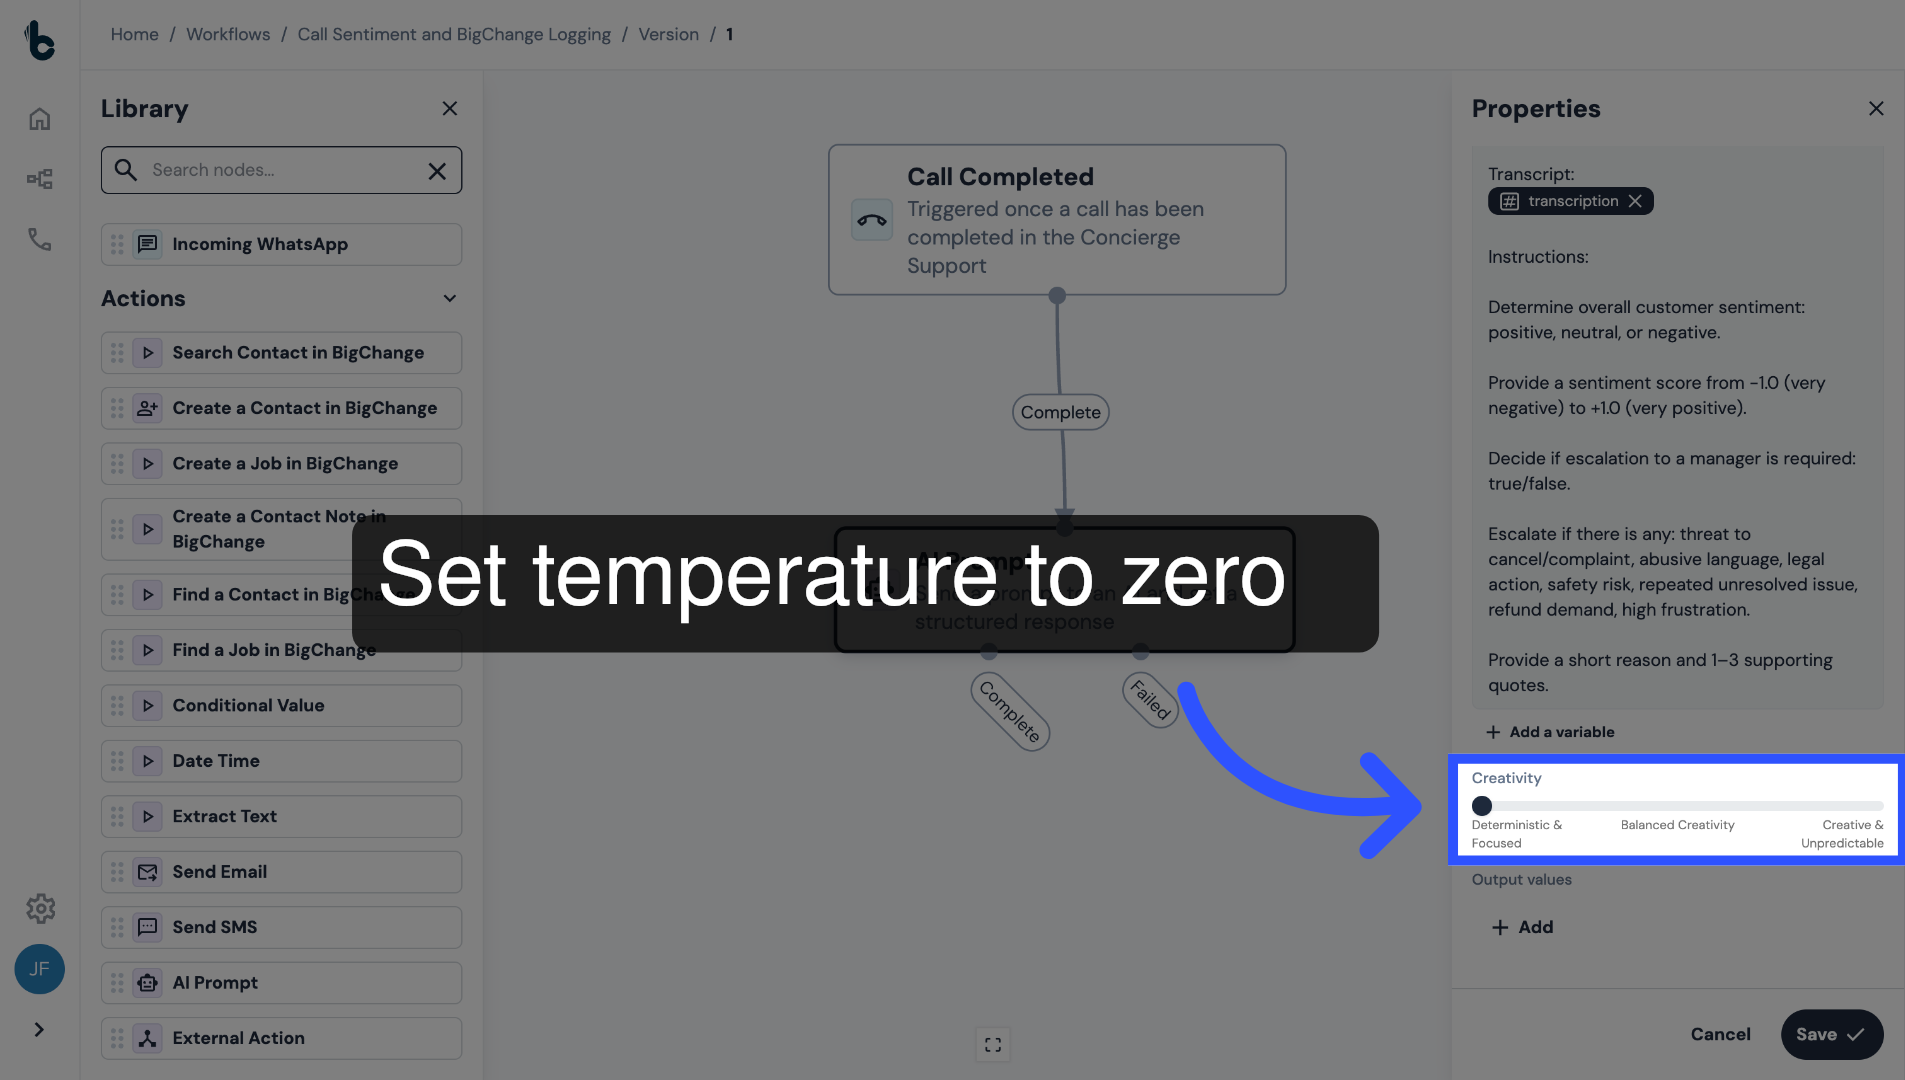
19. Adjust temperature
Set the temperature to 0 for consistent results.
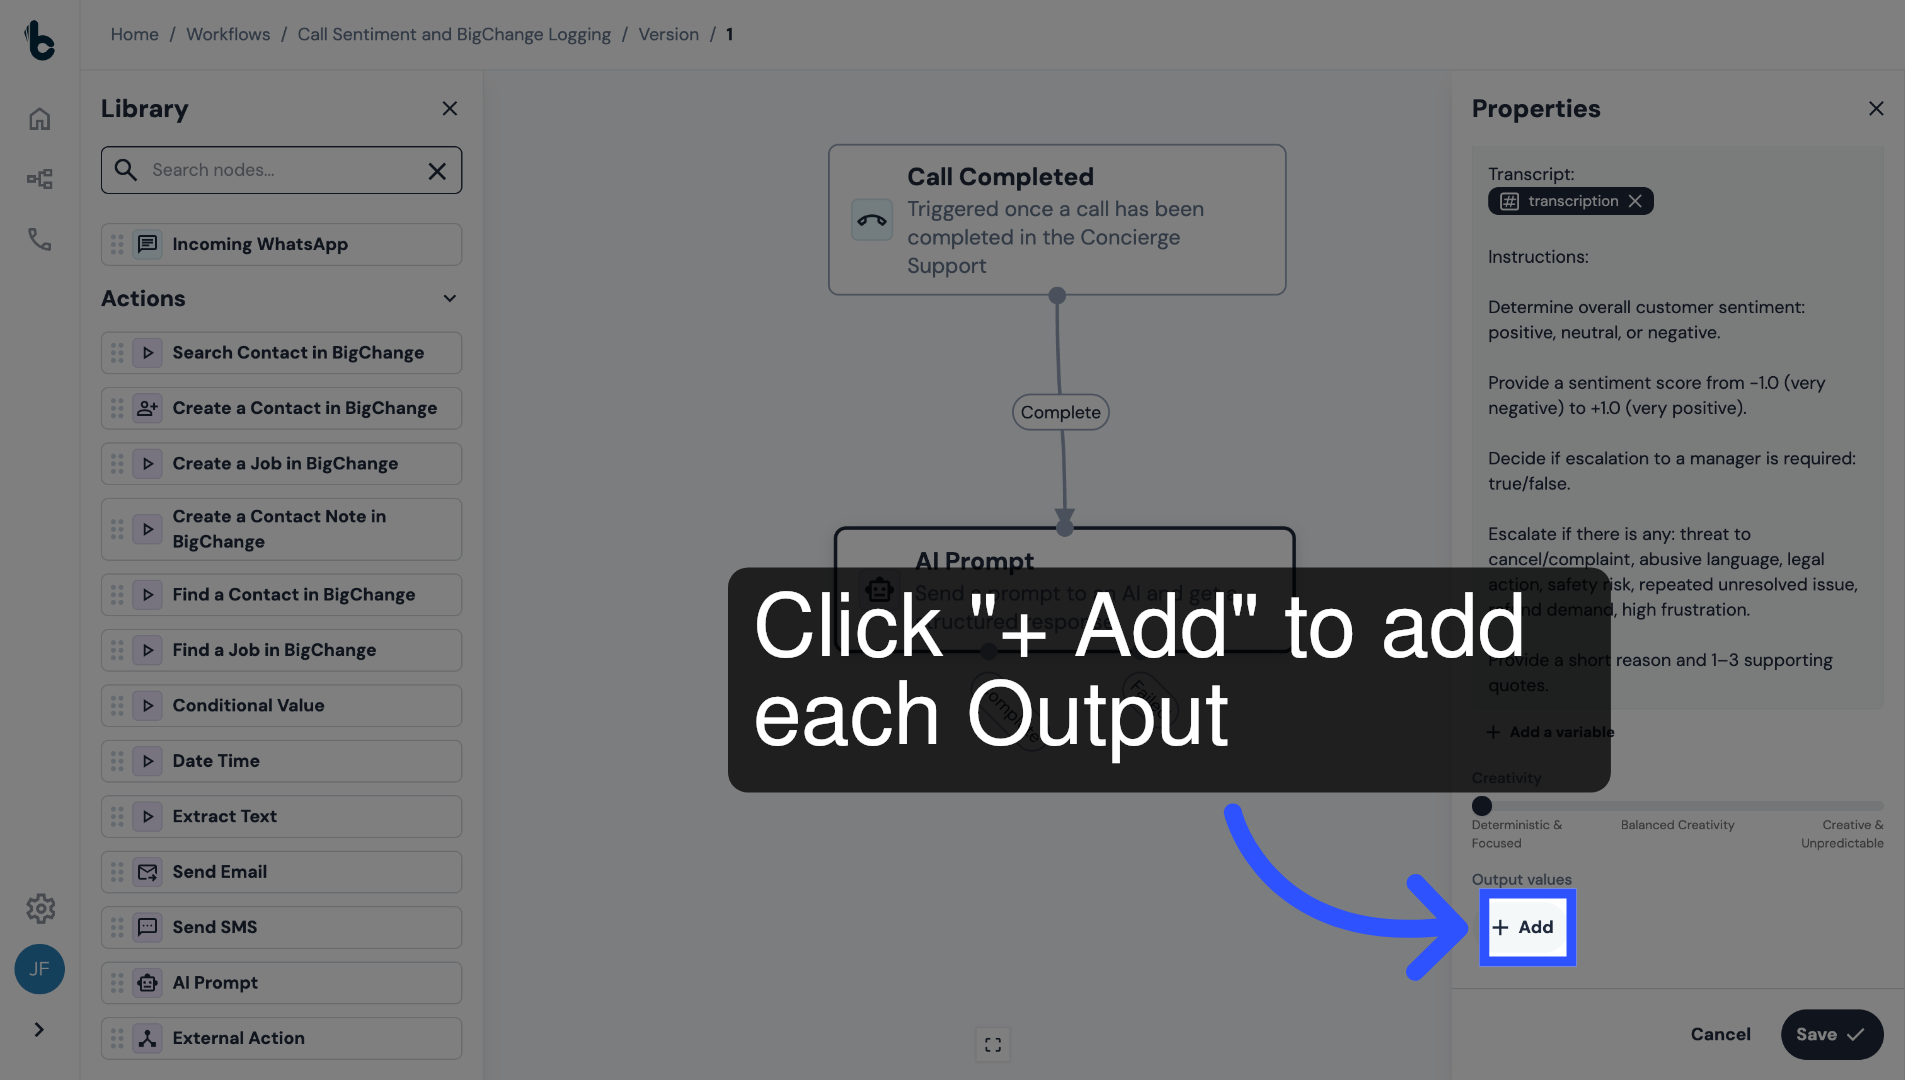
20. Click +Add
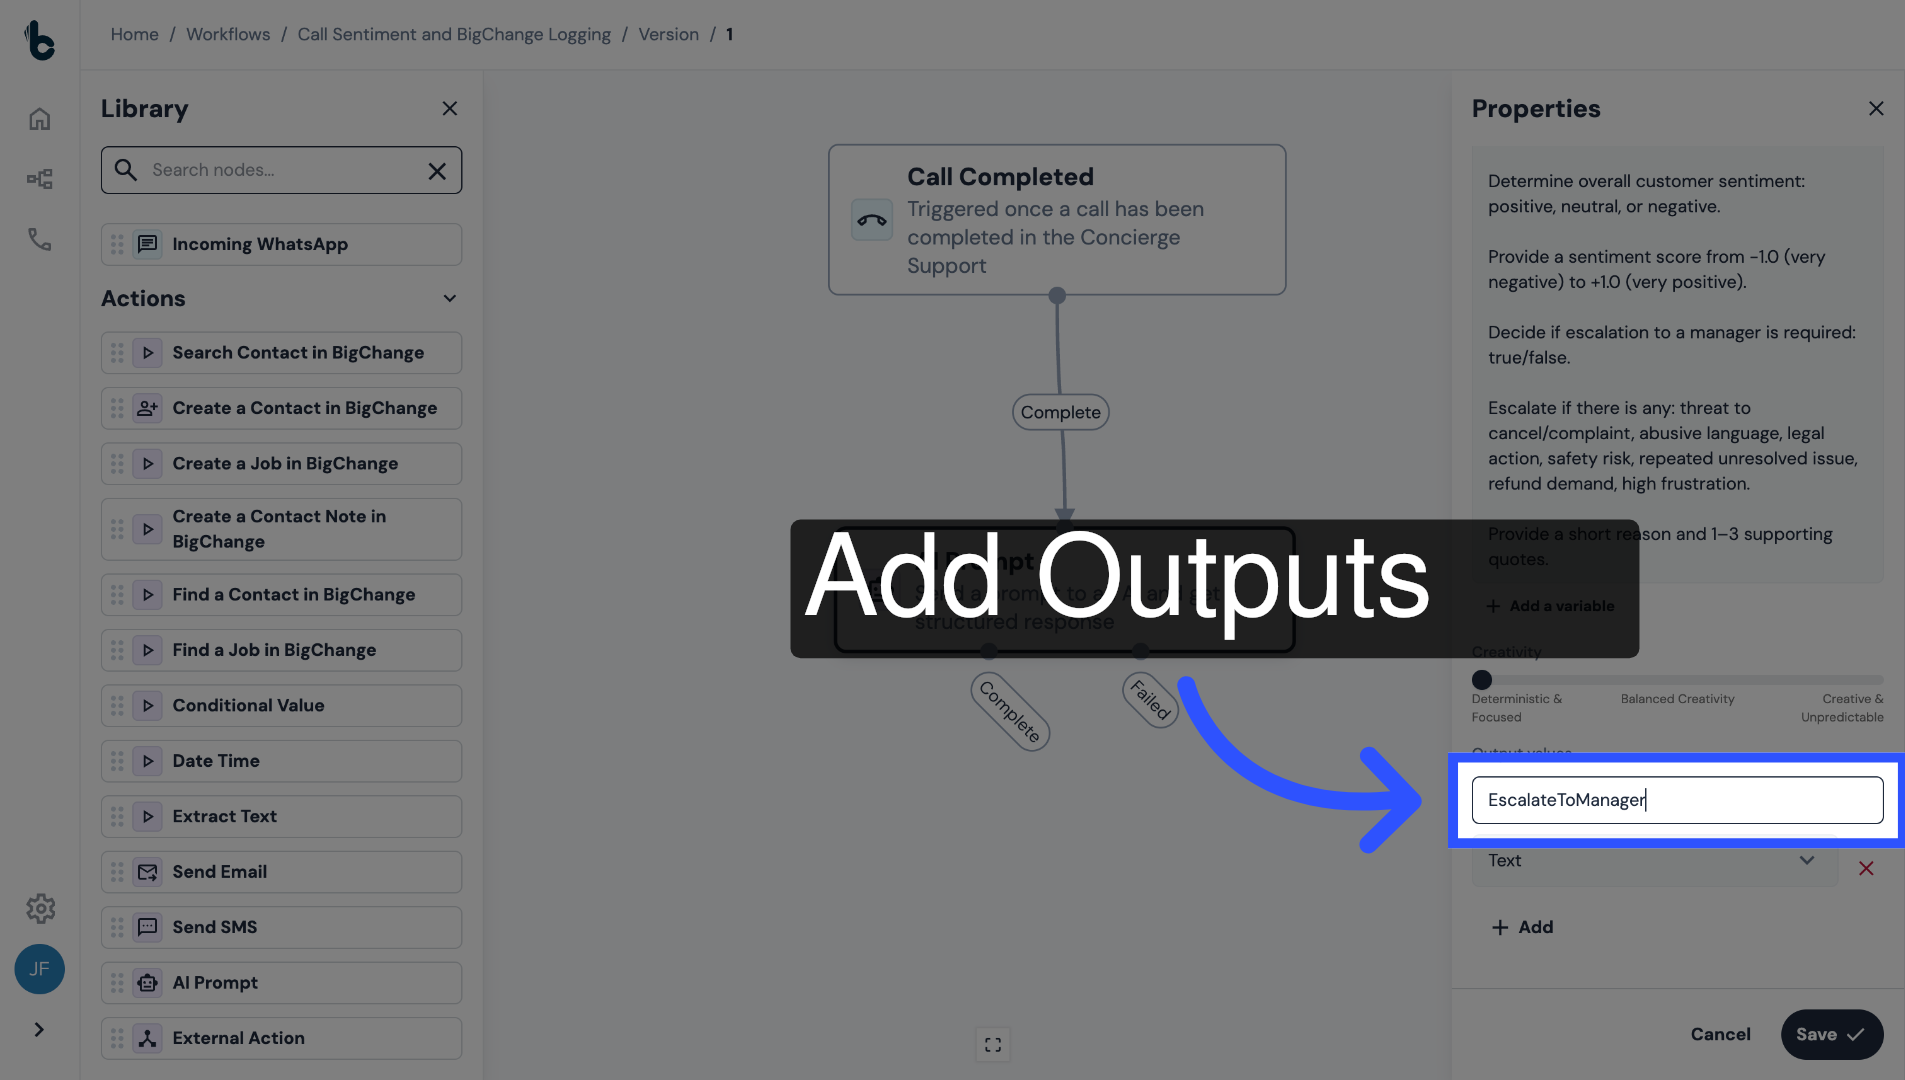
In the Output section, click + Add and define the following outputs.
21. Escalate to manager
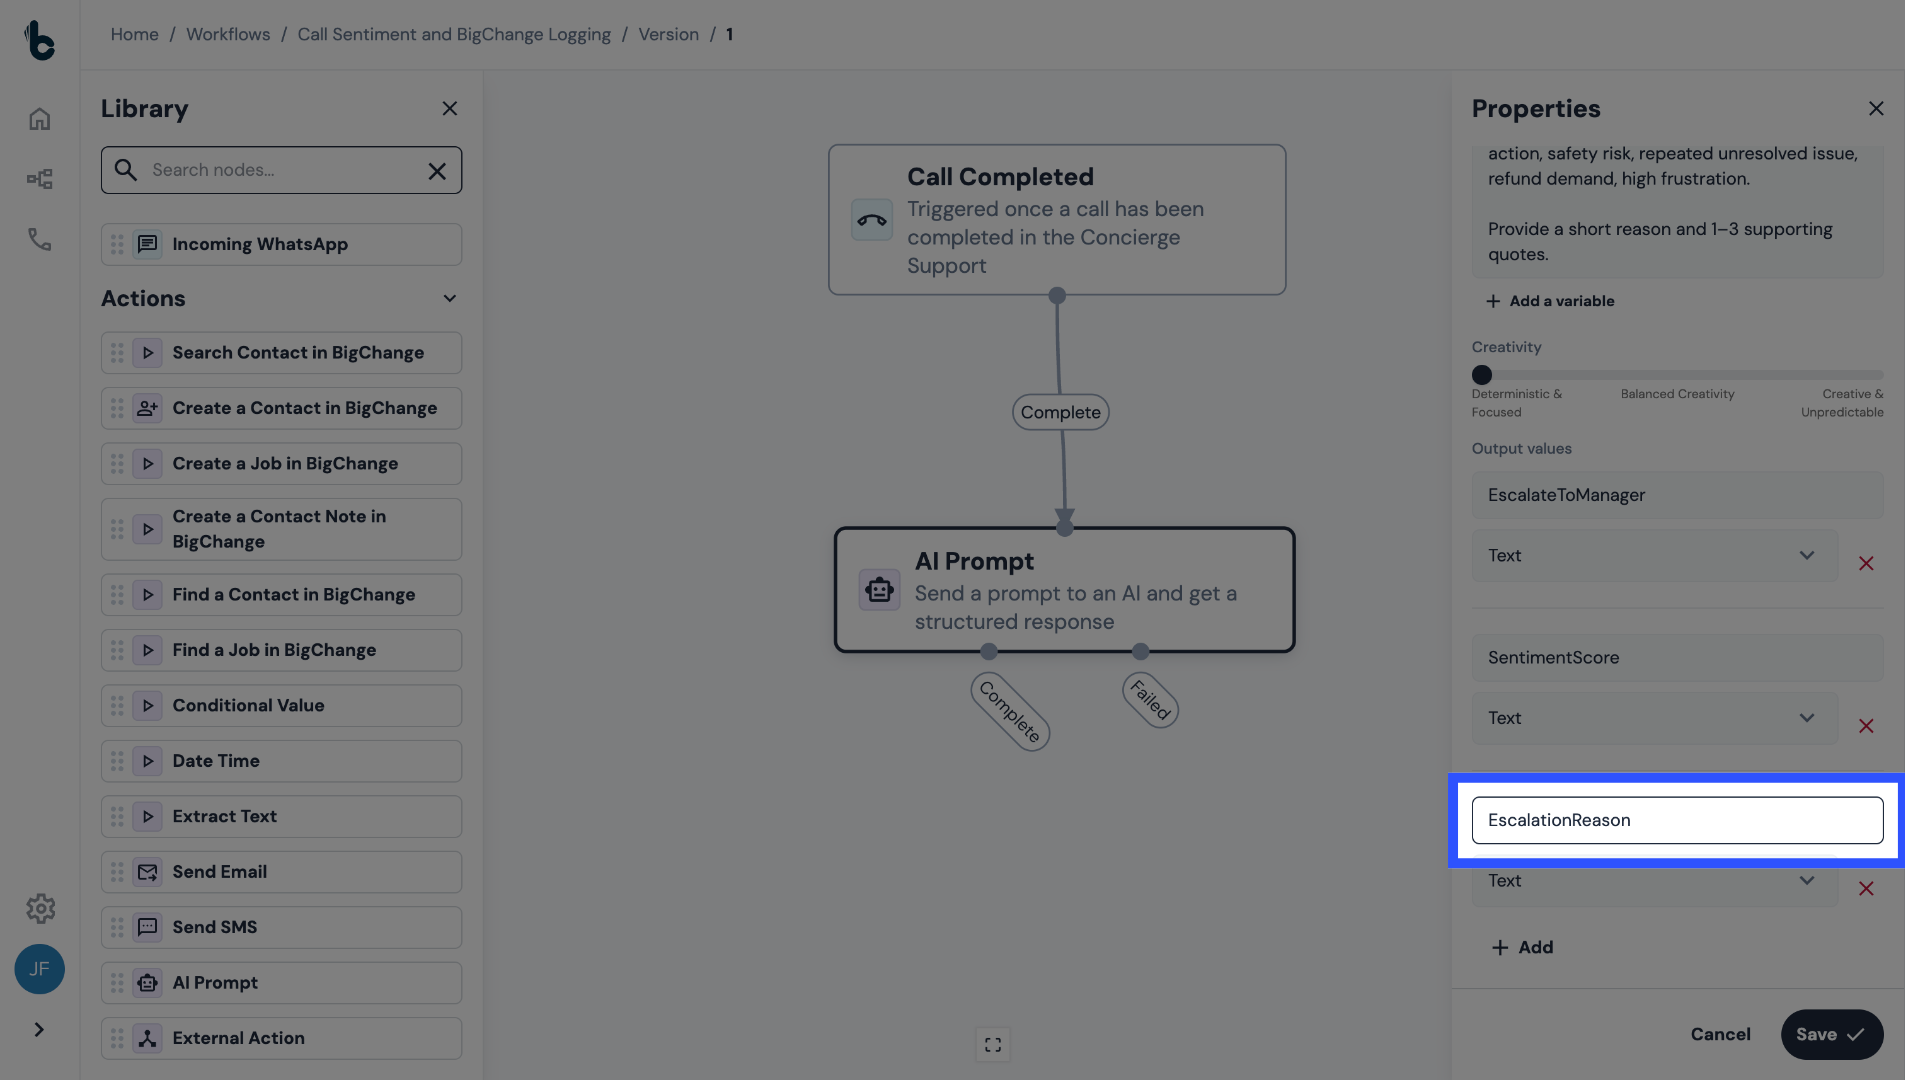
22. Sentiment score

23. Escalation reason
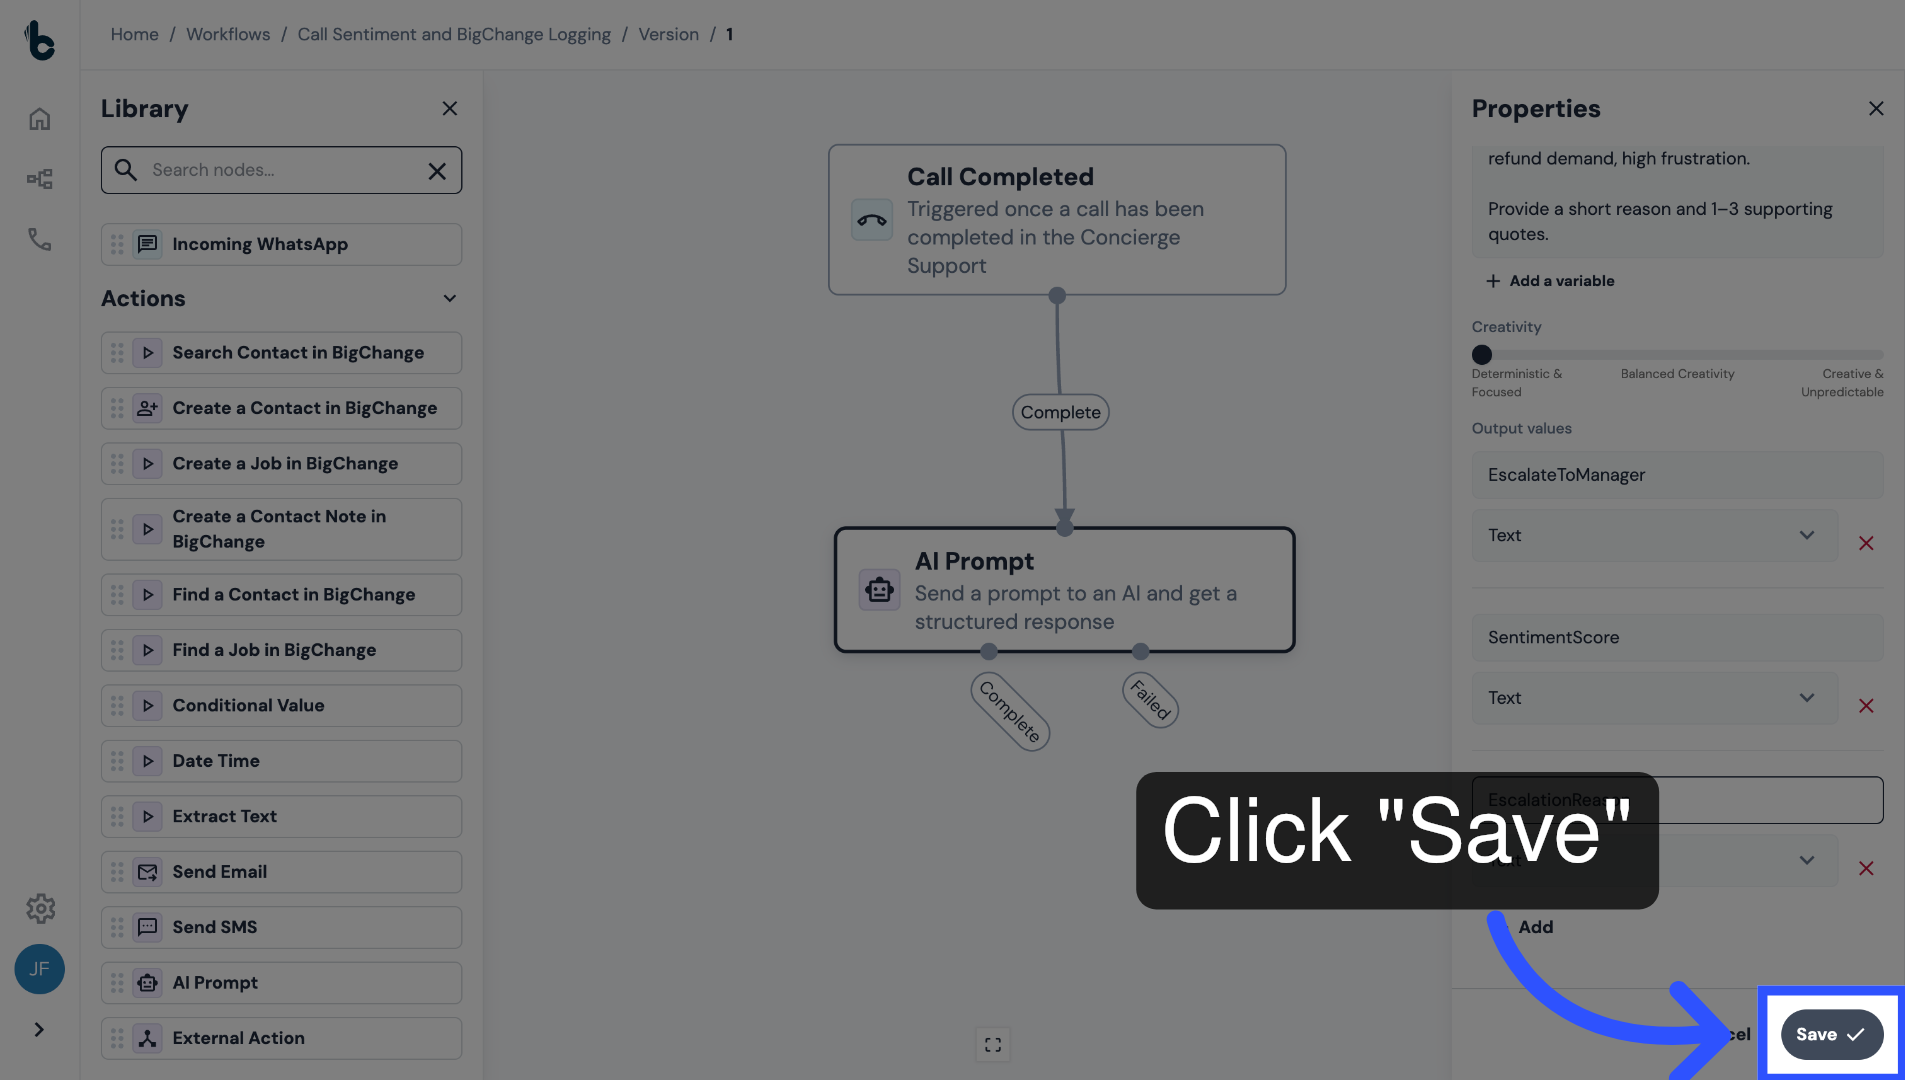
24. Save configuration
Click Save to save the configuration.
Now, every completed call will be analyzed automatically.
25. 📚 Learn more
You can learn more about AI Prompt nodes in the guide entitled AI Prompt action.
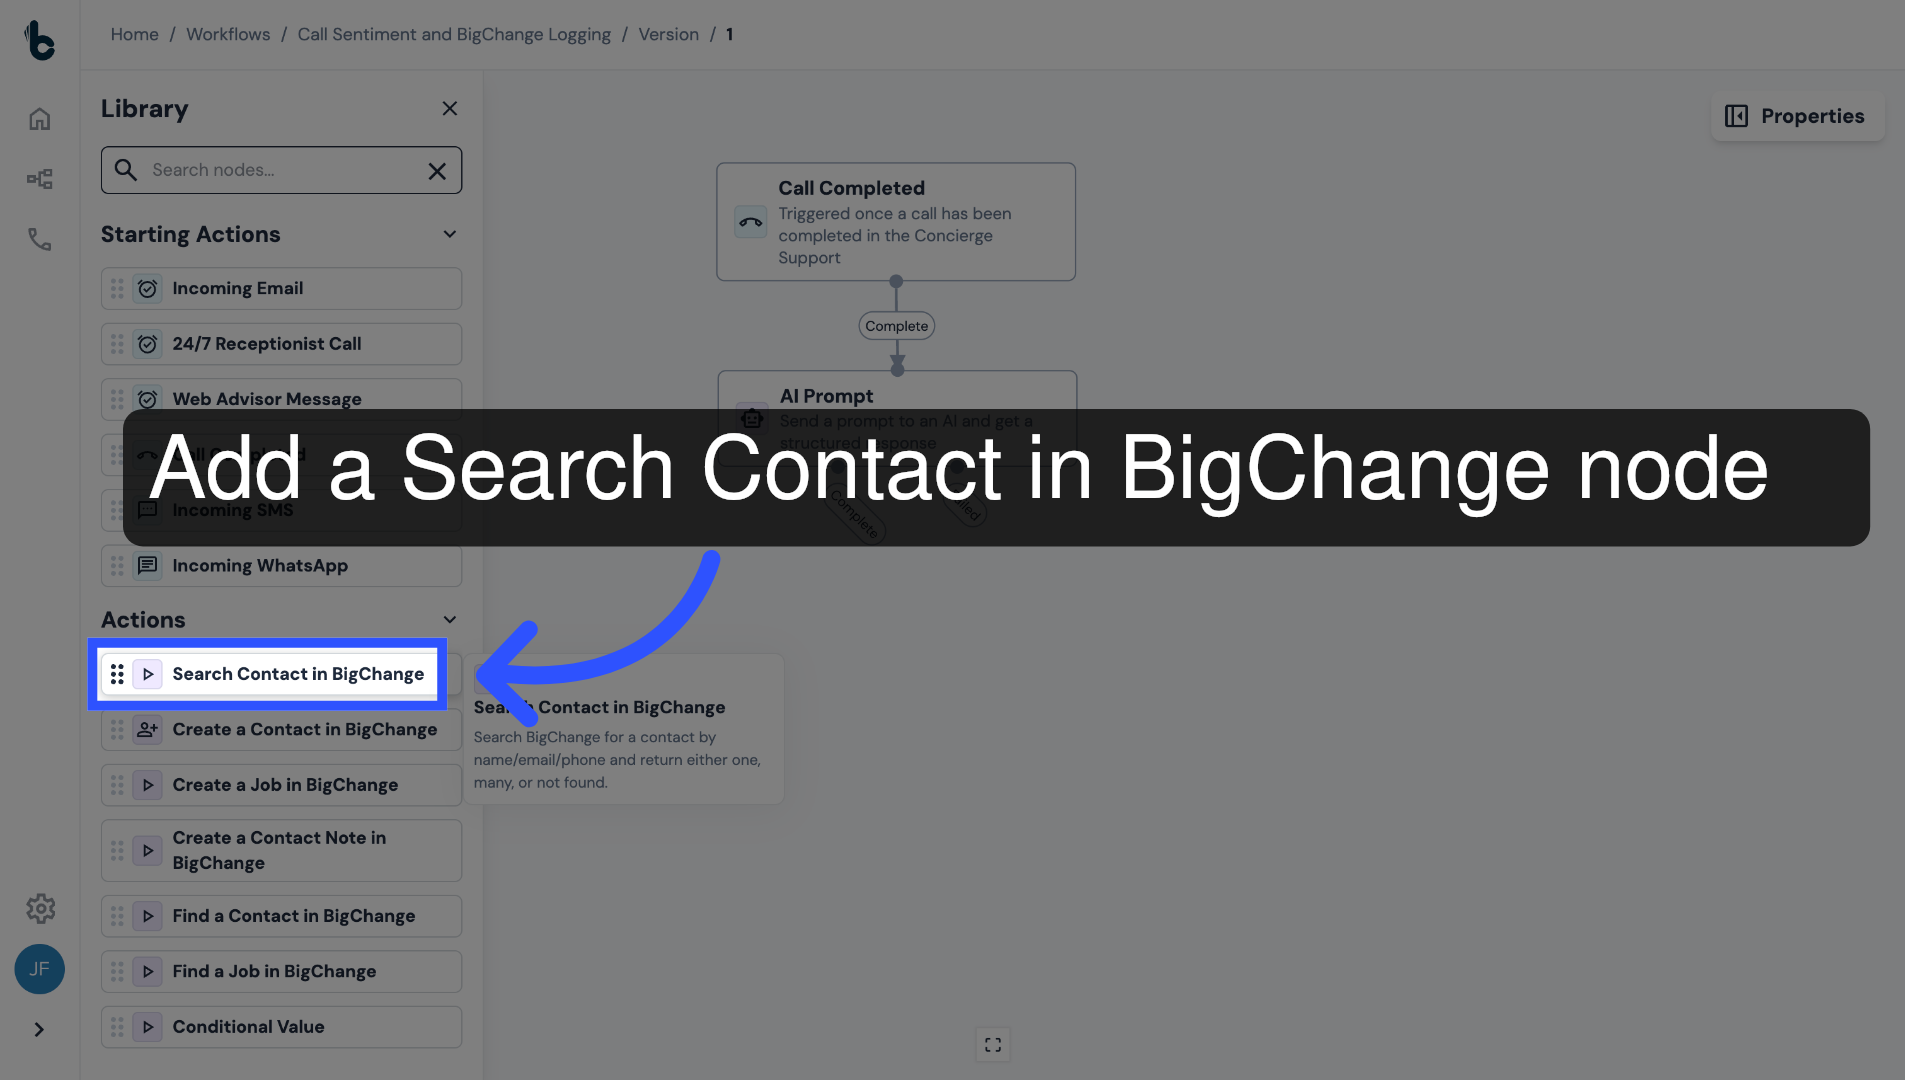
26. Add Search Contact in BigChange node
Next, add a Search Contact in BigChange node.
This will identify the right Contact in BigChange to log the call against.
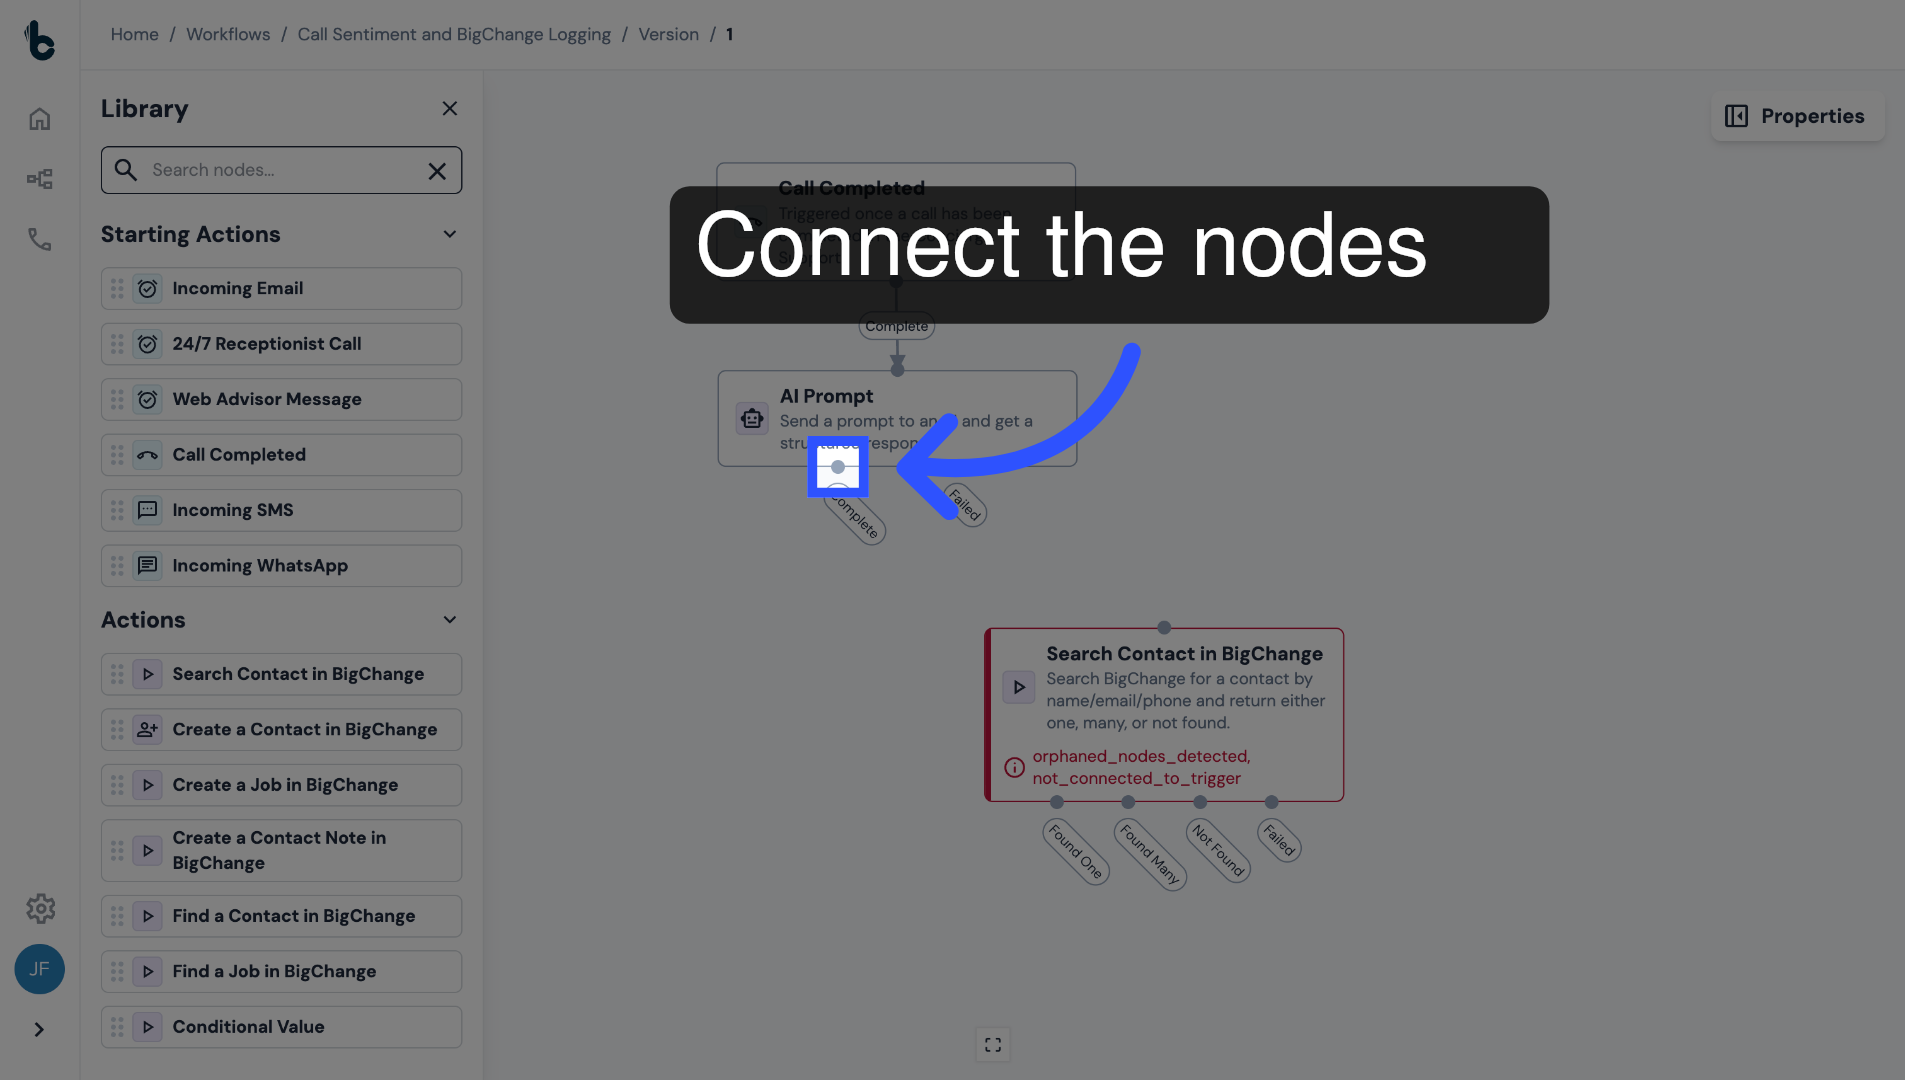
27. Connect the nodes
Connect it to the Complete branch of the AI prompt node.
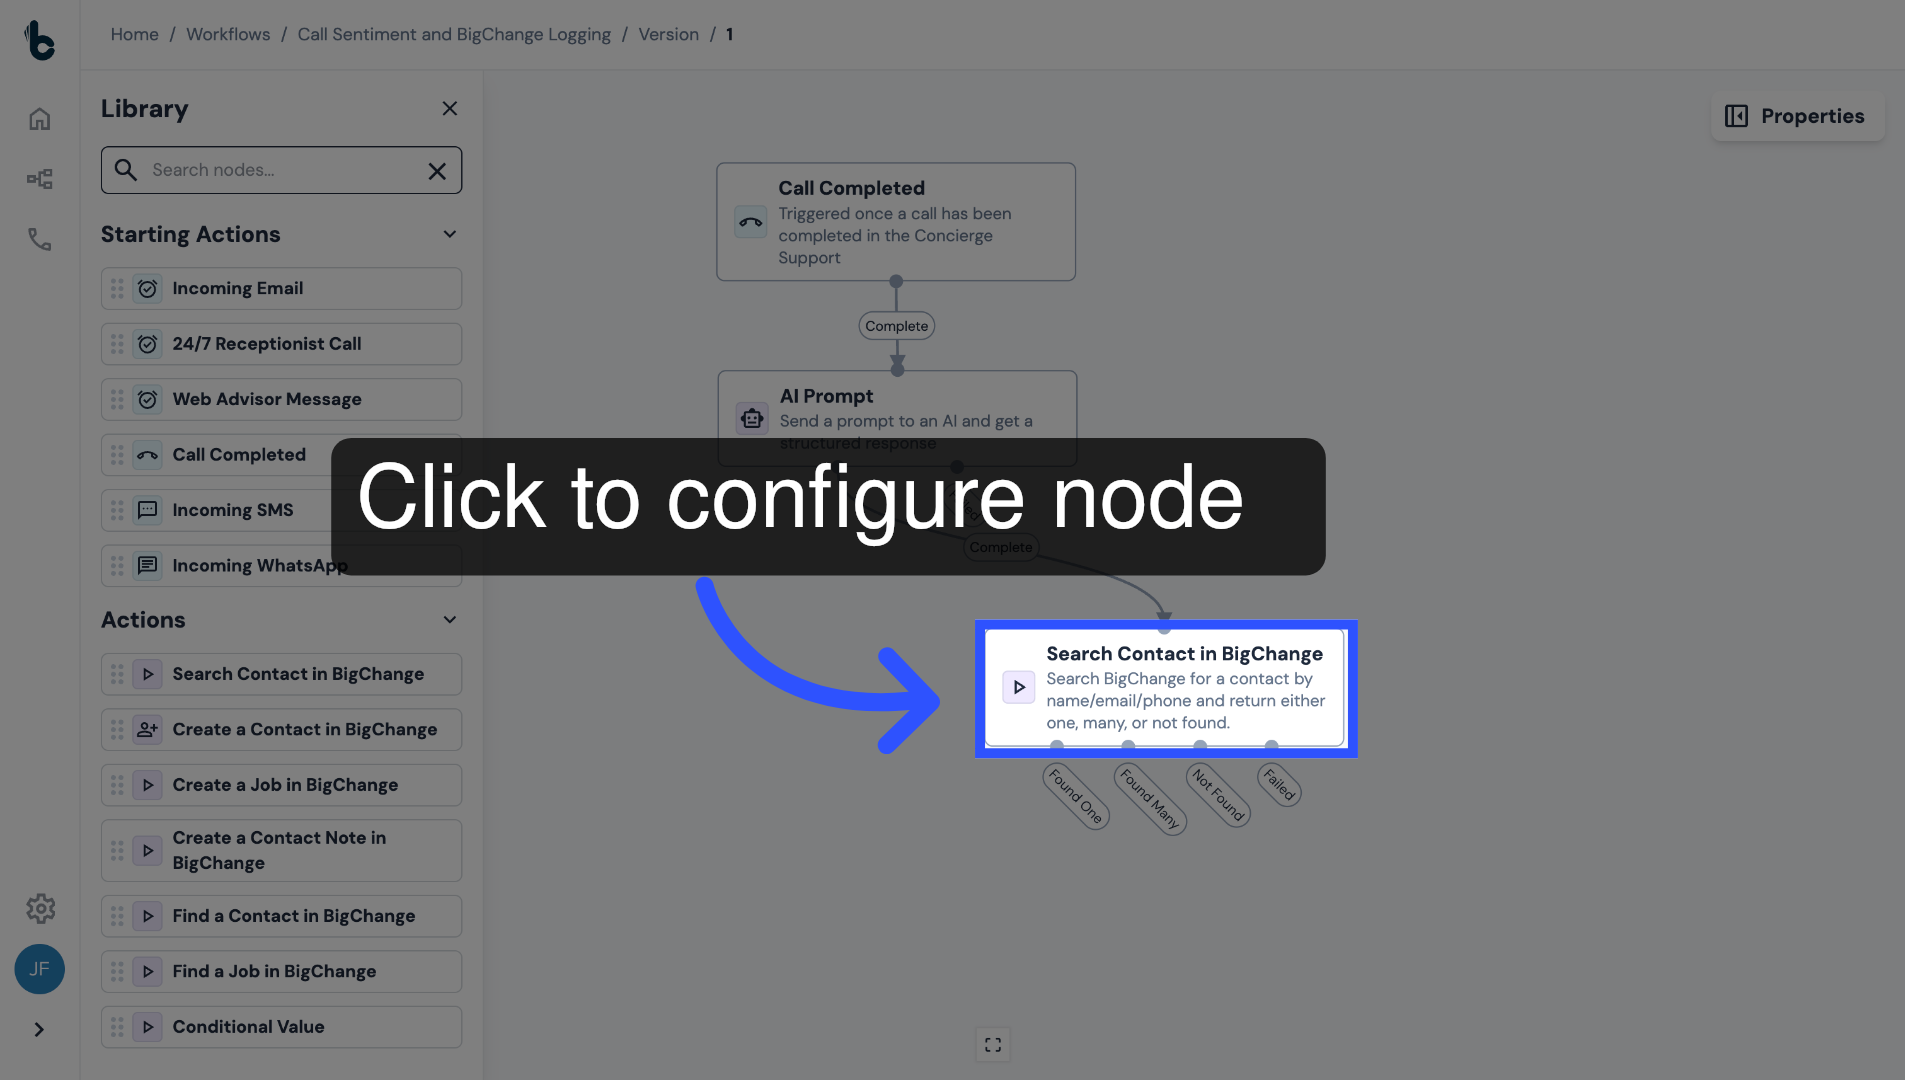
28. Click to configure node
Click on the node to begin the configuration.
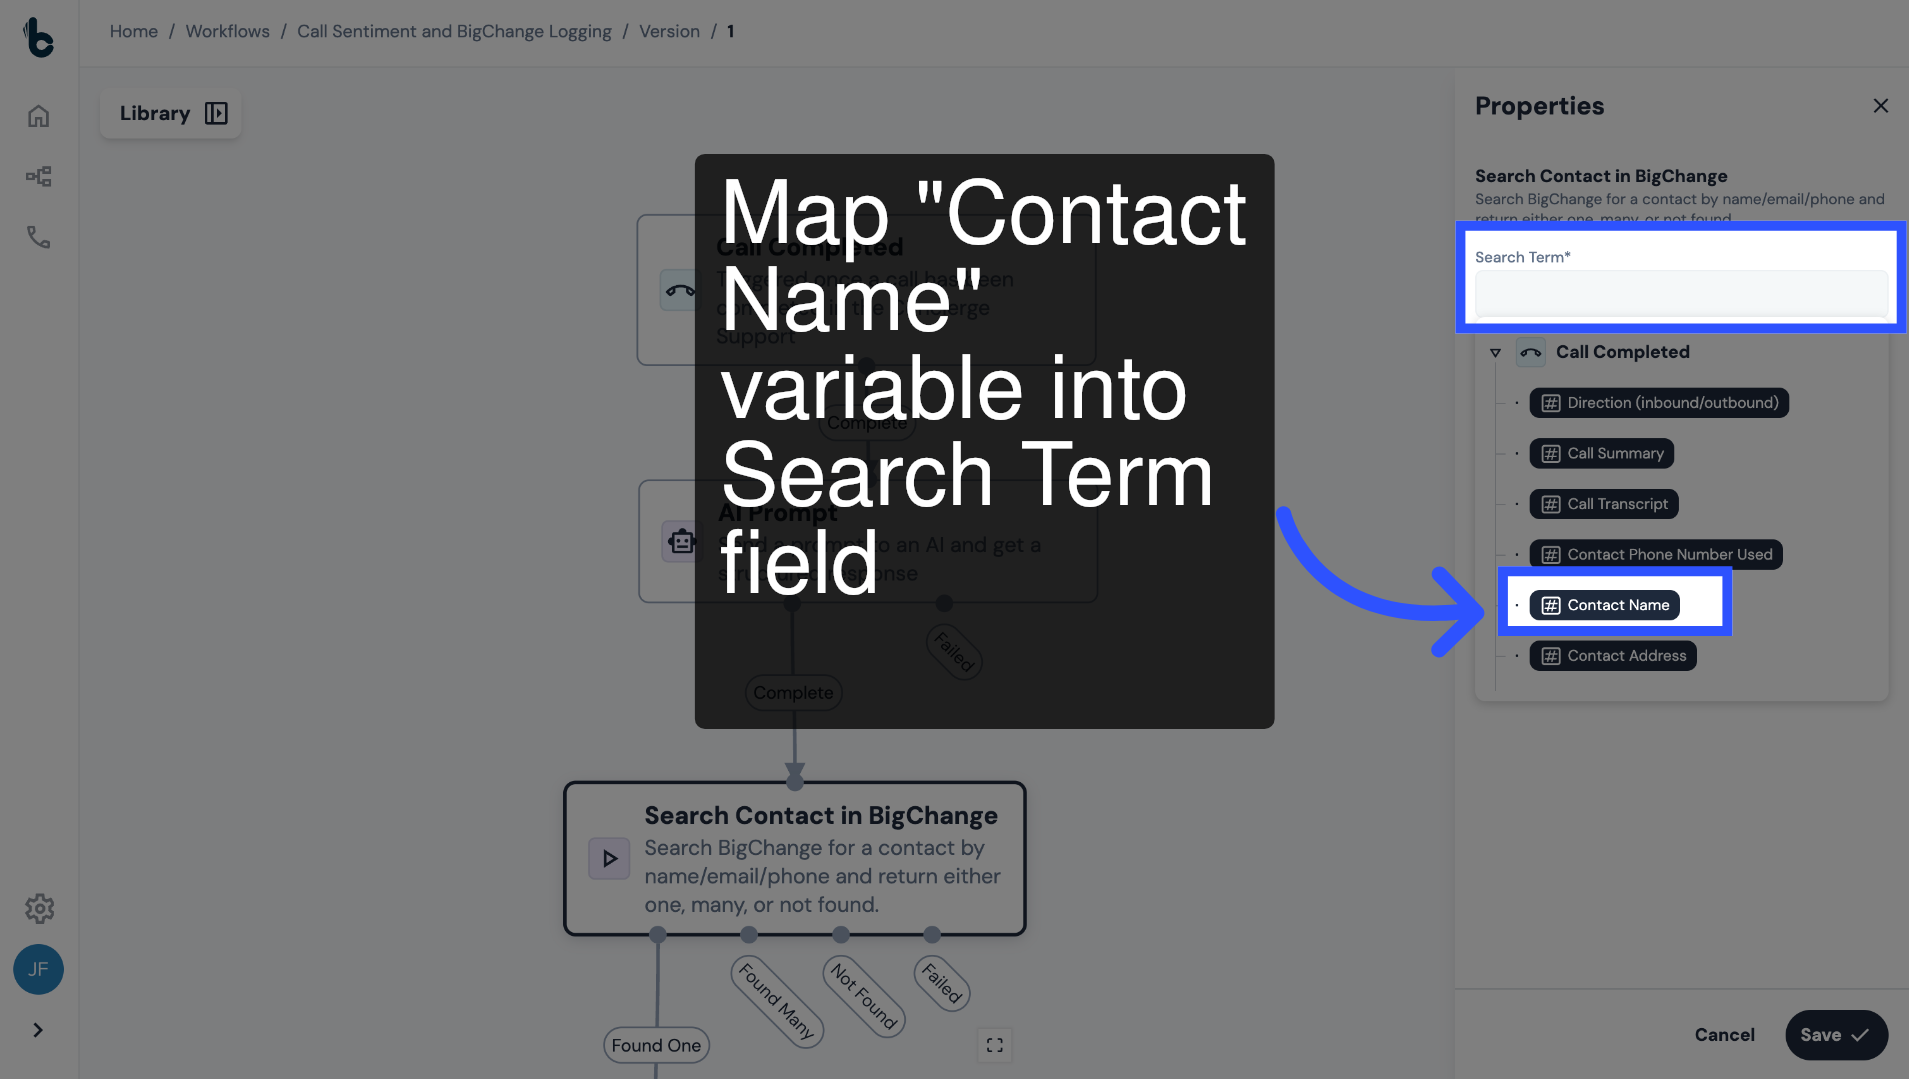
29. Map Contact Name variable into Search Term field
Map the Contact Name of the caller, which was output as a variable by the Call Completed Starting action into the Search Term field.
This is the term which will be used to search for the contact in BigChange.
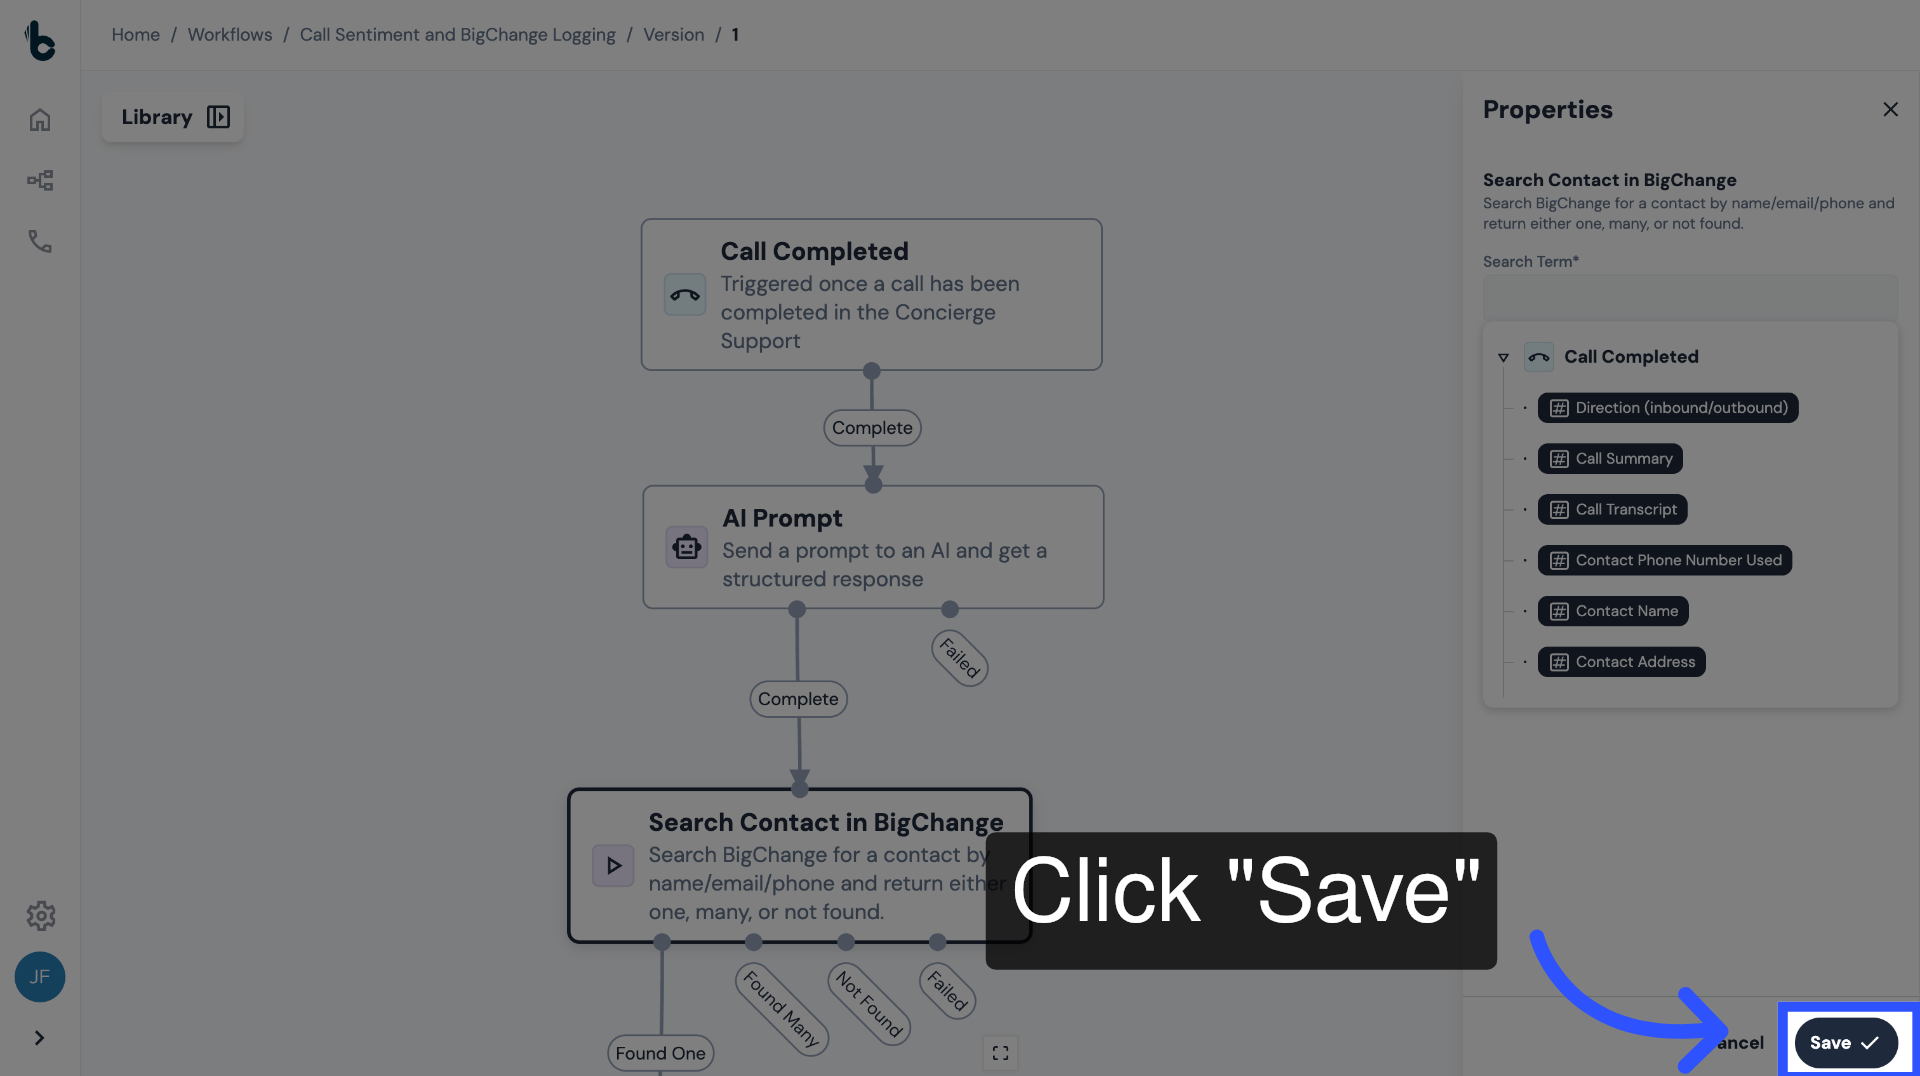
30. Click Save
Press Save.
If a single contact match is found using the Search Term, the workflow should continue to the next step to create a Contact Note in BigChange.
31. 📚 Learn more
To learn more about the Search Contact in BigChange node, read the article Search Contact in BigChange action.
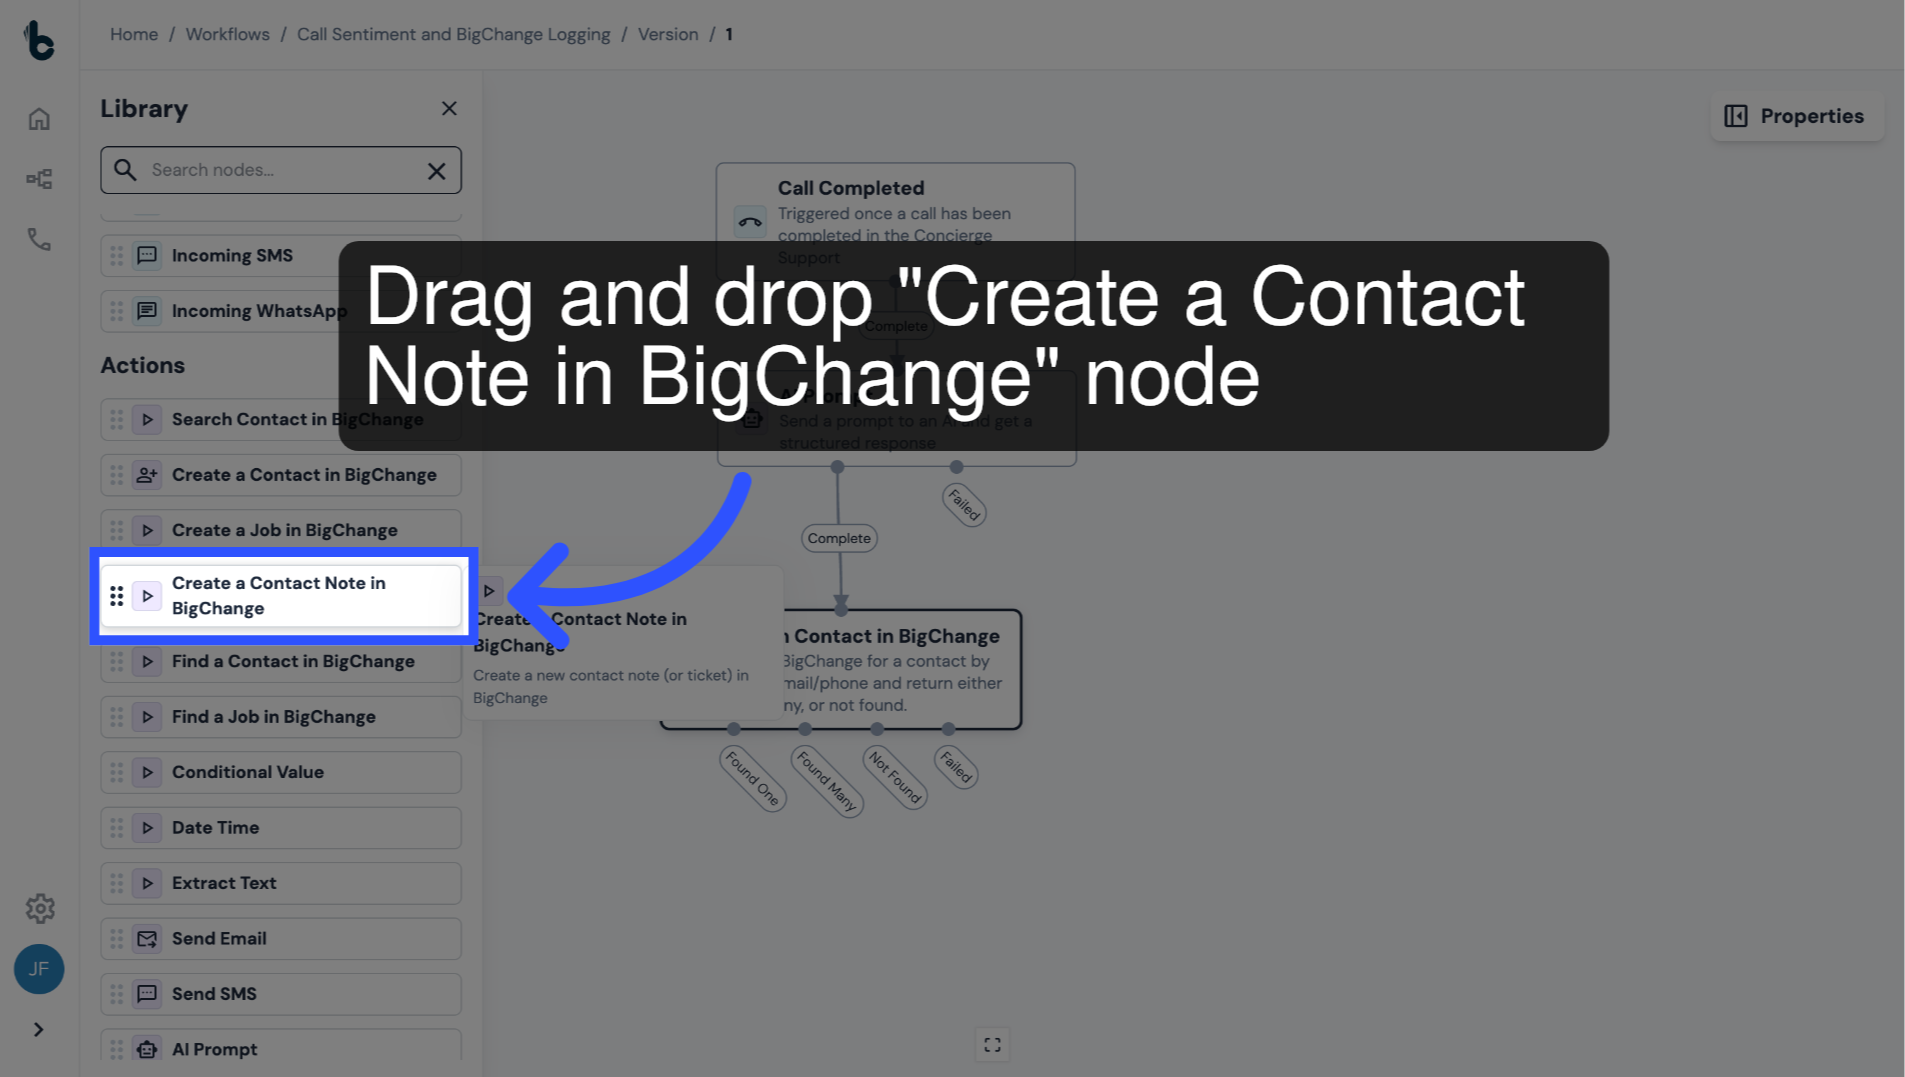
32. Add a Create a Contact Note in BigChange node
Add a Create Contact Note in BigChange node into the Workflow Editor.
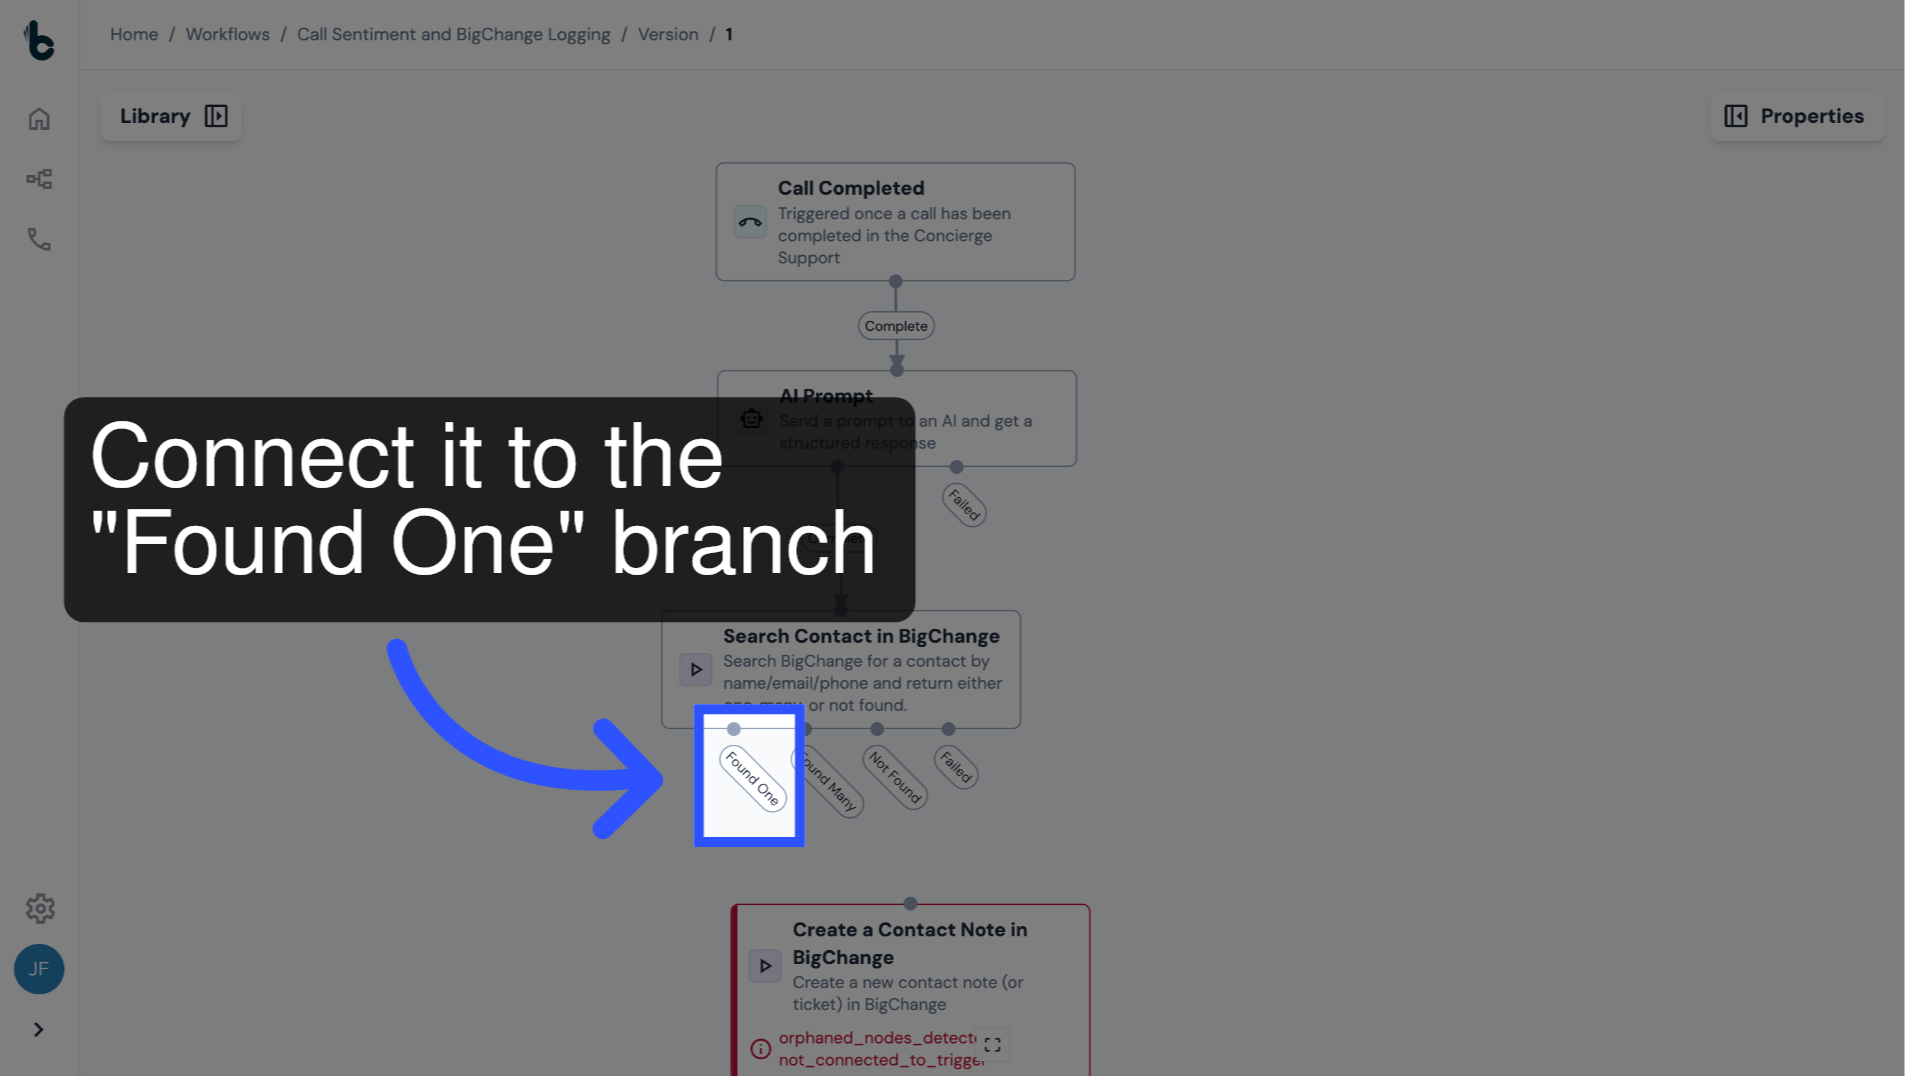
33. Connect the nodes
Connect the Create Contact Note in BigChange node to the Found One branch of the Search for a Contact in BigChange node.
This ensures a note is only created if exactly one Contact is matched.
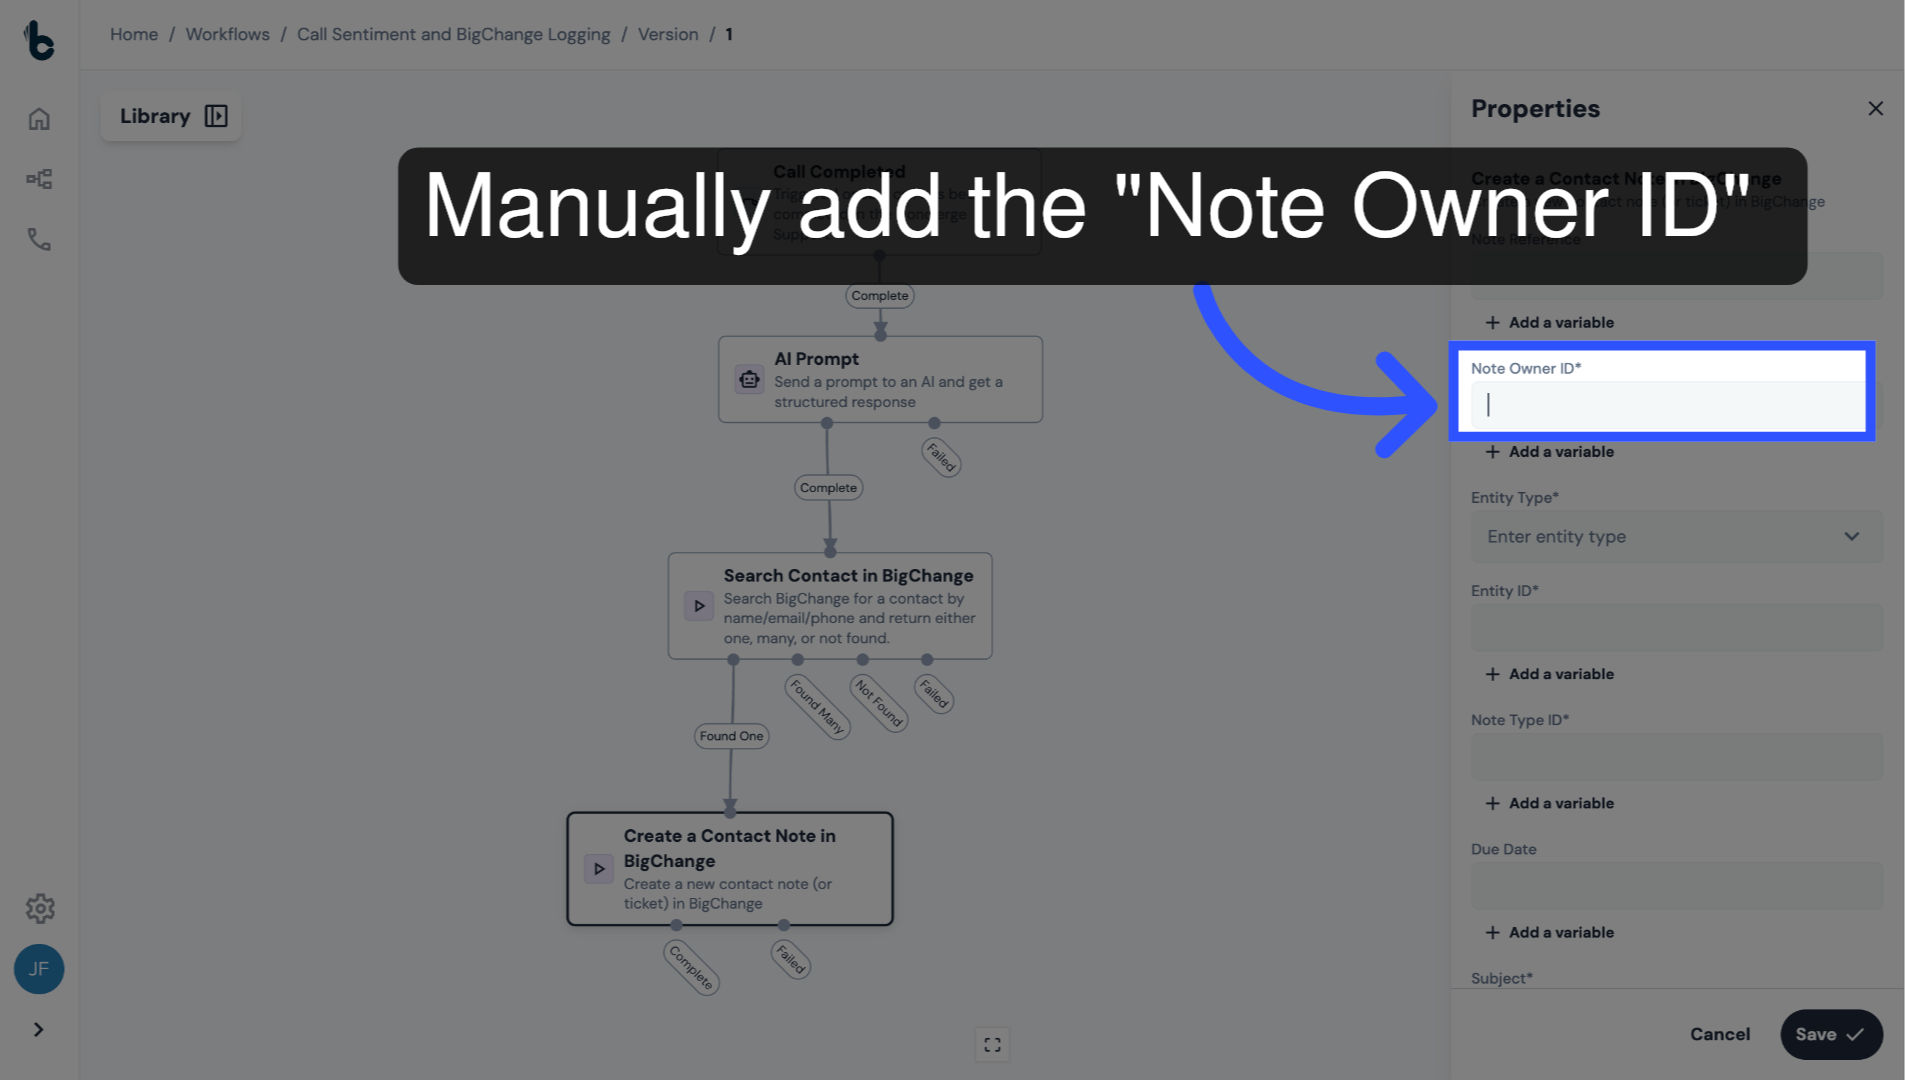
34. Insert Note Owner ID
Open the Properties panel.
Configure the Note Owner ID field, which is mandatory.
This value can be taken from your BigChange account and inserted manually.
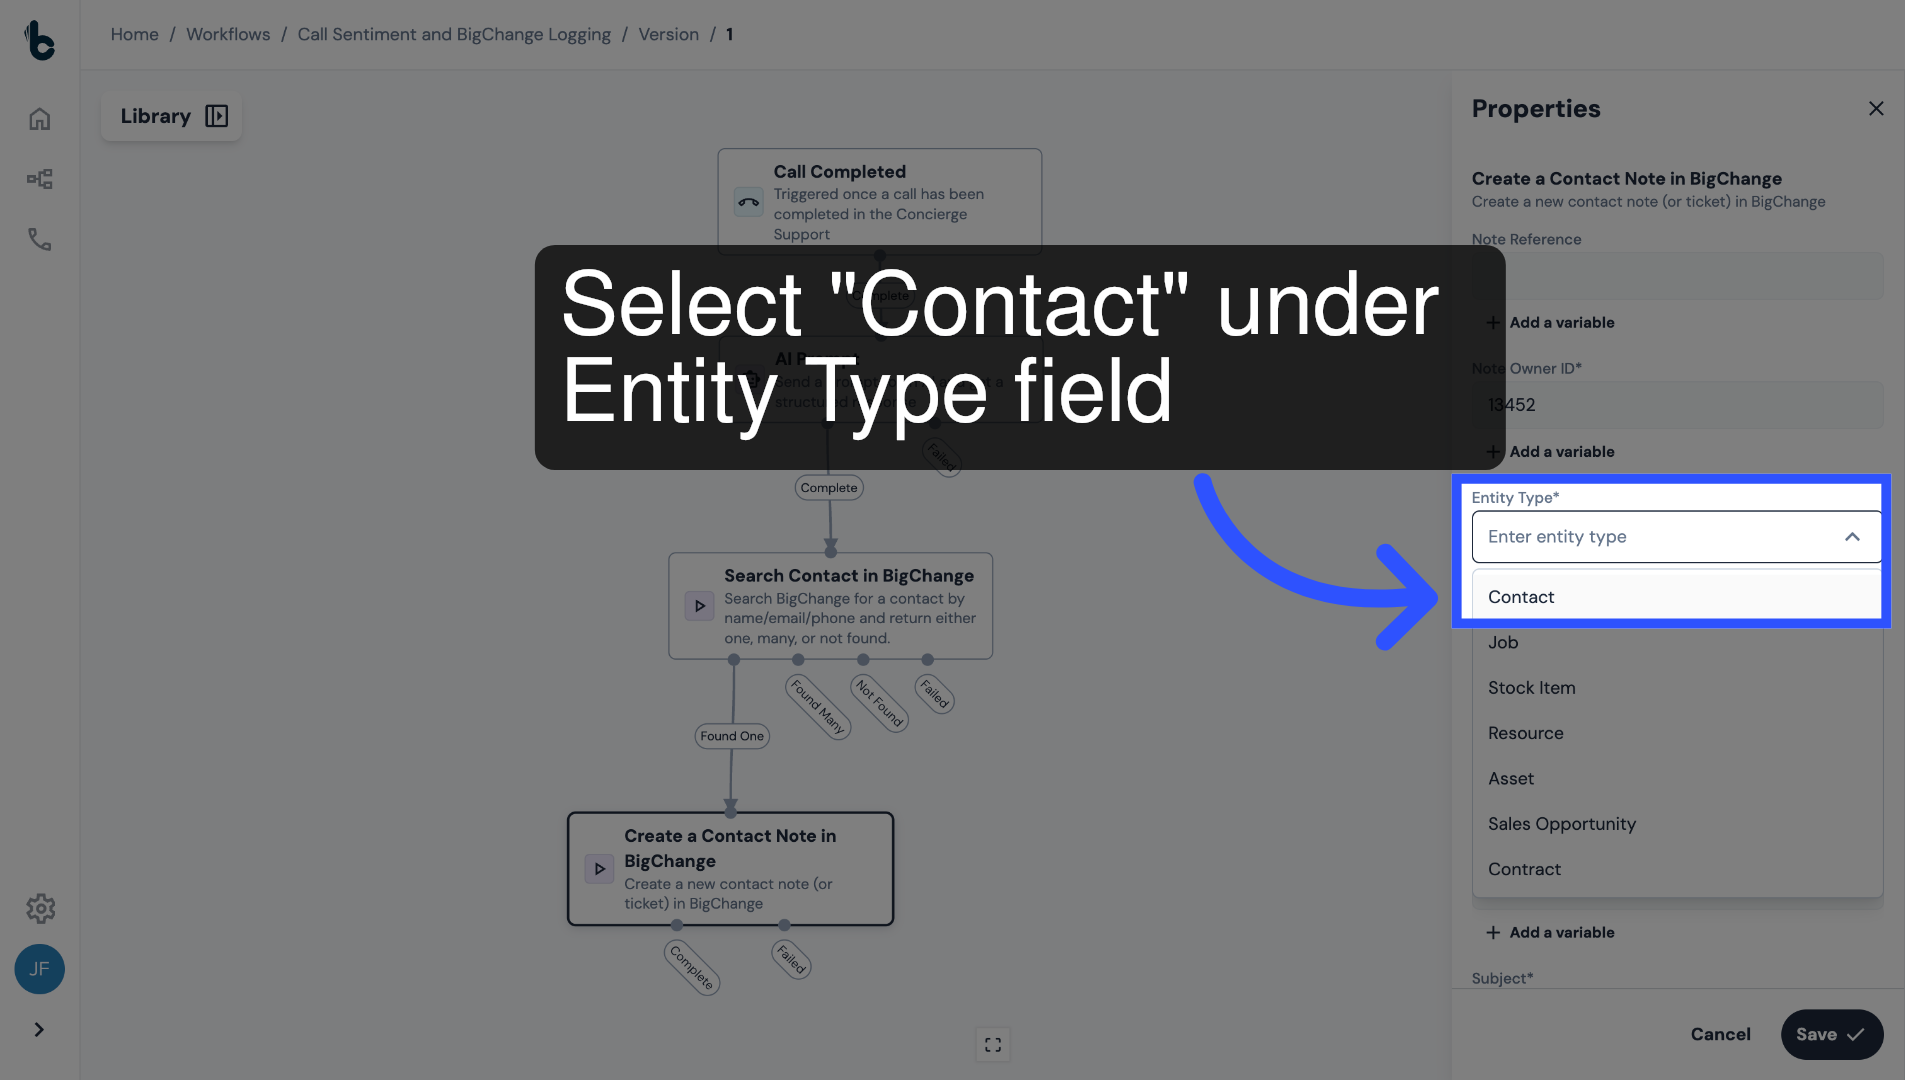
35. Select the Entity Type
Select Contact in the Entity Type field.
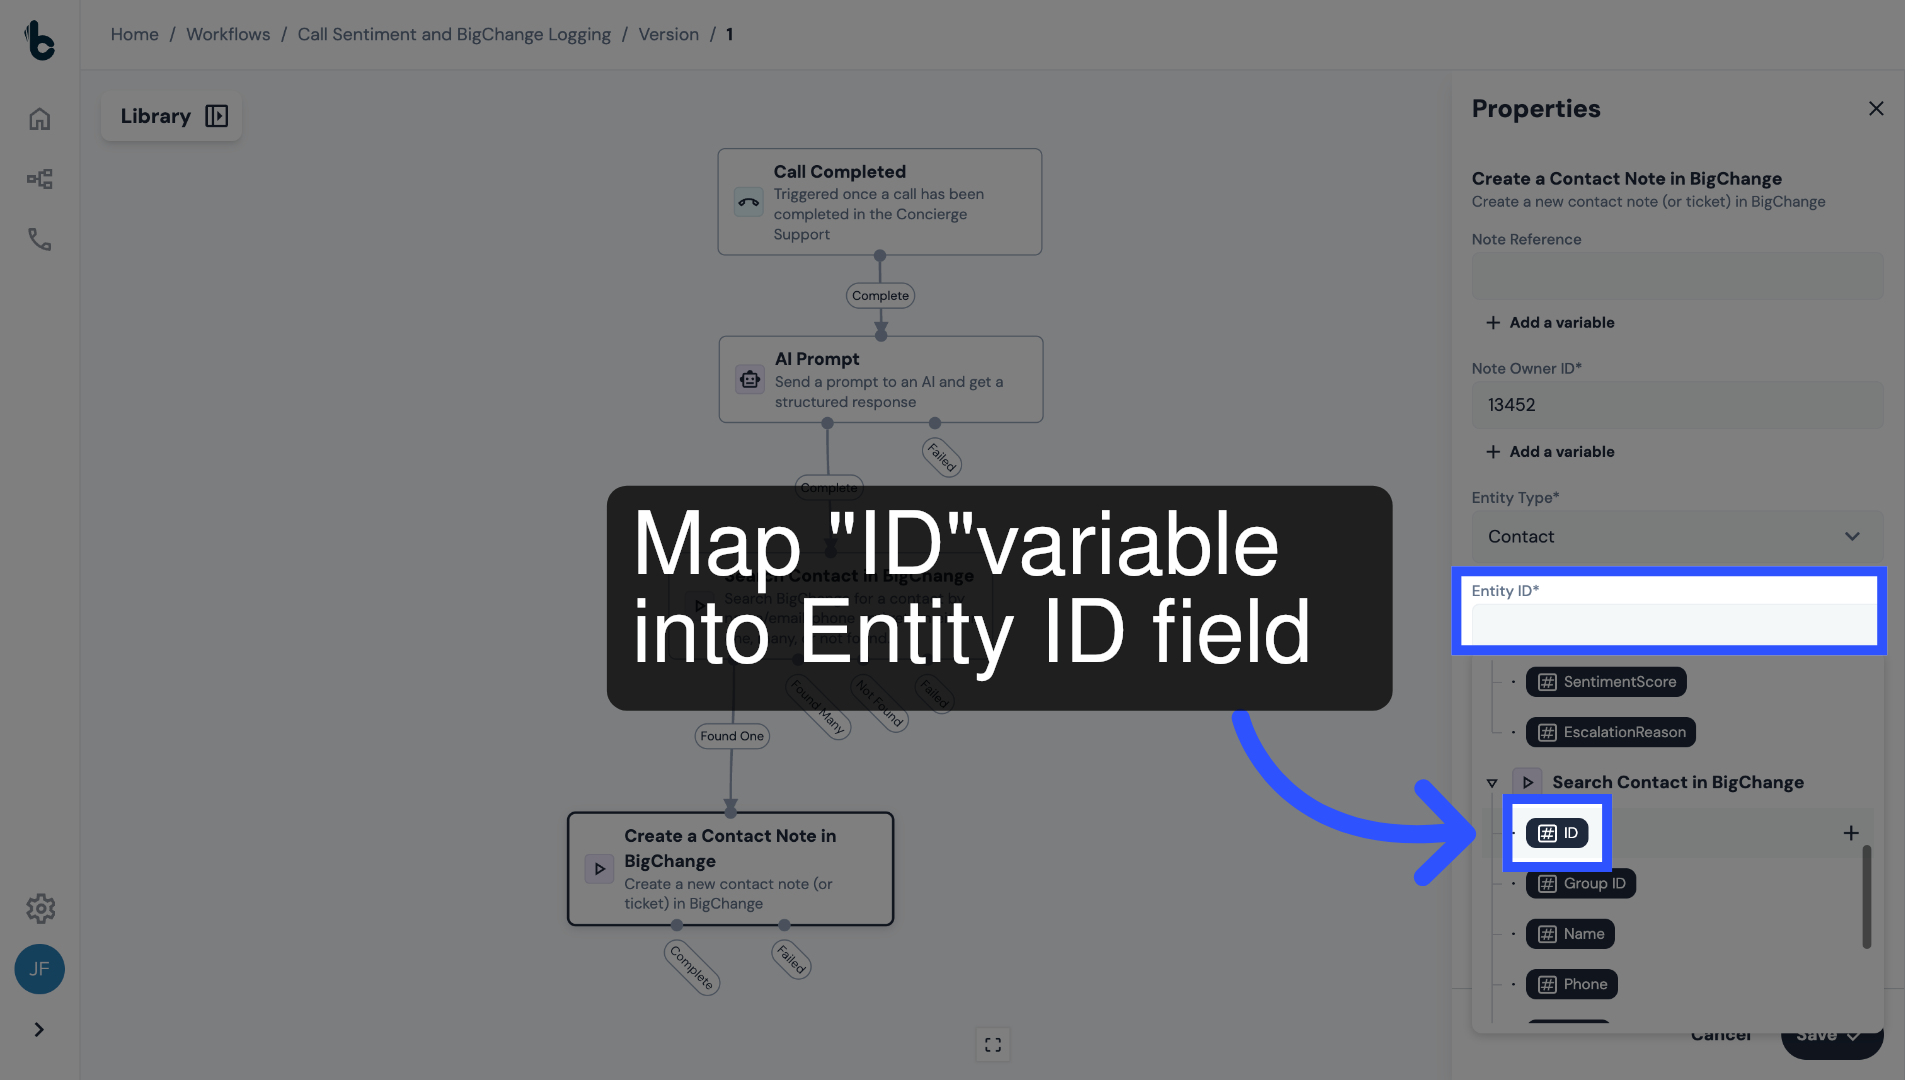
36. Add Entity ID
In the Entity ID field, add the Contact ID variable that was returned by the Search Contact in BigChange node.
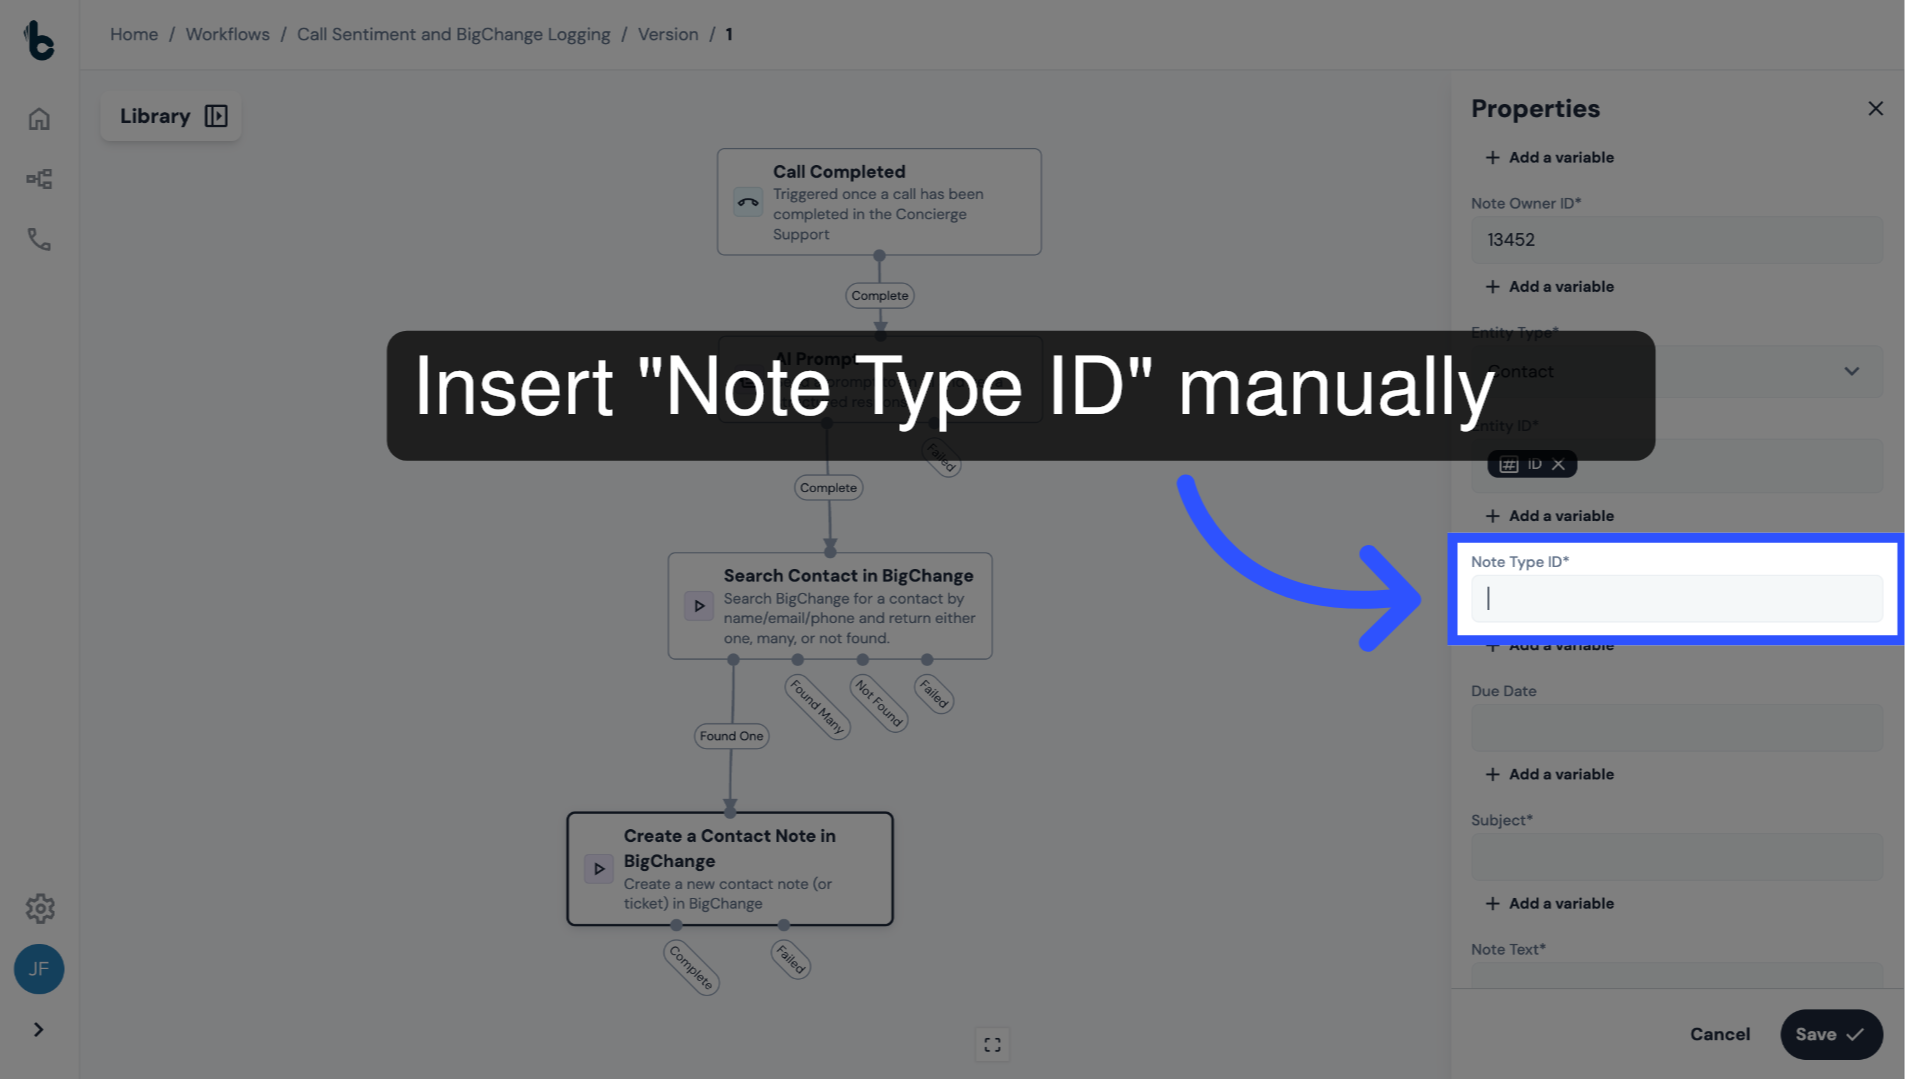
37. Insert Note Type ID
In the Note Type ID field, insert the Note Type ID manually, which you can find in your BigChange account.
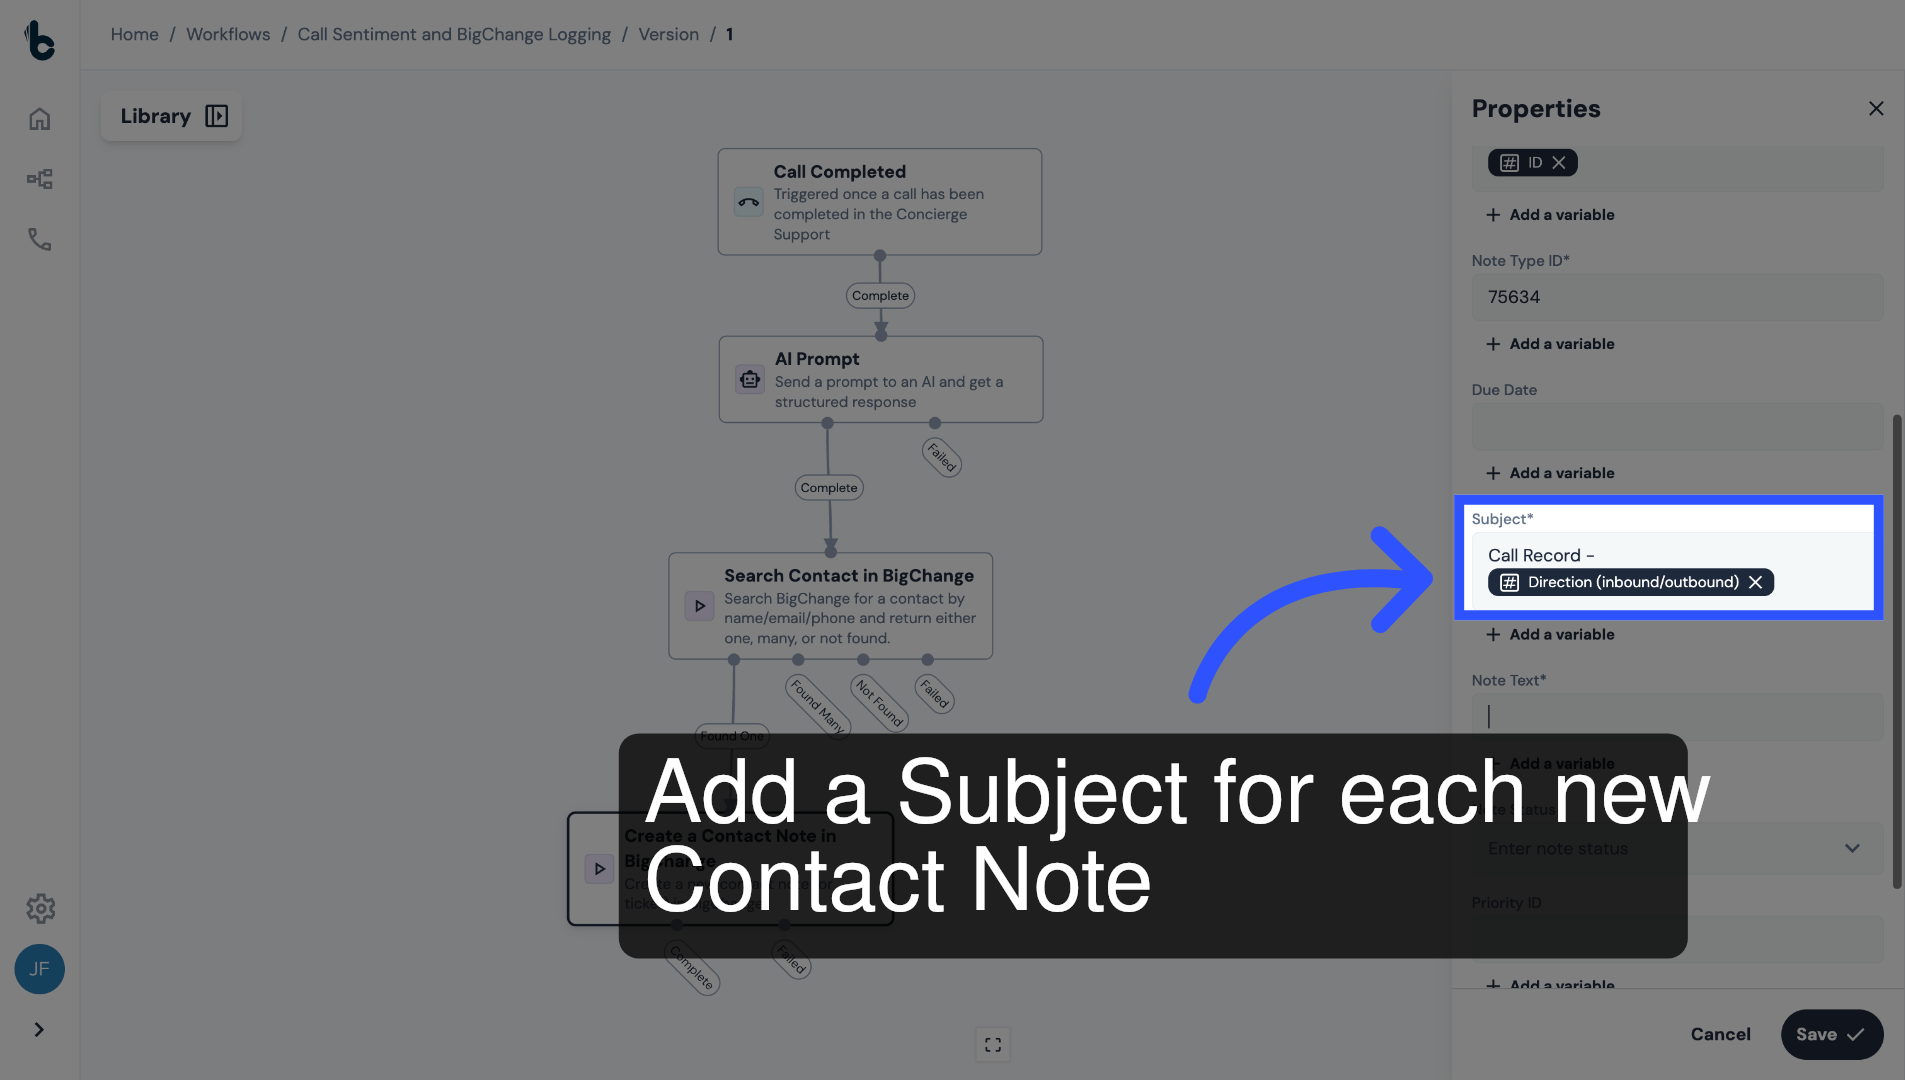
38. Configure the Subject field
In the Subject field, insert a subject for all new Contact Notes.
For example, the subject could be "Call Record" followed by the Call Direction variable, so you can quickly see if the call was inbound or outbound.
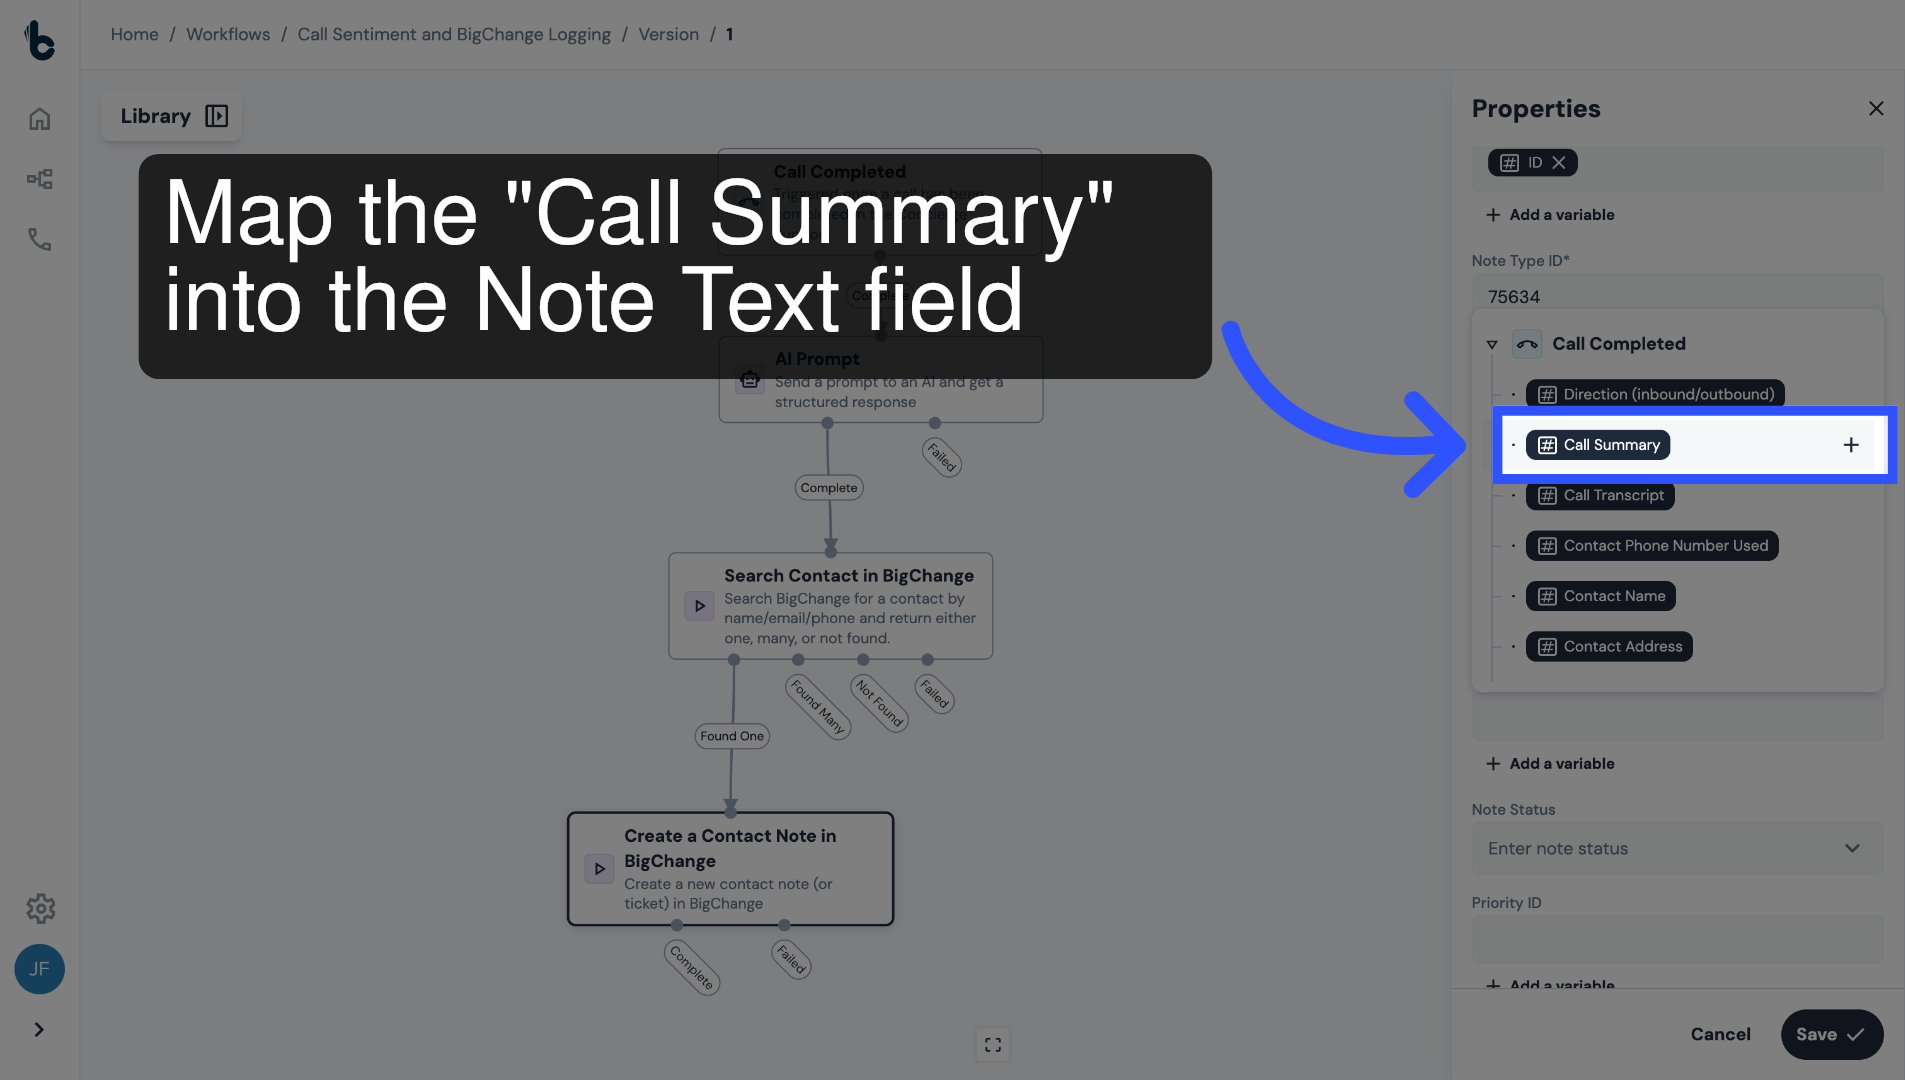
39. Configure Note Text field
Insert the Call Summary variable into the Note Text field.
This adds the AI-generated call summary into the main body of each Contact Note.
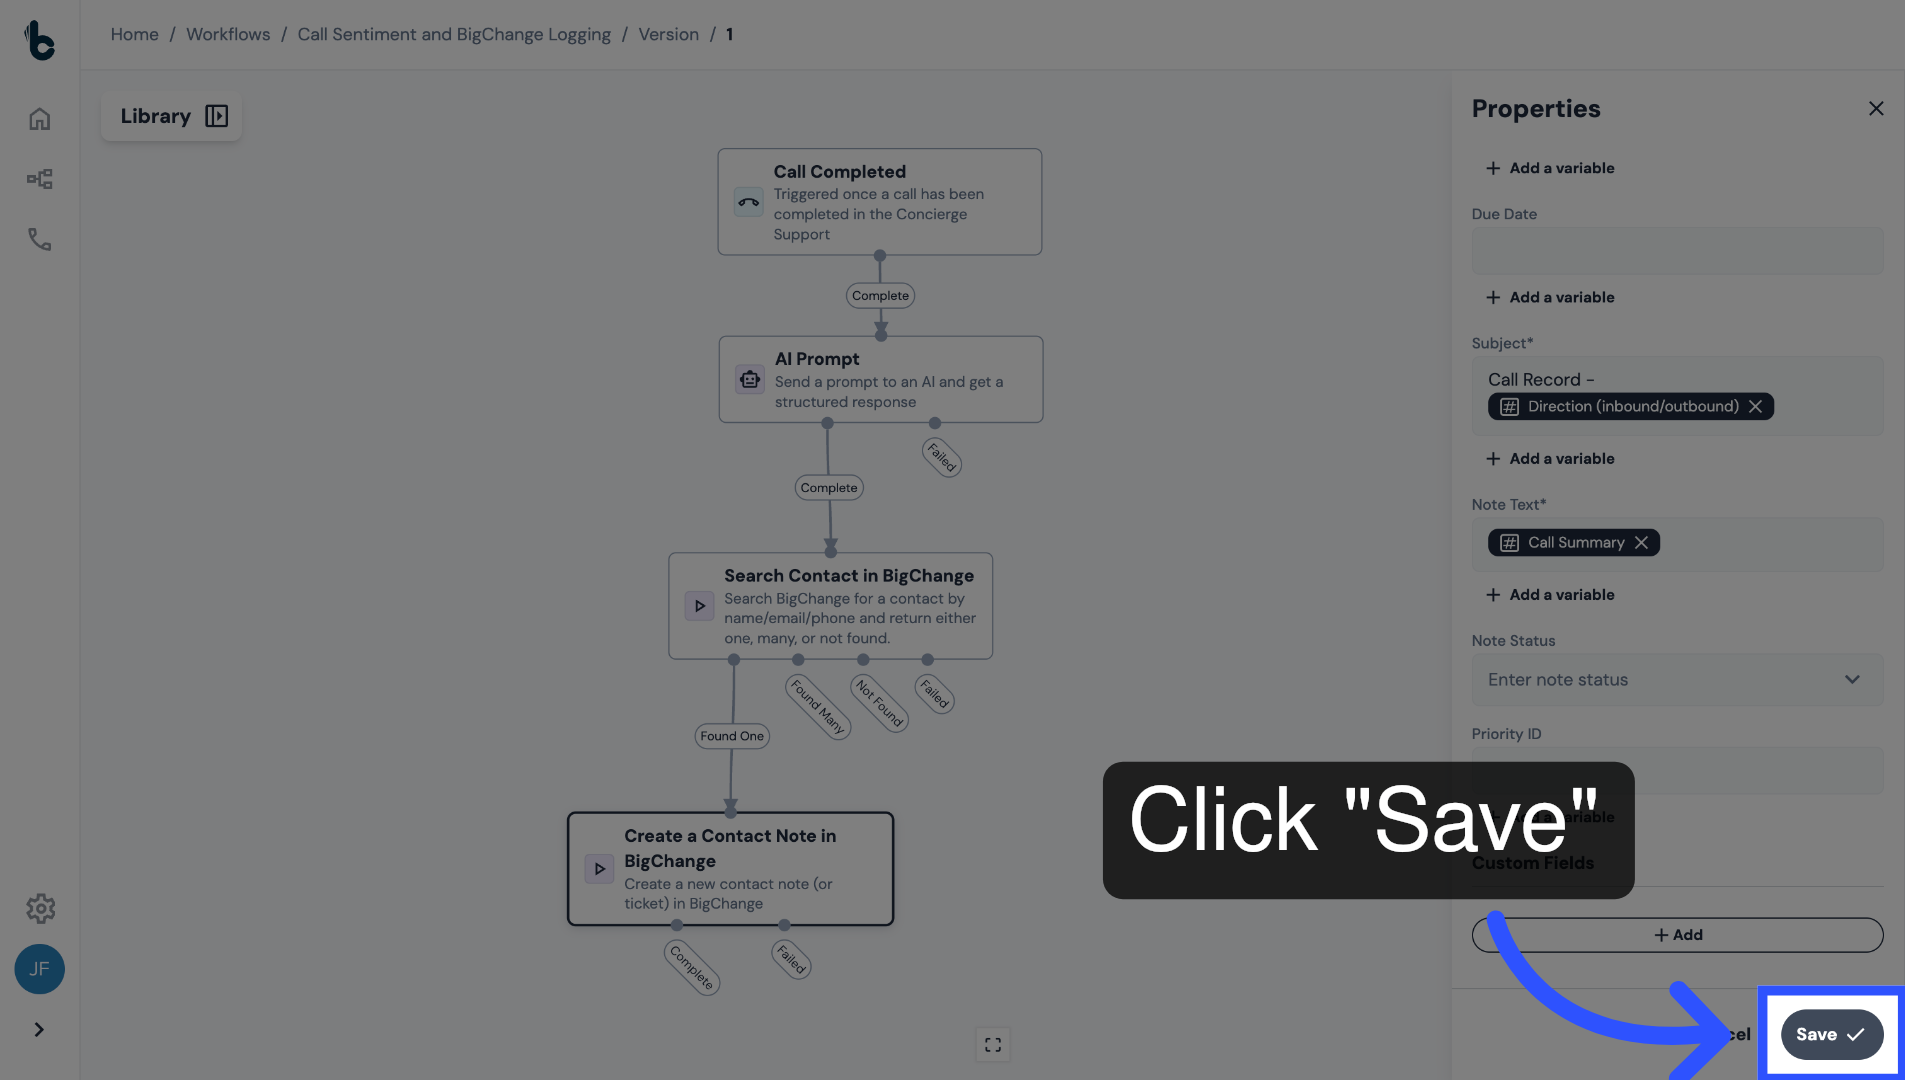
40. Save Configuration
You can leave the remaining optional fields blank.
Then, press Save.
Now, every call will automatically create a structured Contact Note in BigChange.
41. 📚 Learn more
Learn more about the Create Contact Note in BigChange node by reading the guide entitled Create Contact Note in BigChange action.
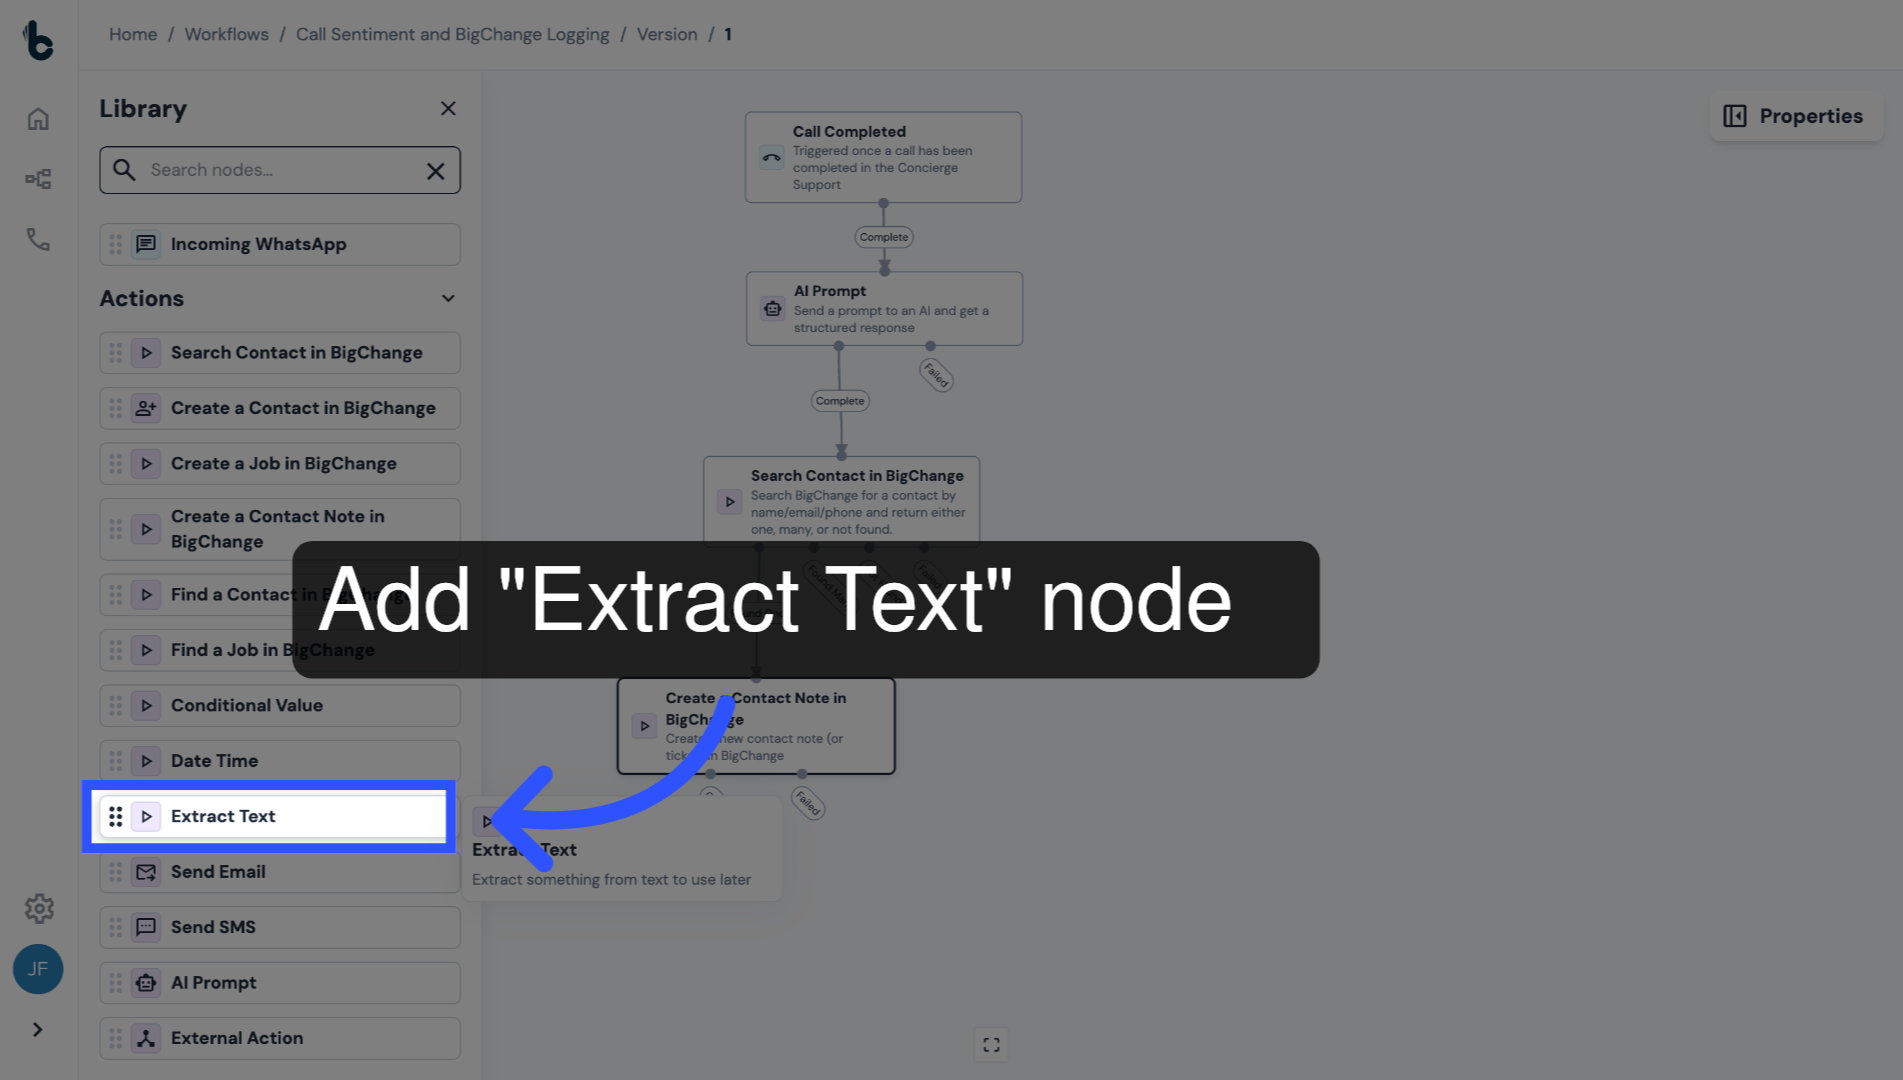
42. Add Extract Text node
The next step is to analyze whether escalation to a manager is required based on the content of the call.
To do this, first add an Extract Text node.
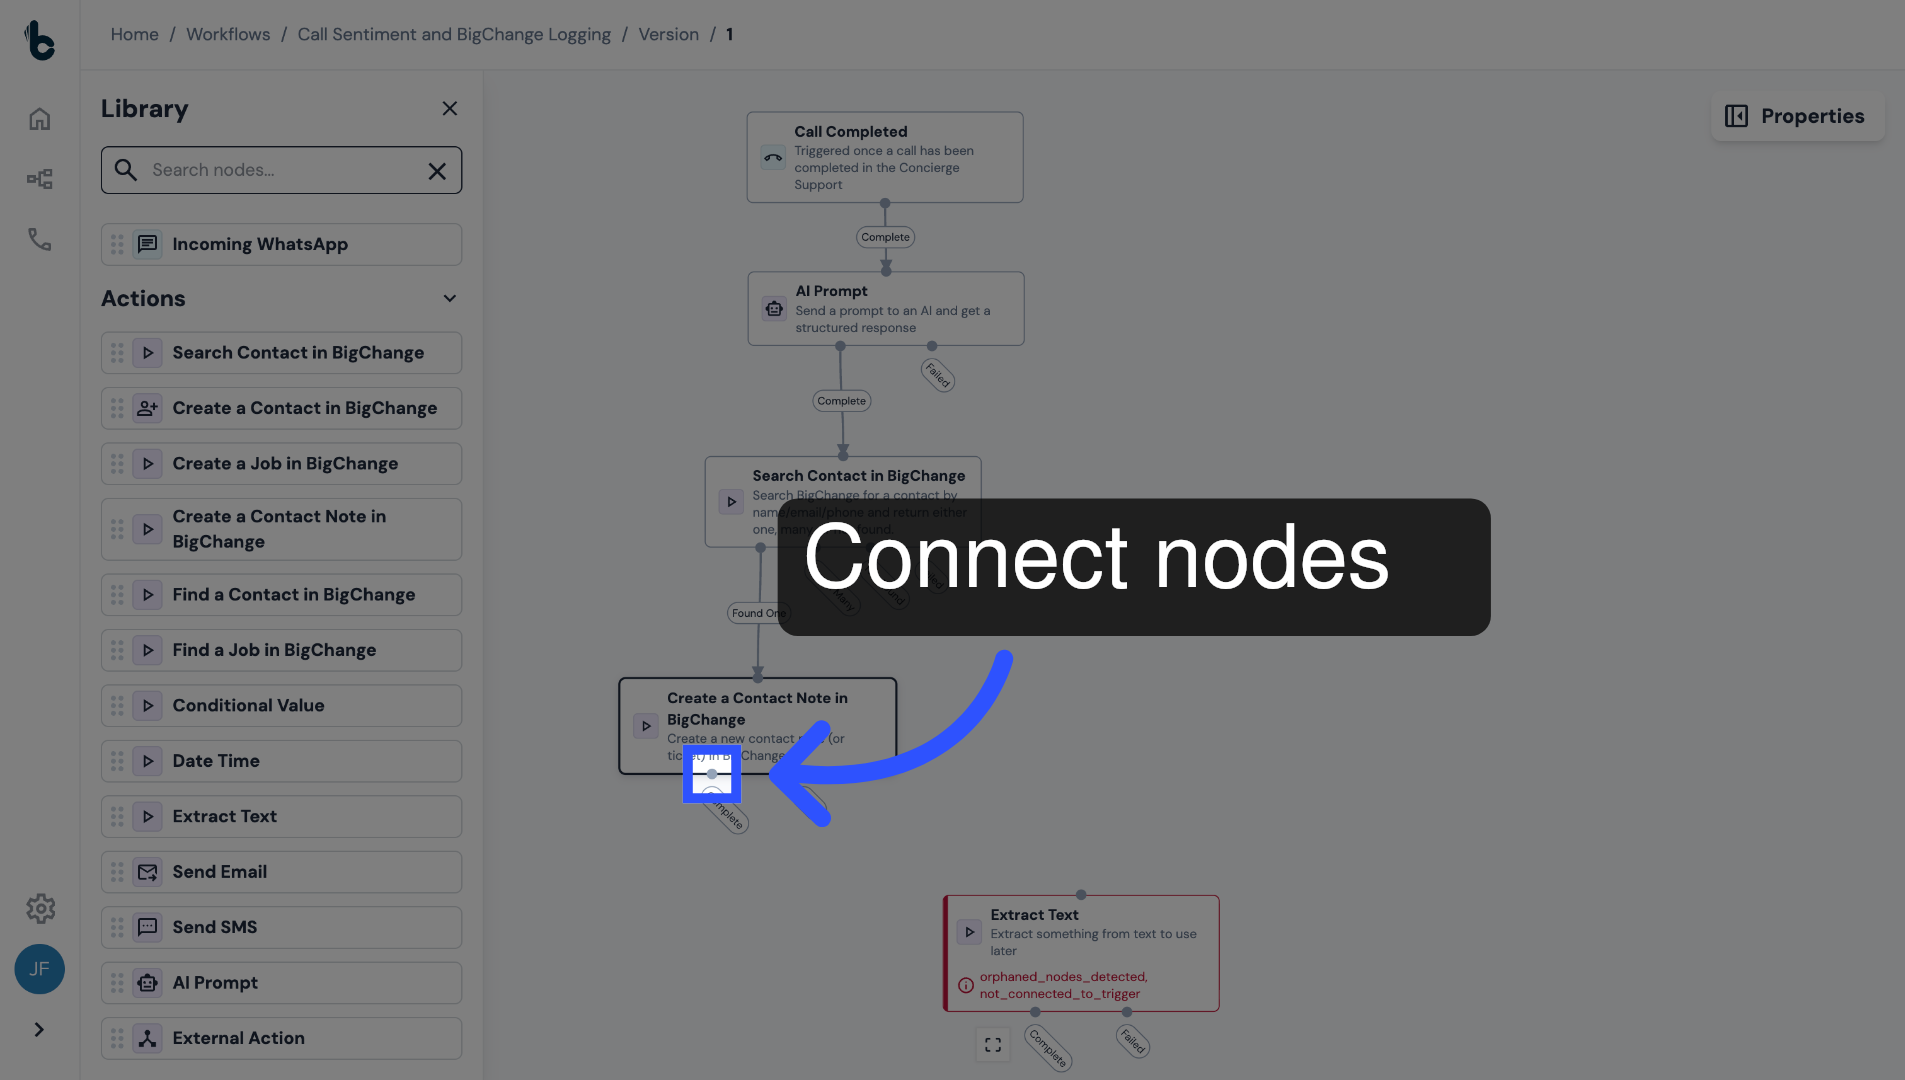
43. Connect nodes and open Properties panel
Connect the nodes and click the Extract Text node to open the Properties panel.
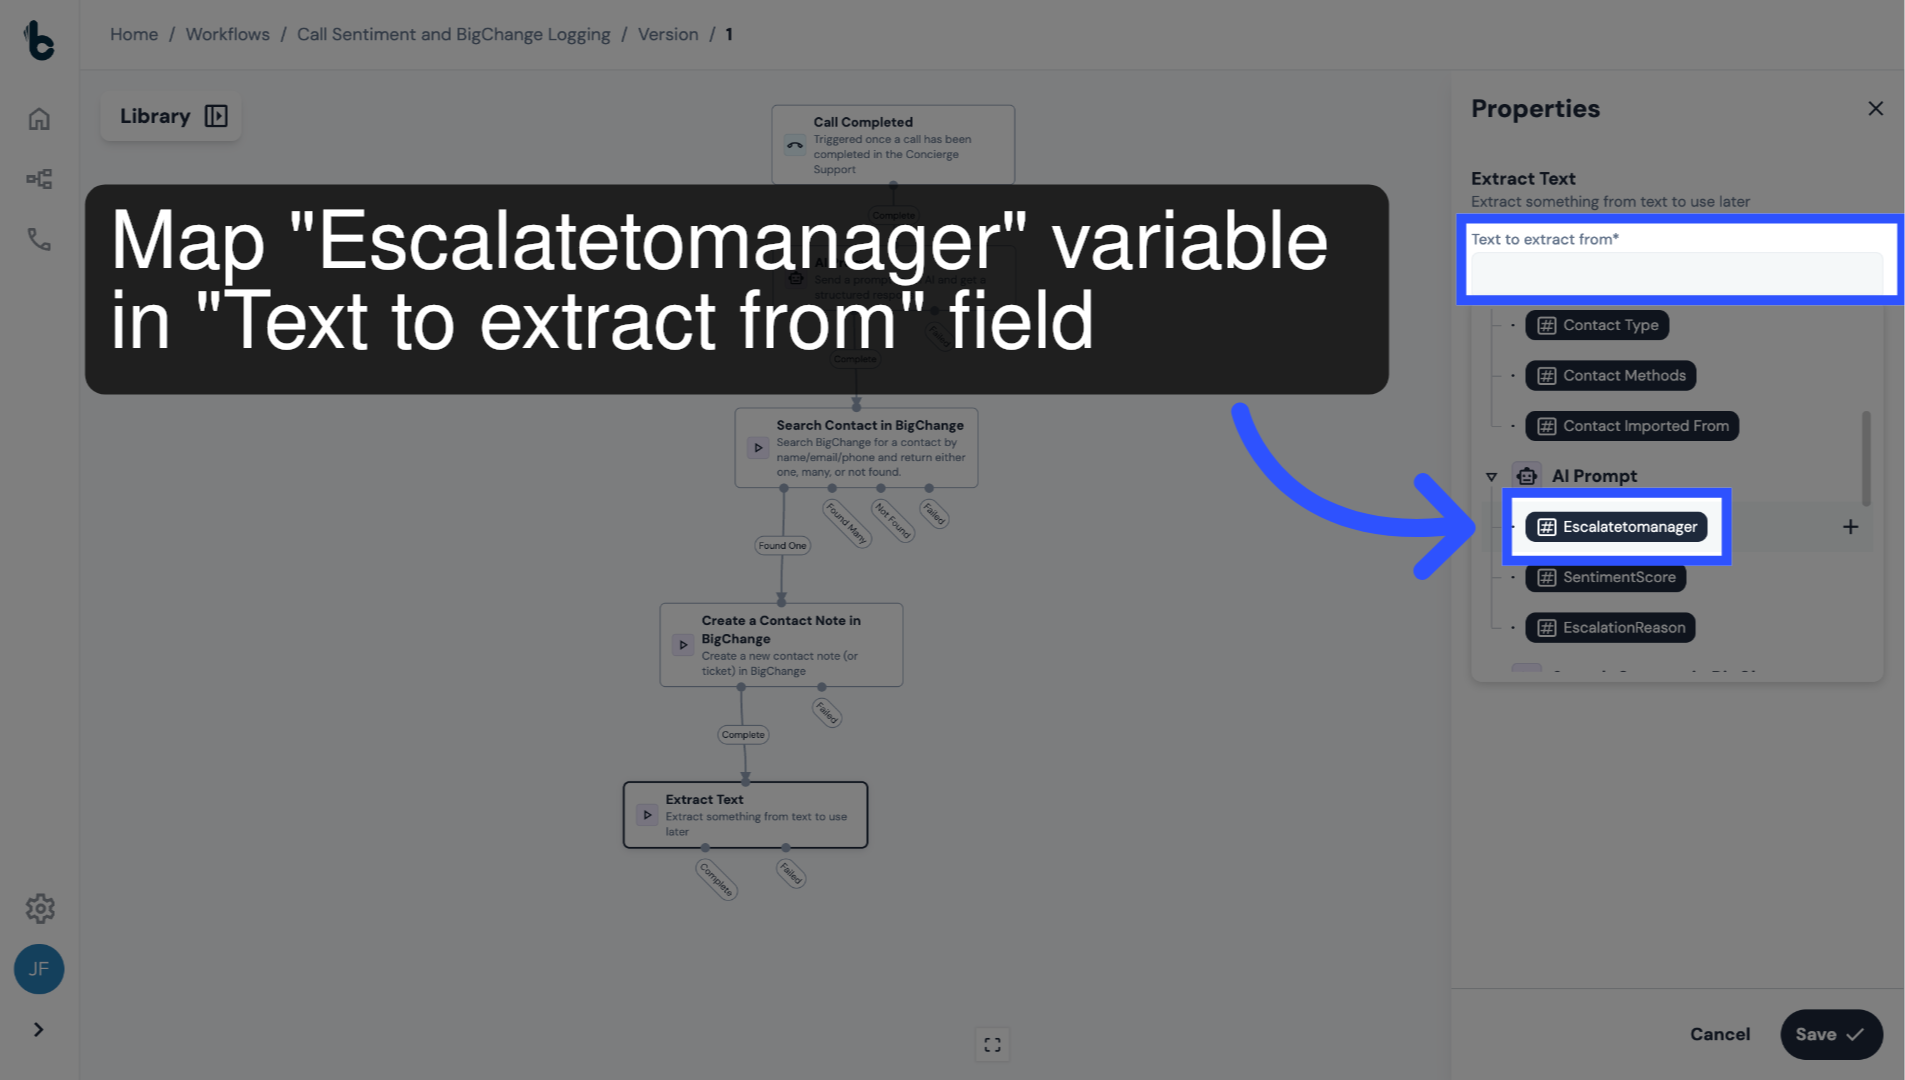
44. Configure Text to Extract from field
In the Text to Extract from field, map the Escalatetomanager output from the AI prompt node.
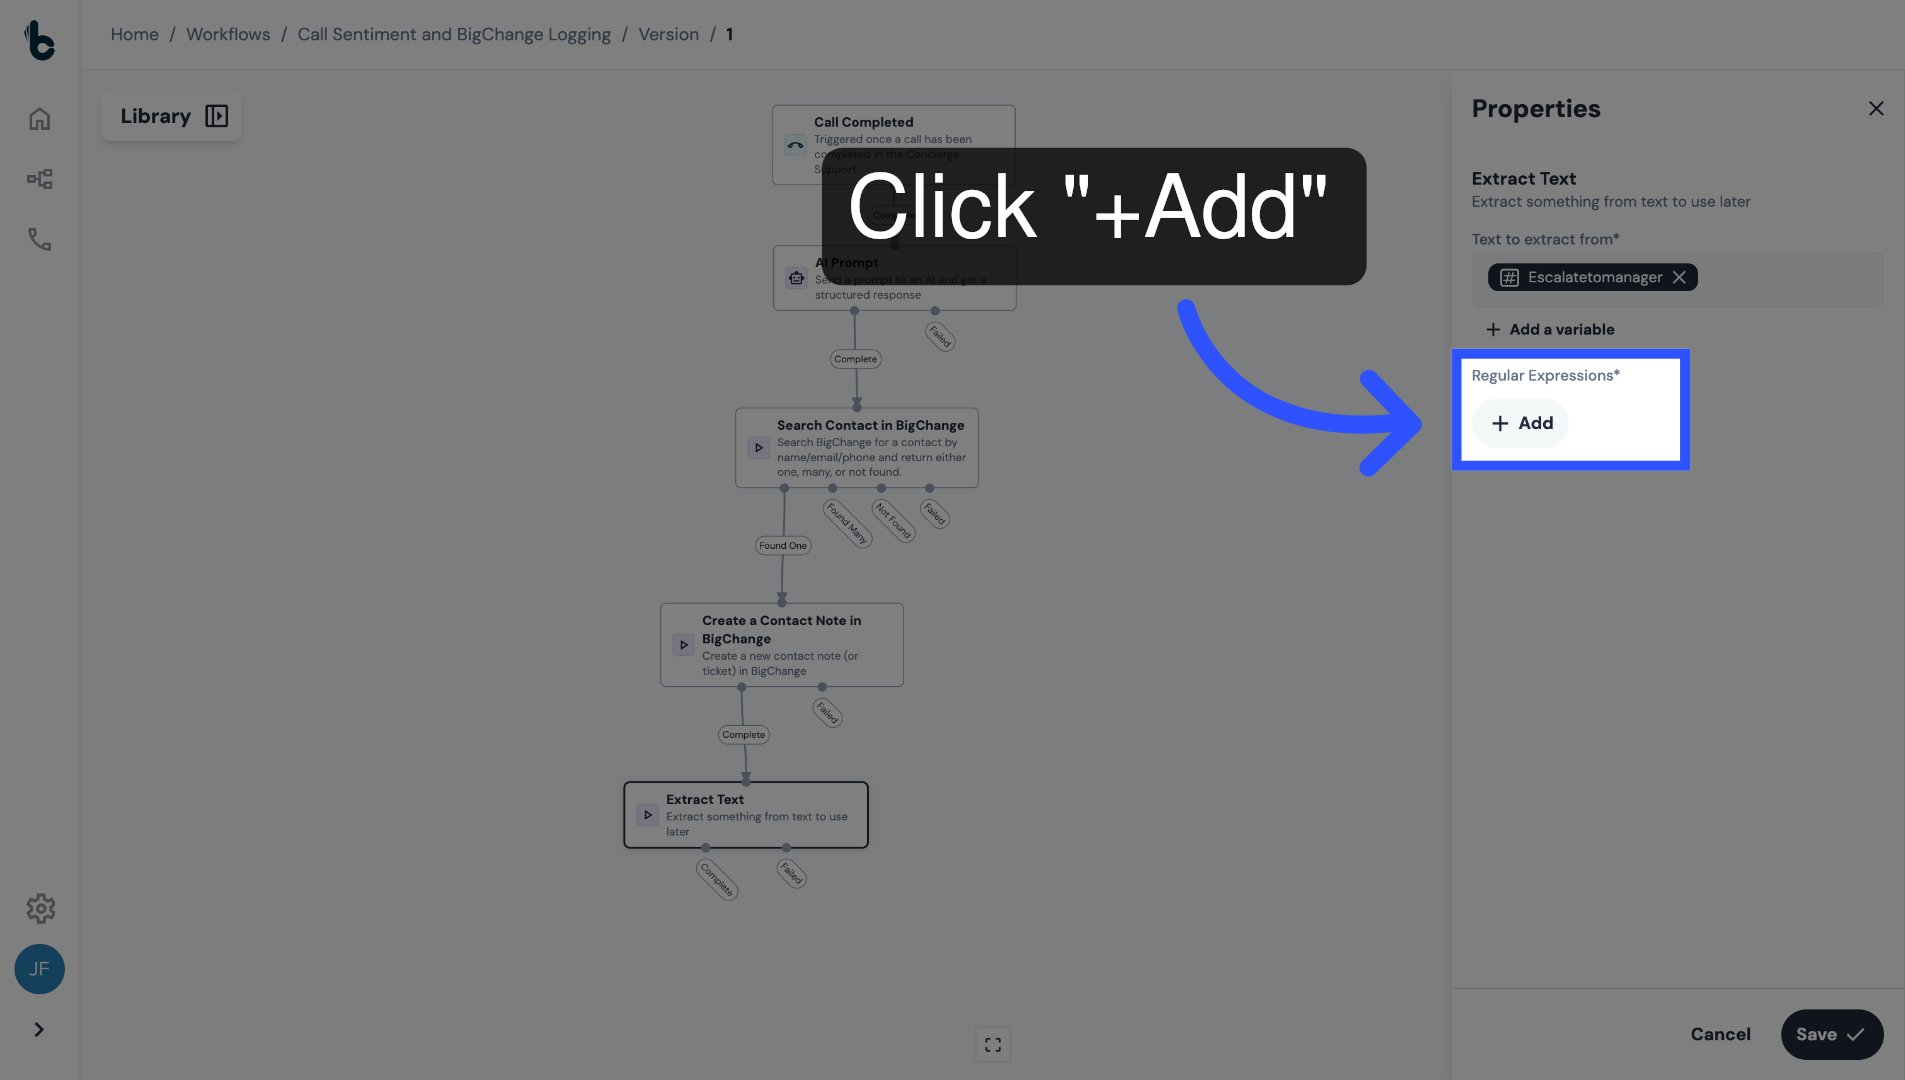
45. Click +Add
Under the Regular Expressions section, click + Add to define the data point to be extracted.
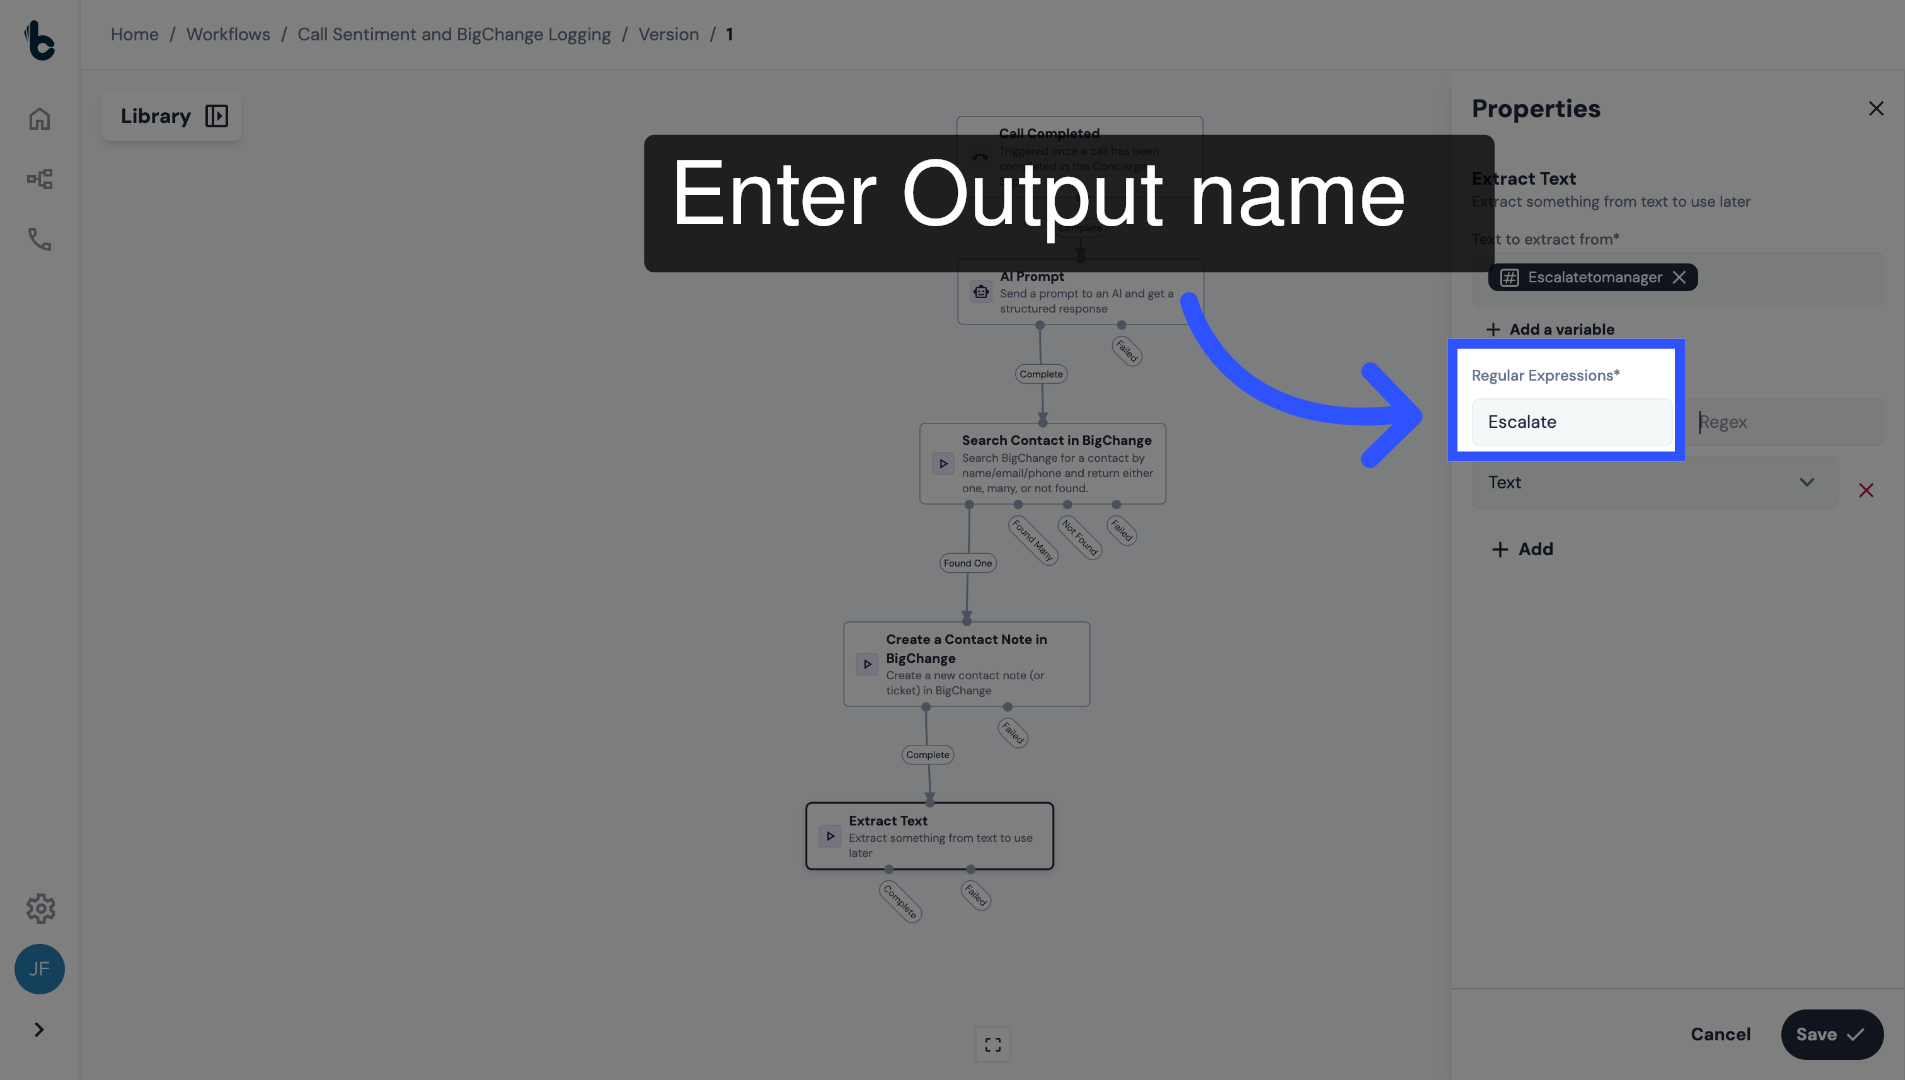
46. Enter Output name
Add the name of the output, which will be Escalate.
47. Enter Regex Pattern
Then add the regular expression, (True).
This will look for the word 'True' when checking the Escalatetomanager output.
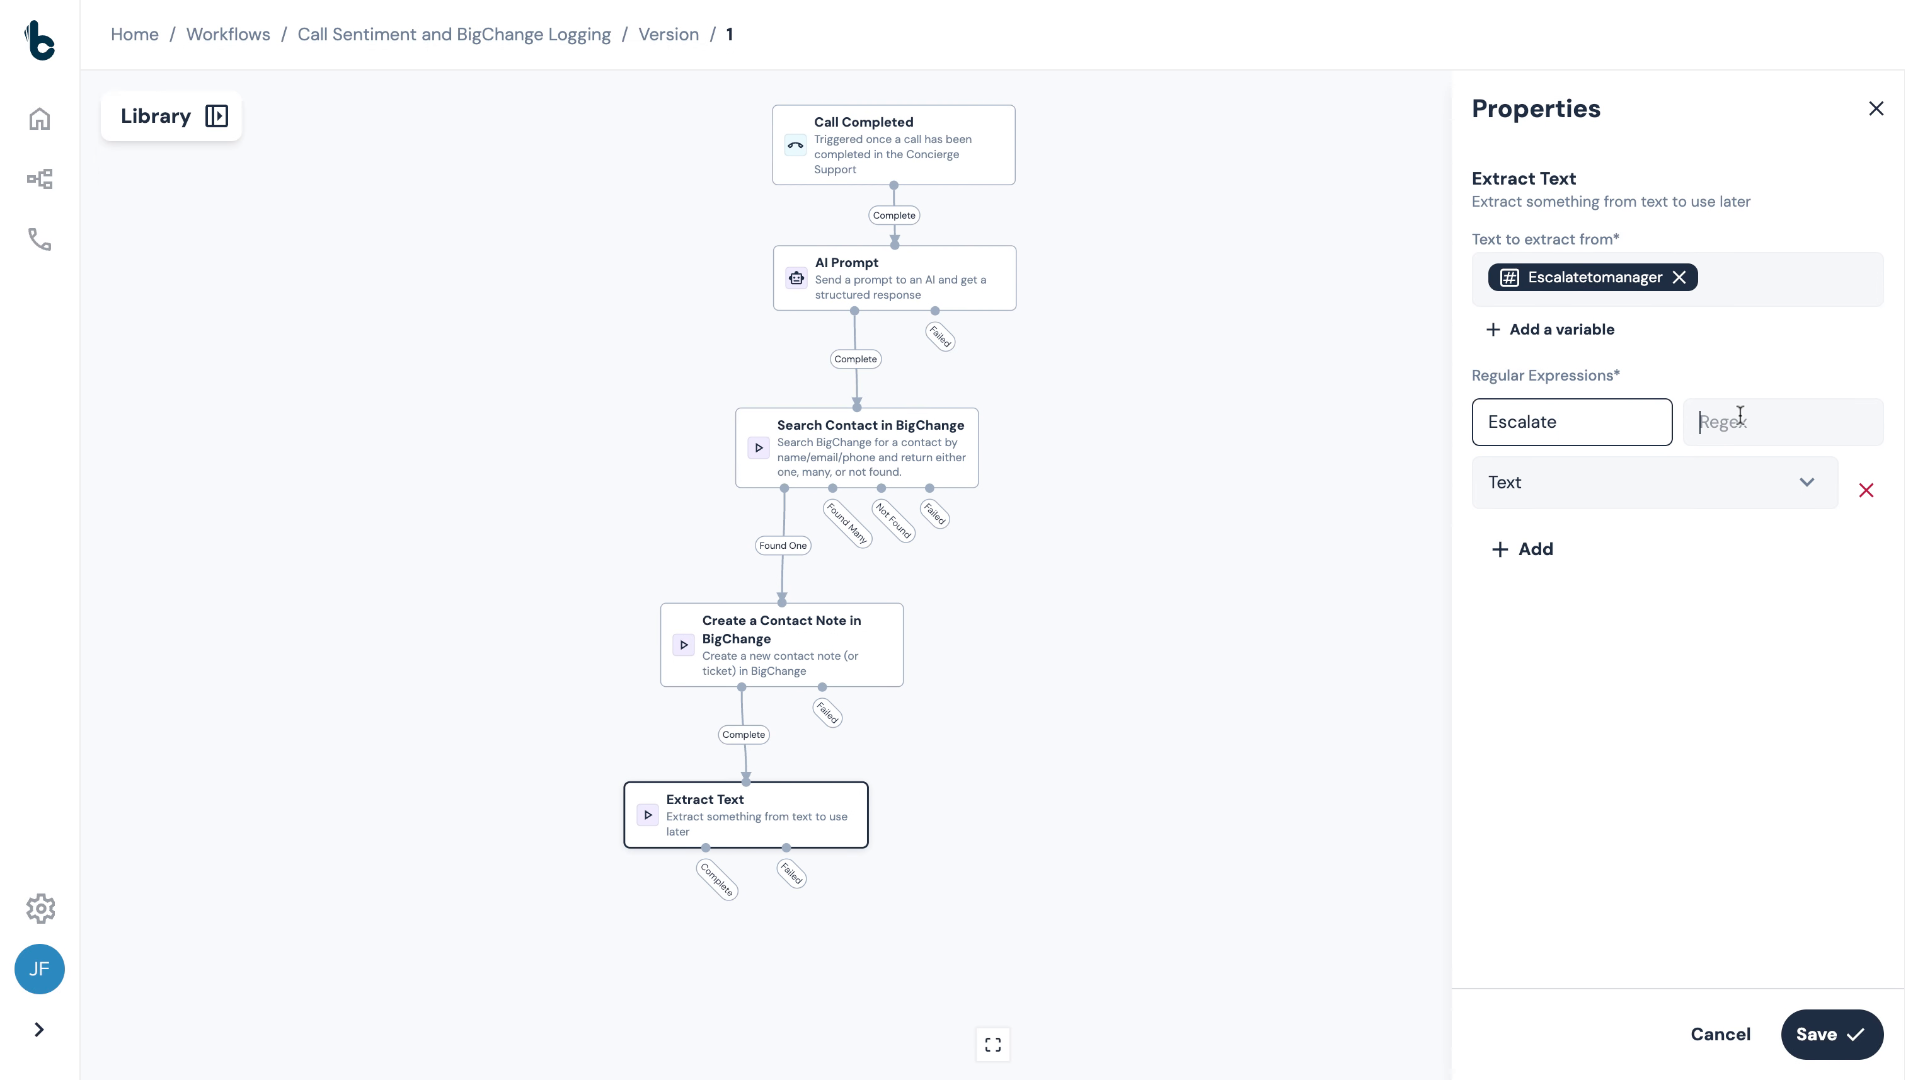
48. Choose Data Type
Keep the Data Type as Text.
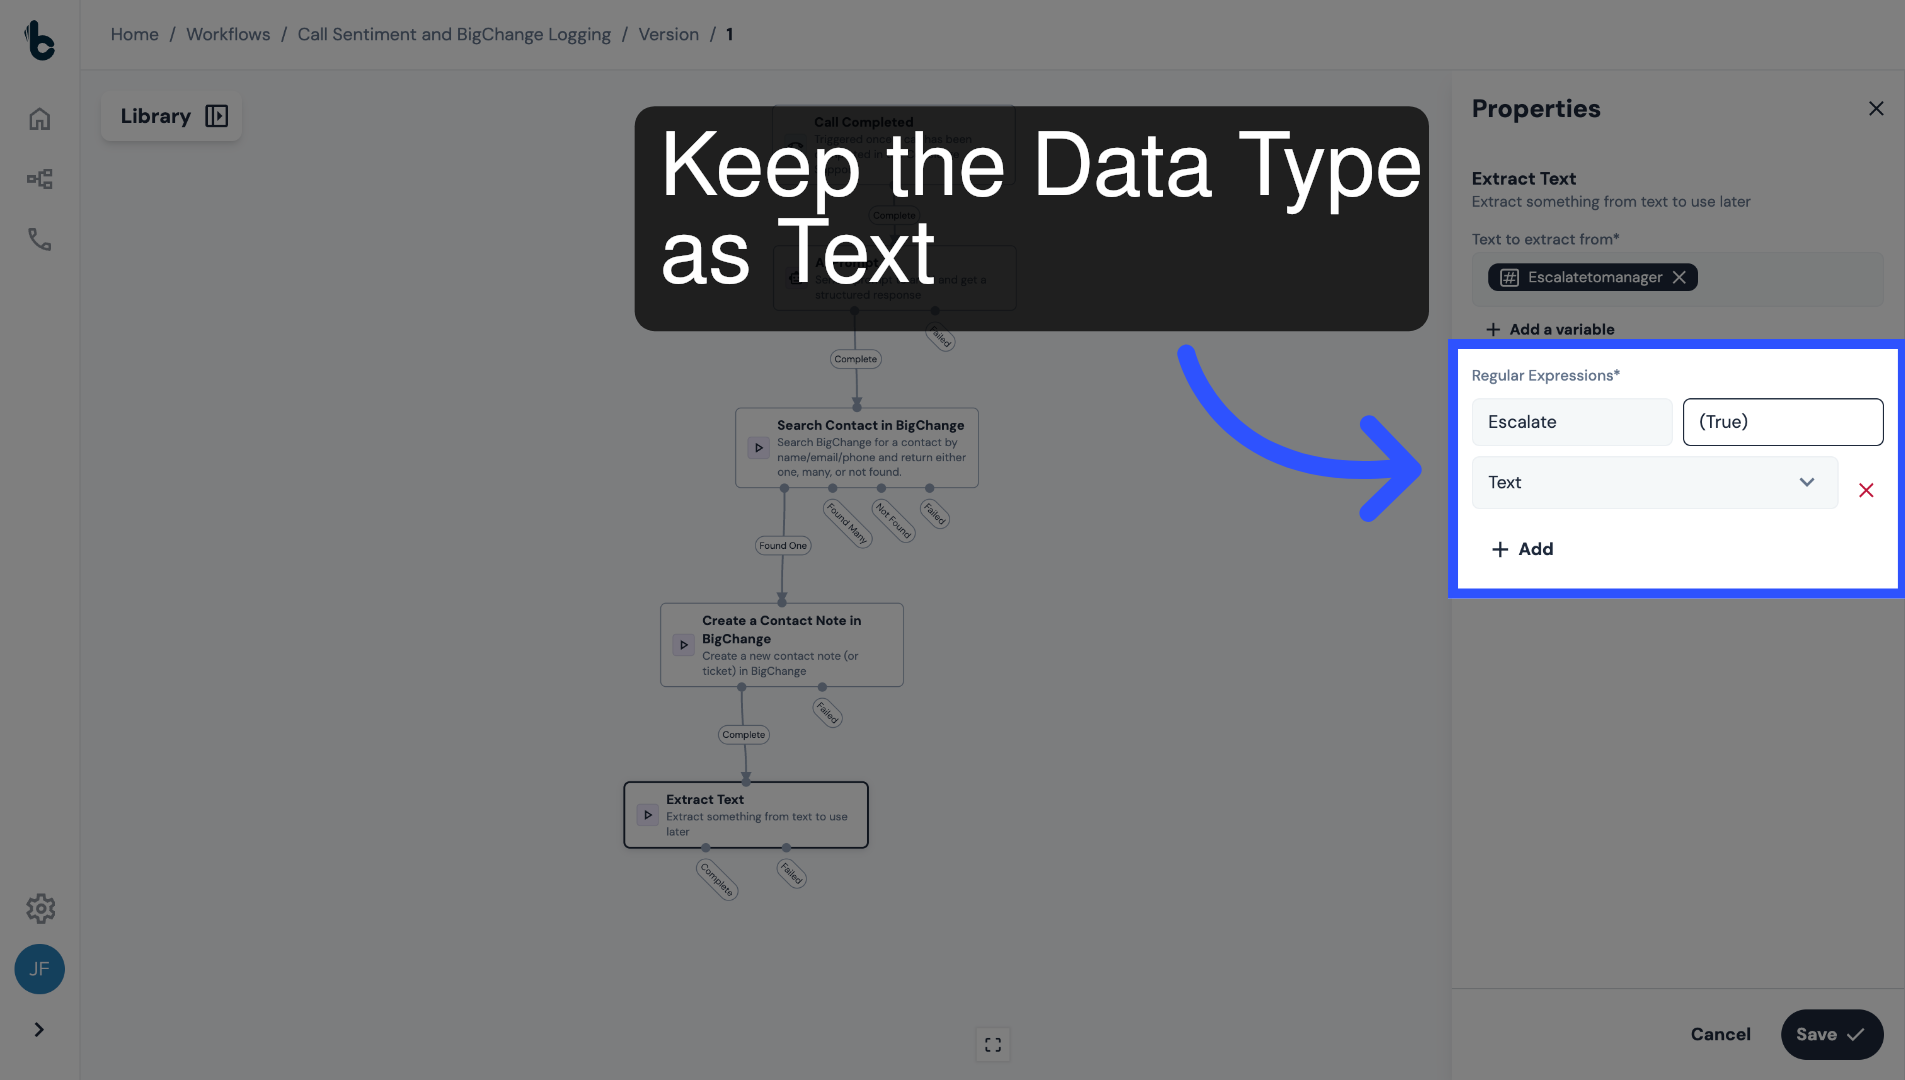
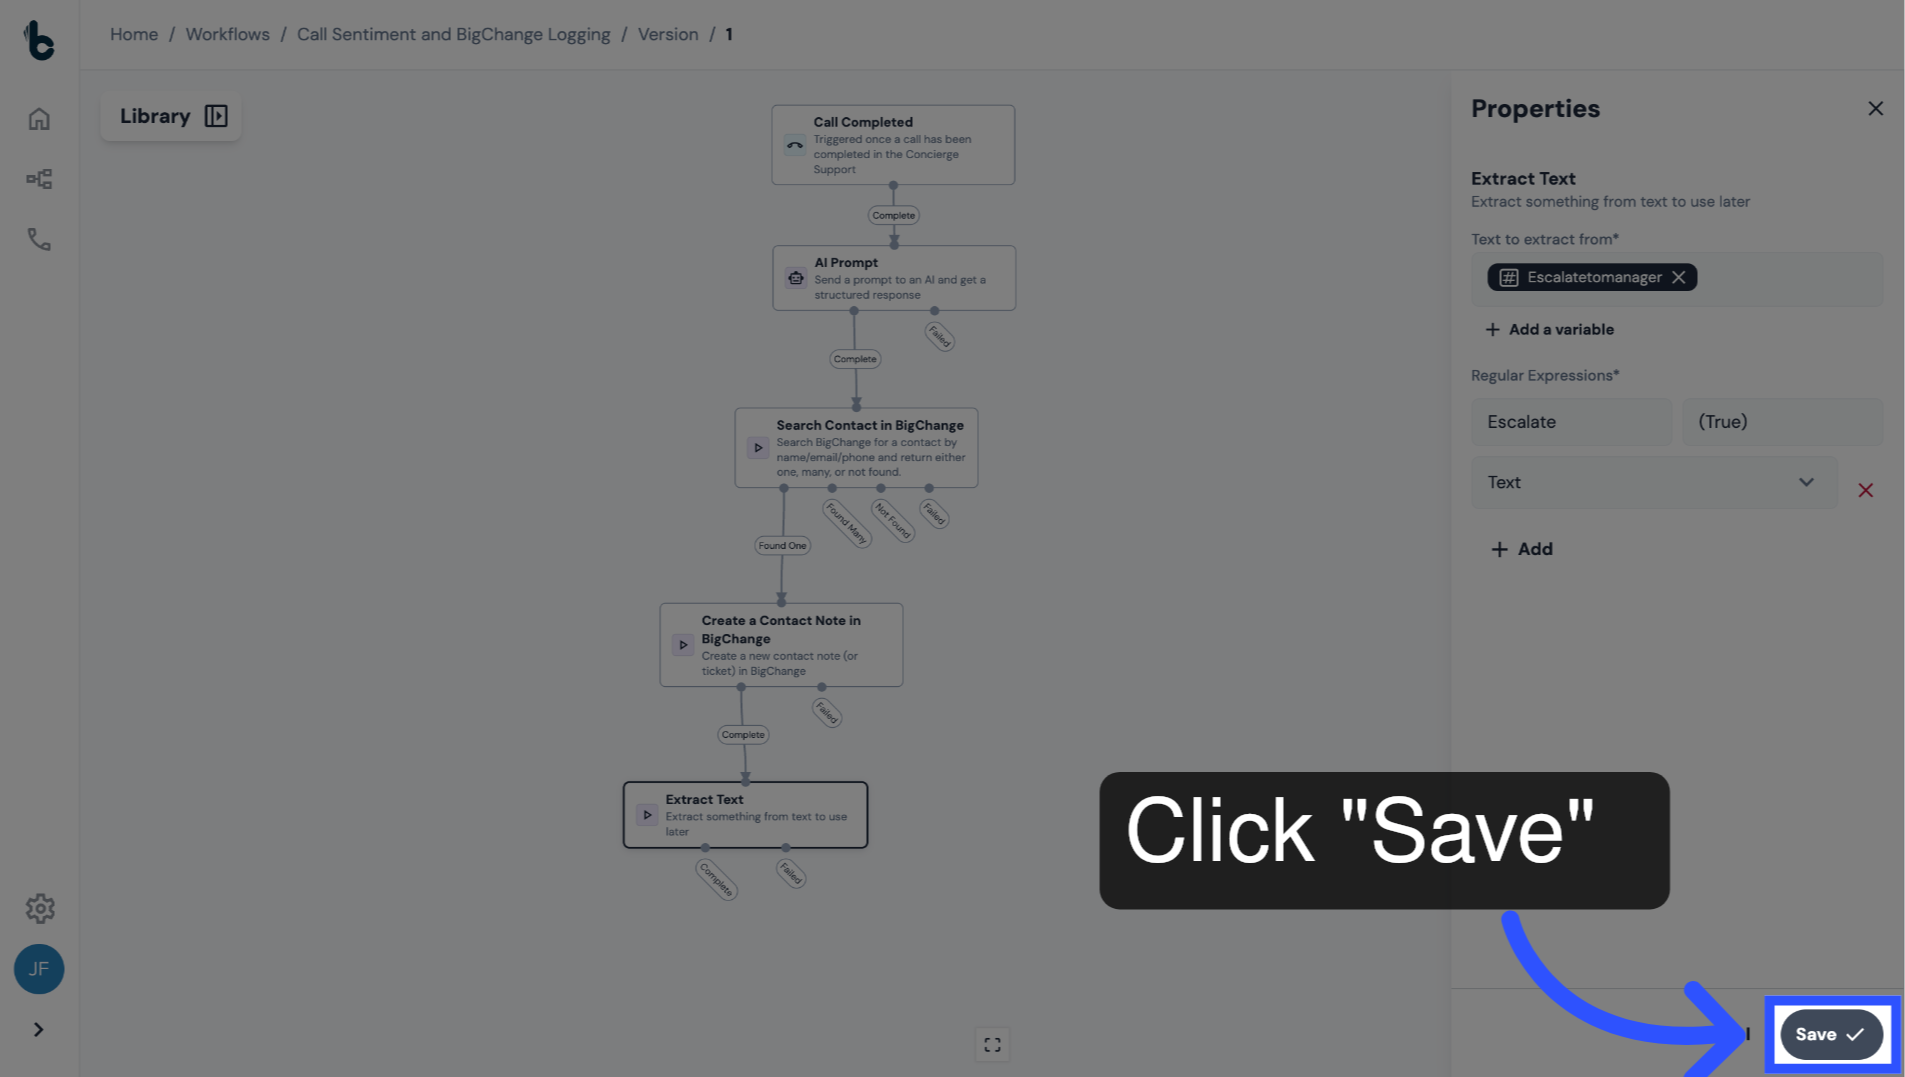
49. Save configuration
Click Save.
Now, if the Escalatetomanager output is True, meaning escalation is required, the workflow will continue to the next and final step, which will add a flag to the note.
50. 📚 Learn more
To learn more about the Extract Text node, read the guide entitled Extract Text action.
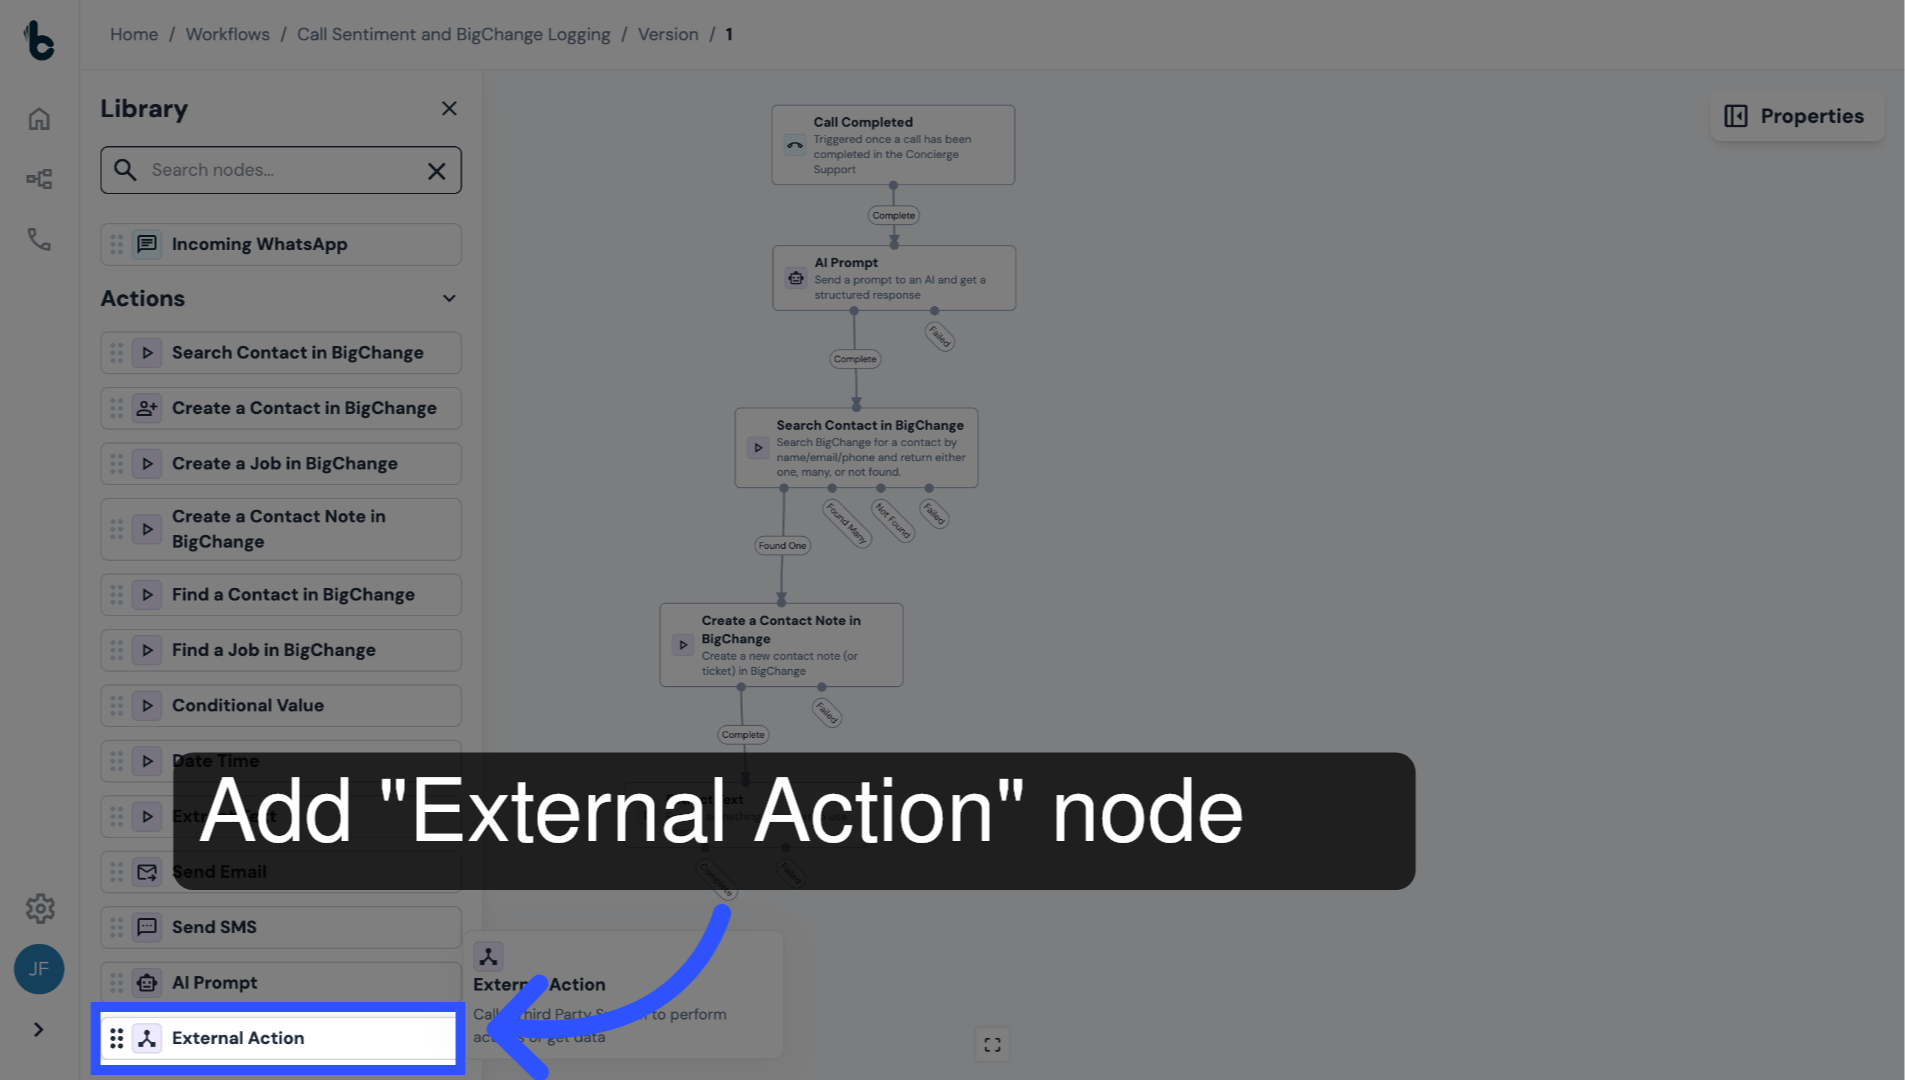
51. Add External Action node
Add an External Action node to the Workflow Editor.
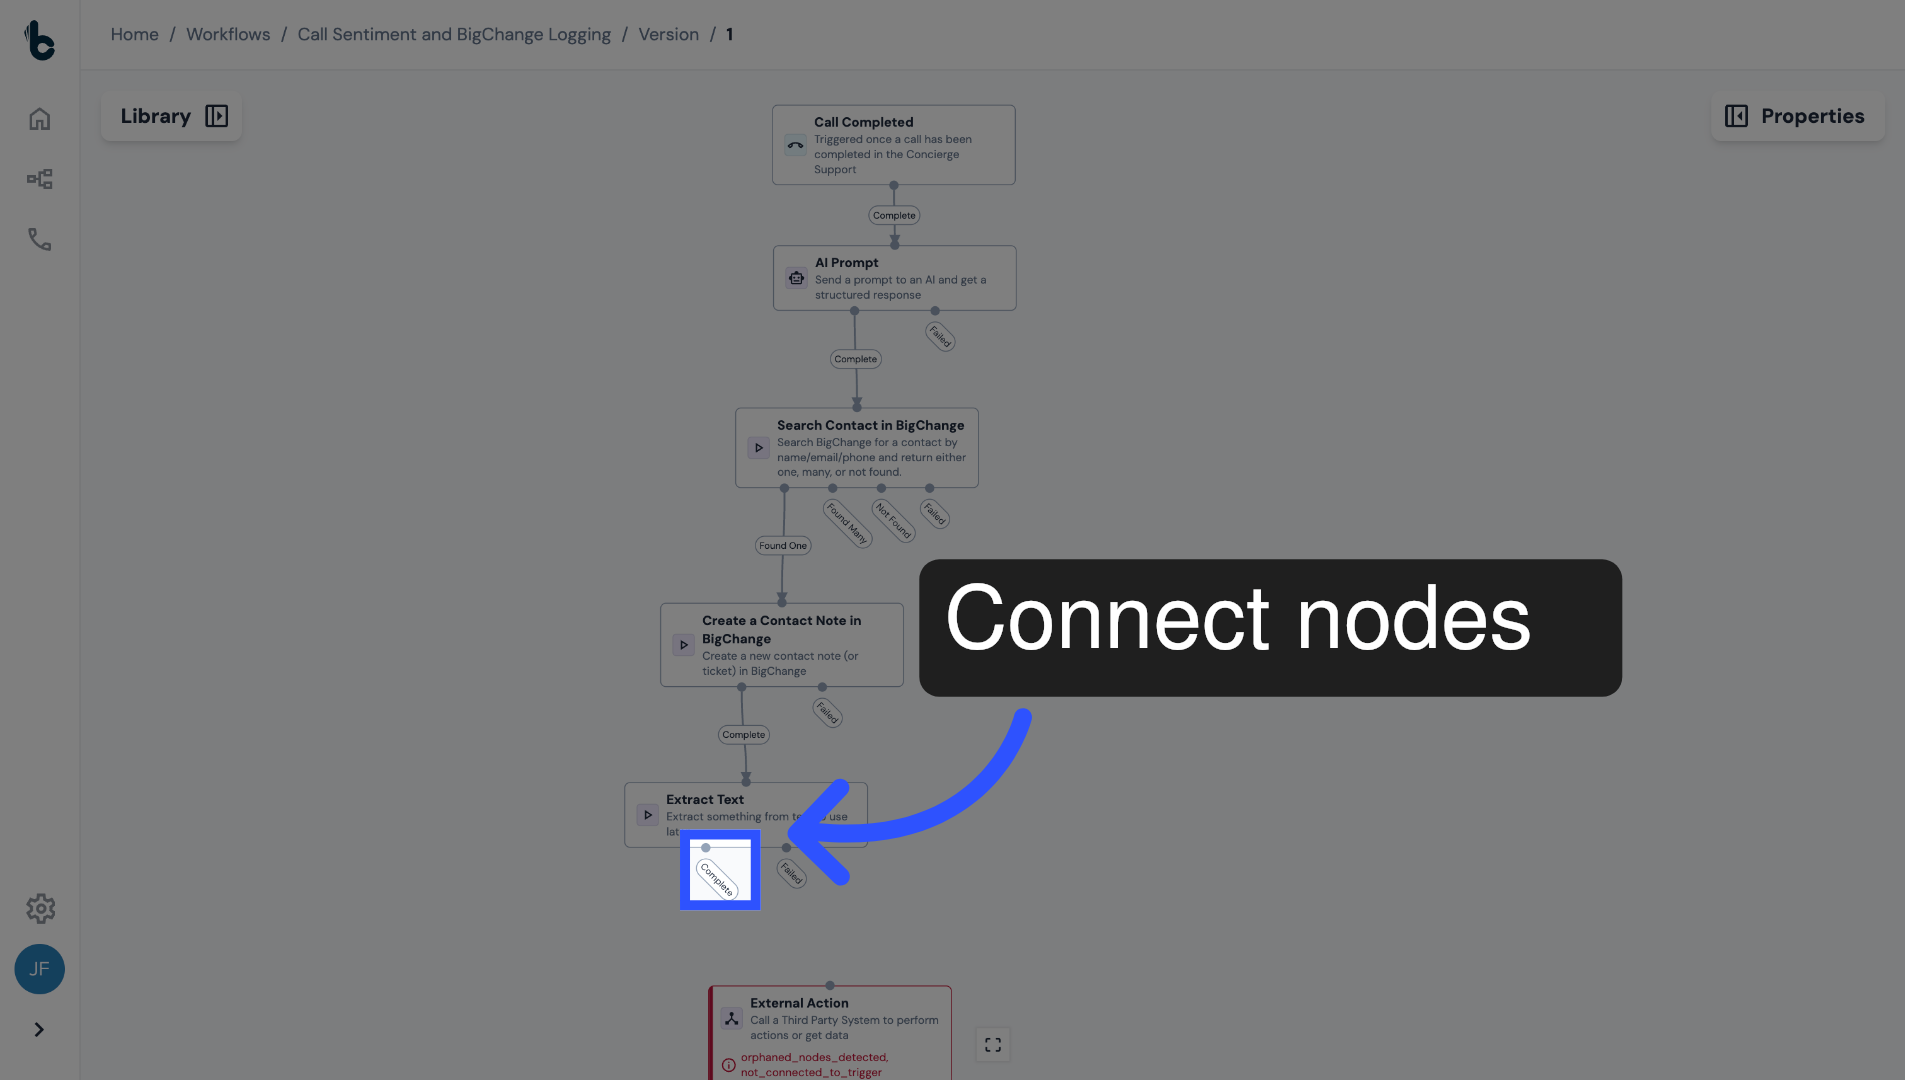
52. Connect nodes and open Properties panel
Connect it to the previous node and open the Properties panel.
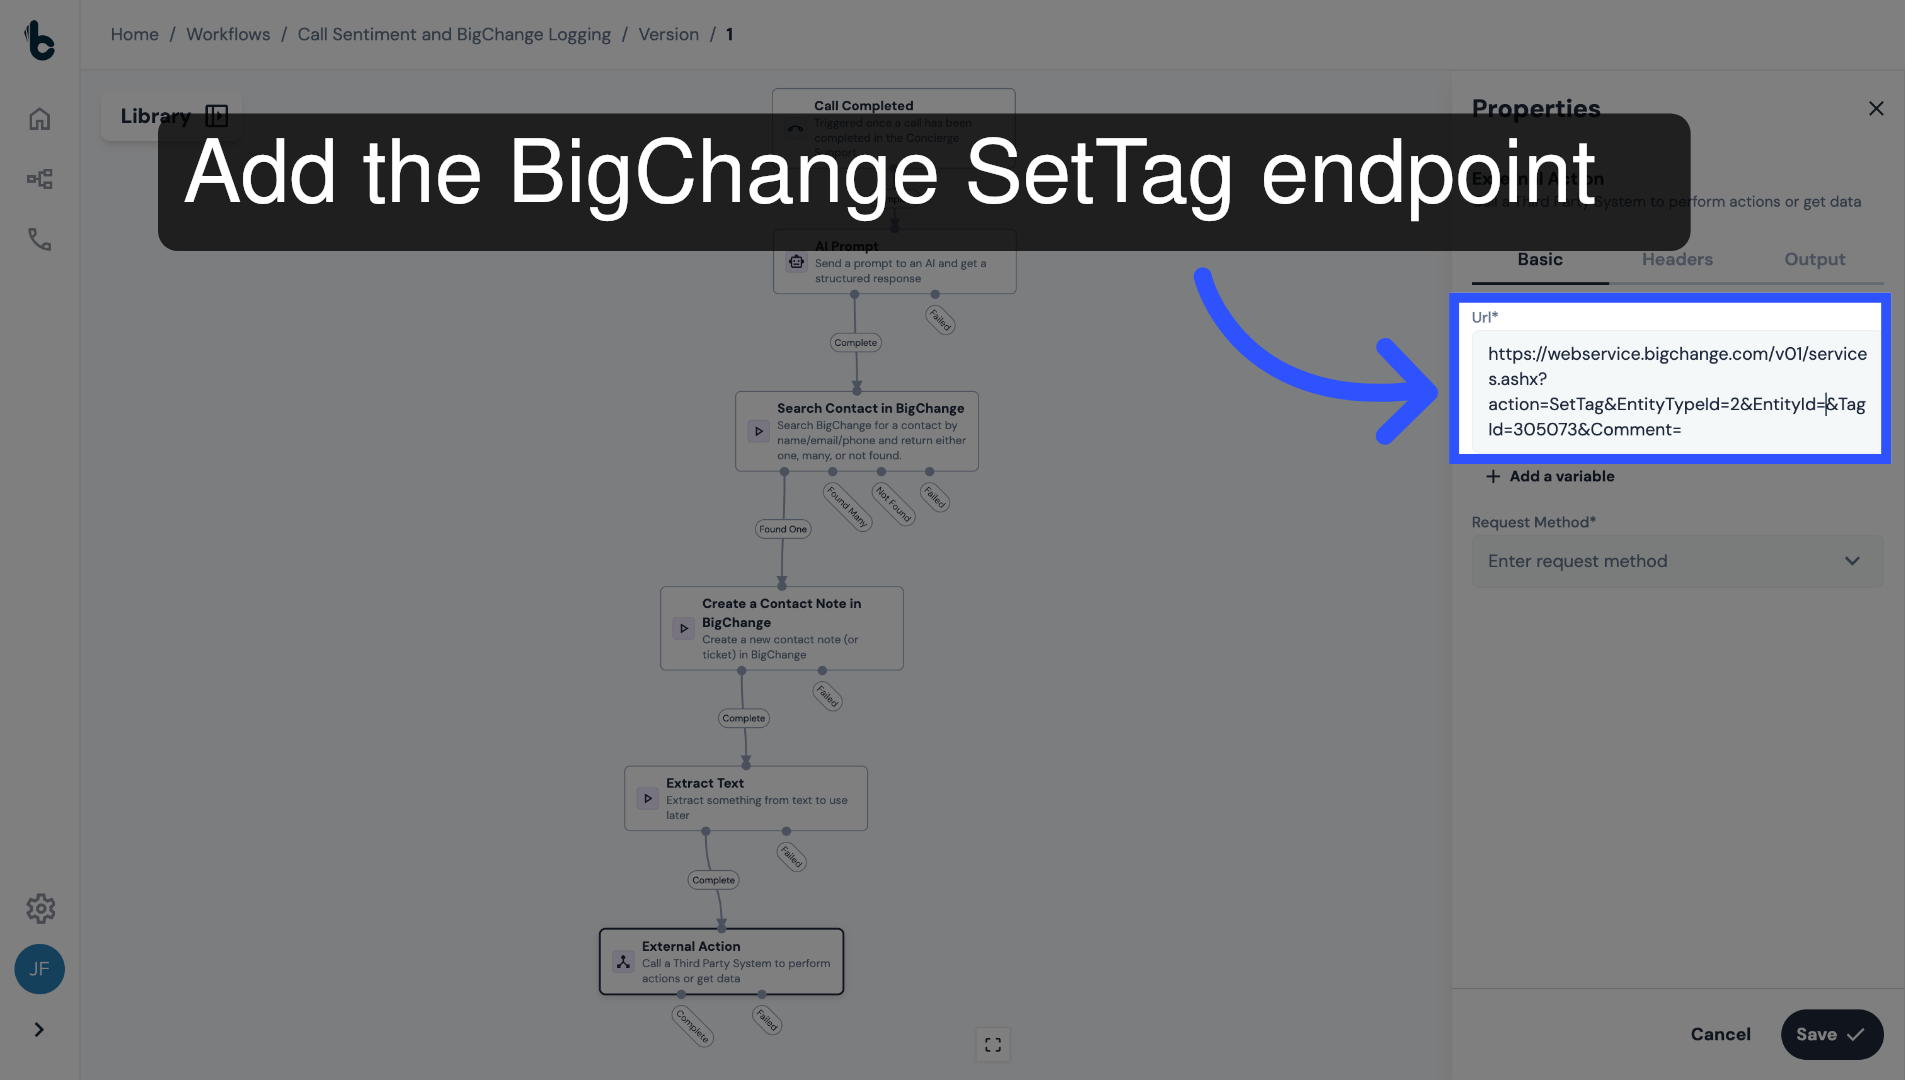
53. Configure URL with SetTag endpoint
Add the BigChange SetTag endpoint in the URL field, which you can find on the BigChange developers page.
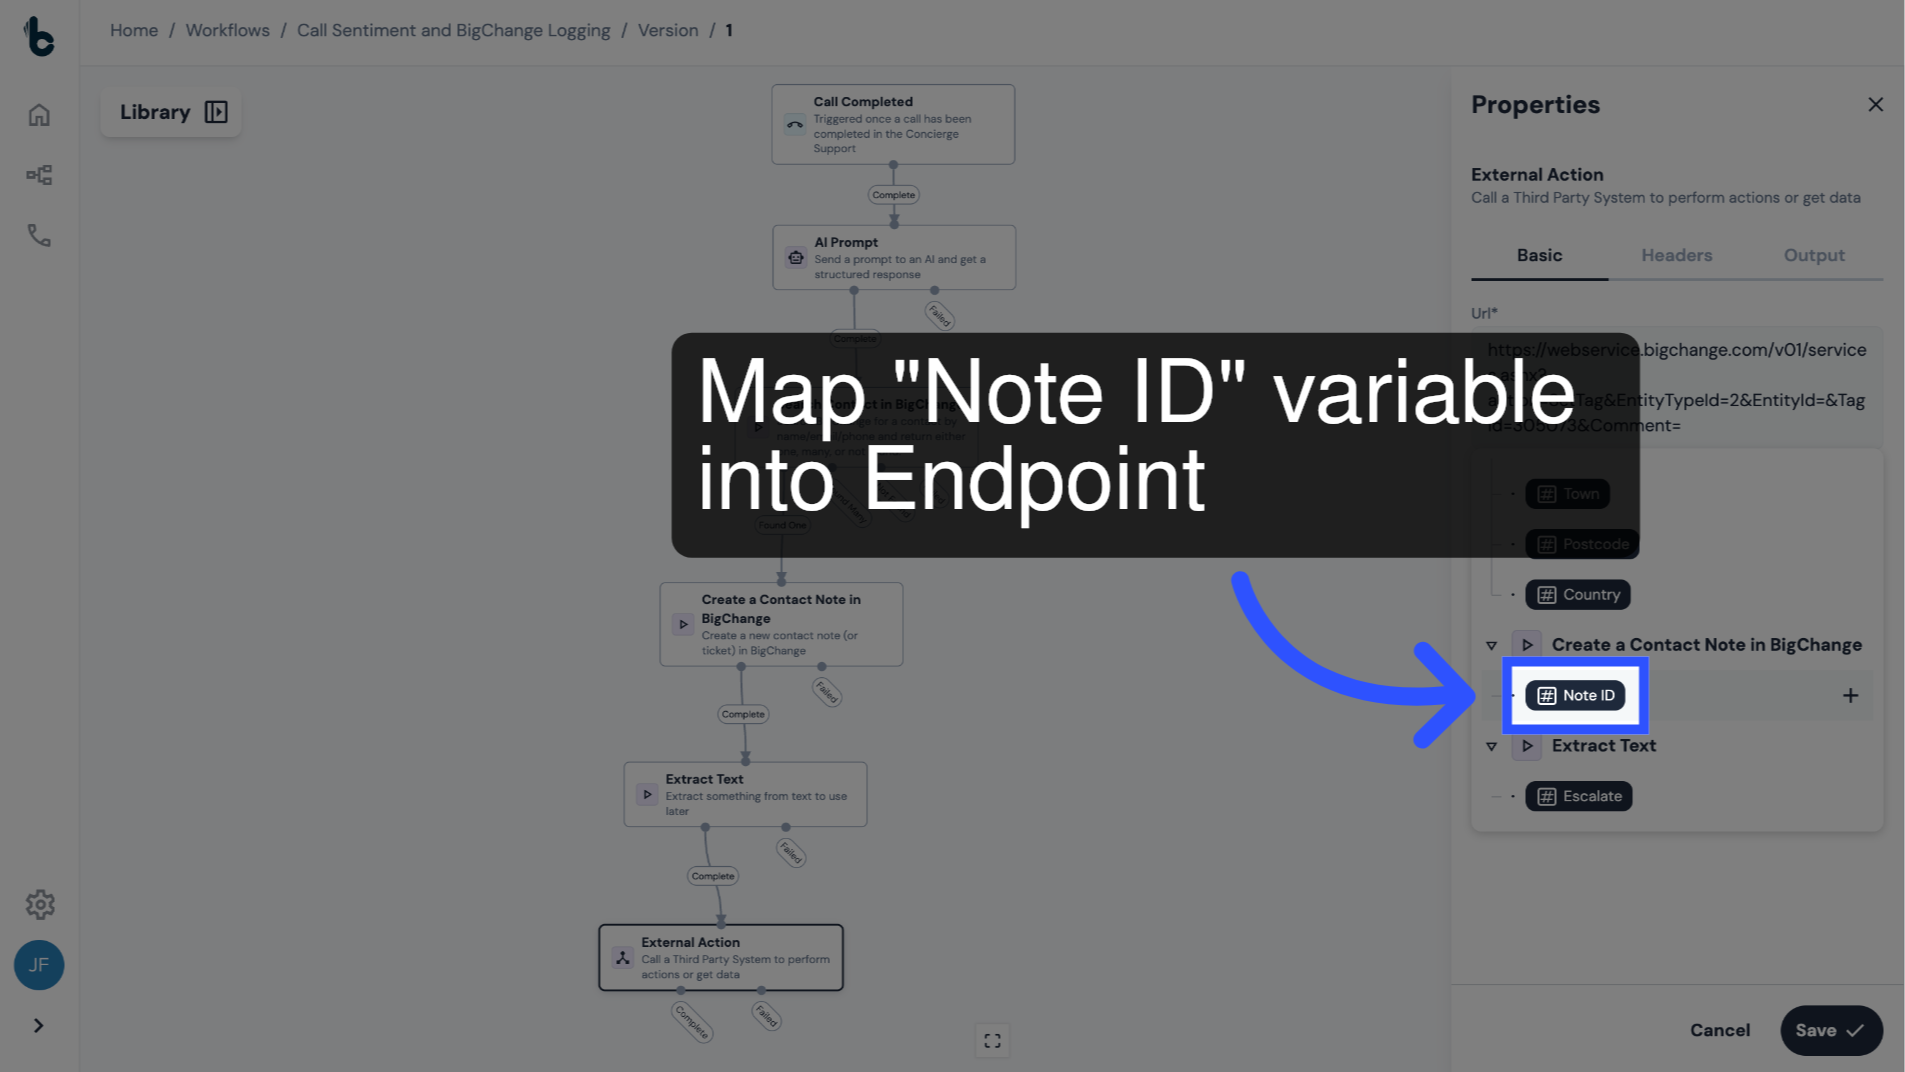
54. Include Note ID variable
Map the Note ID variable into the relevant point of the endpoint, after EntityId=.
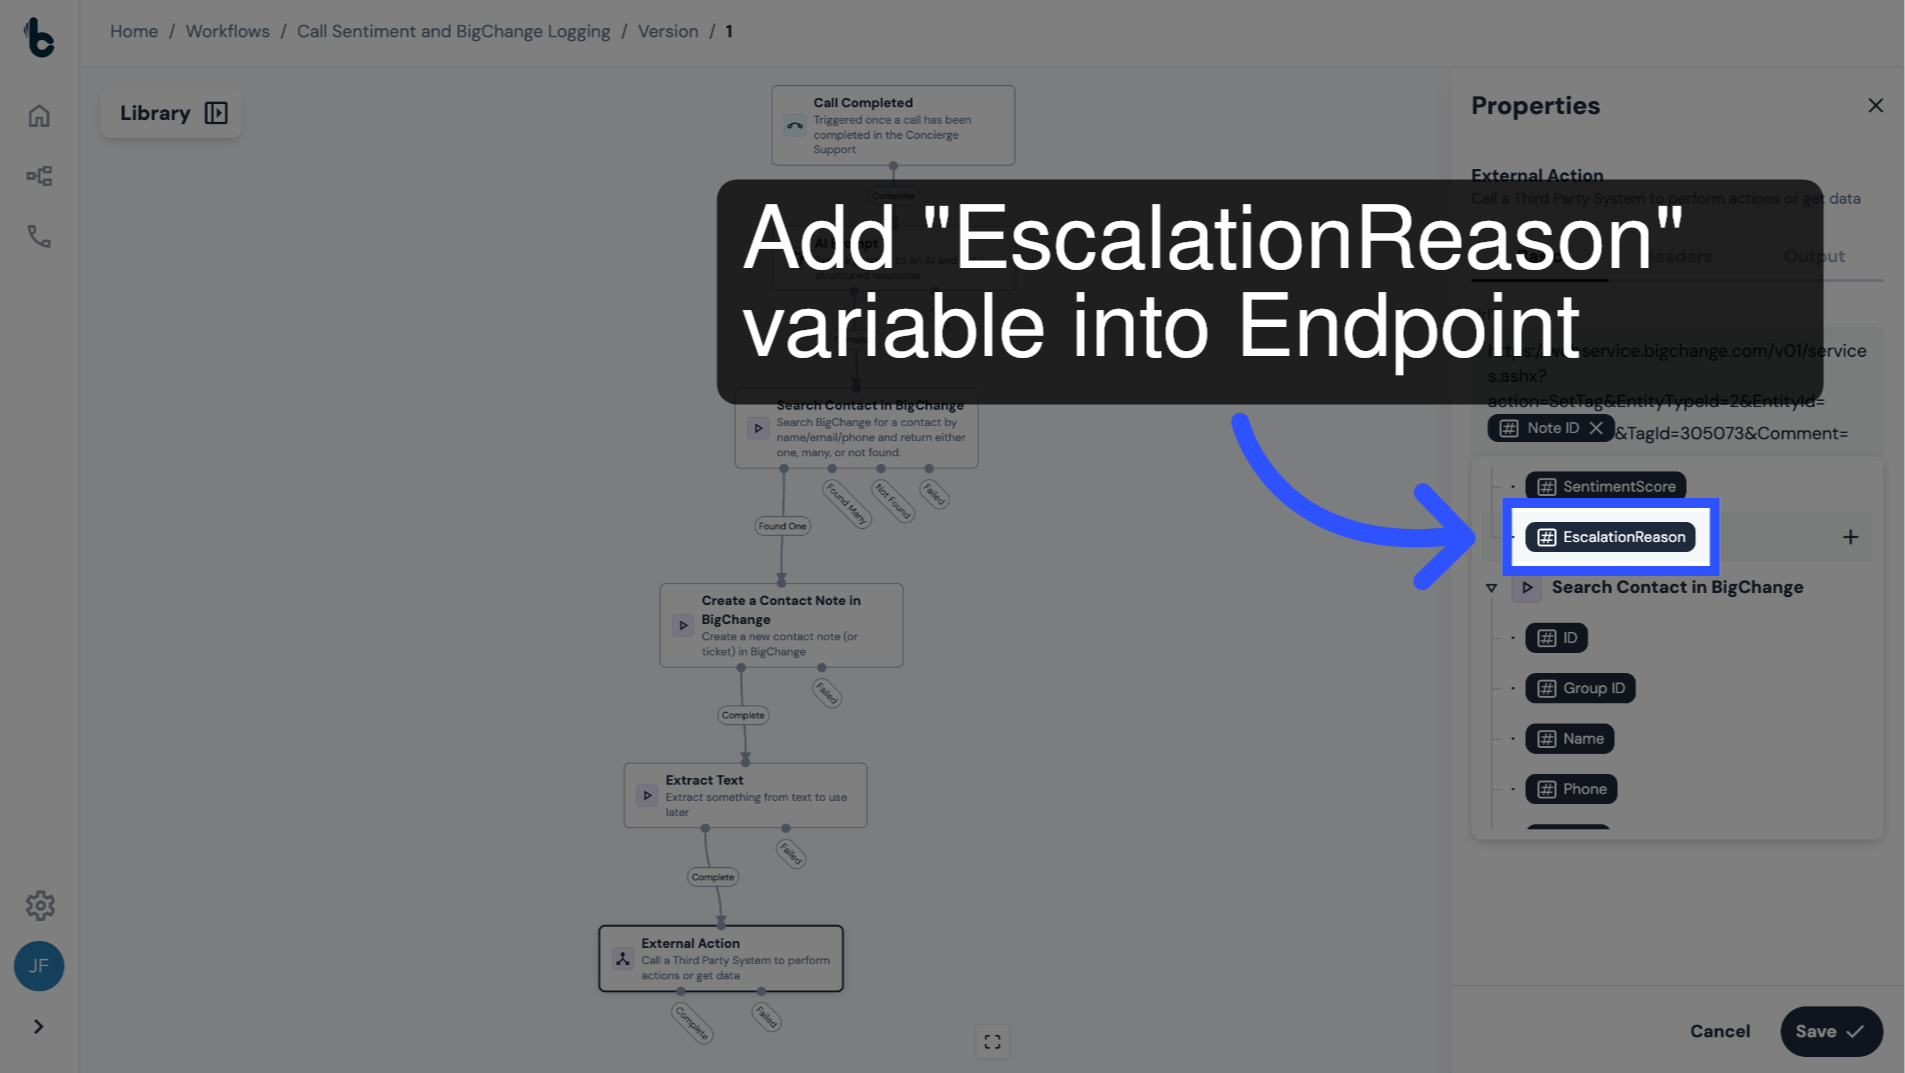
55. Add Escalation Reason variable
And the EscalationReason variable after Comment= in the endpoint.
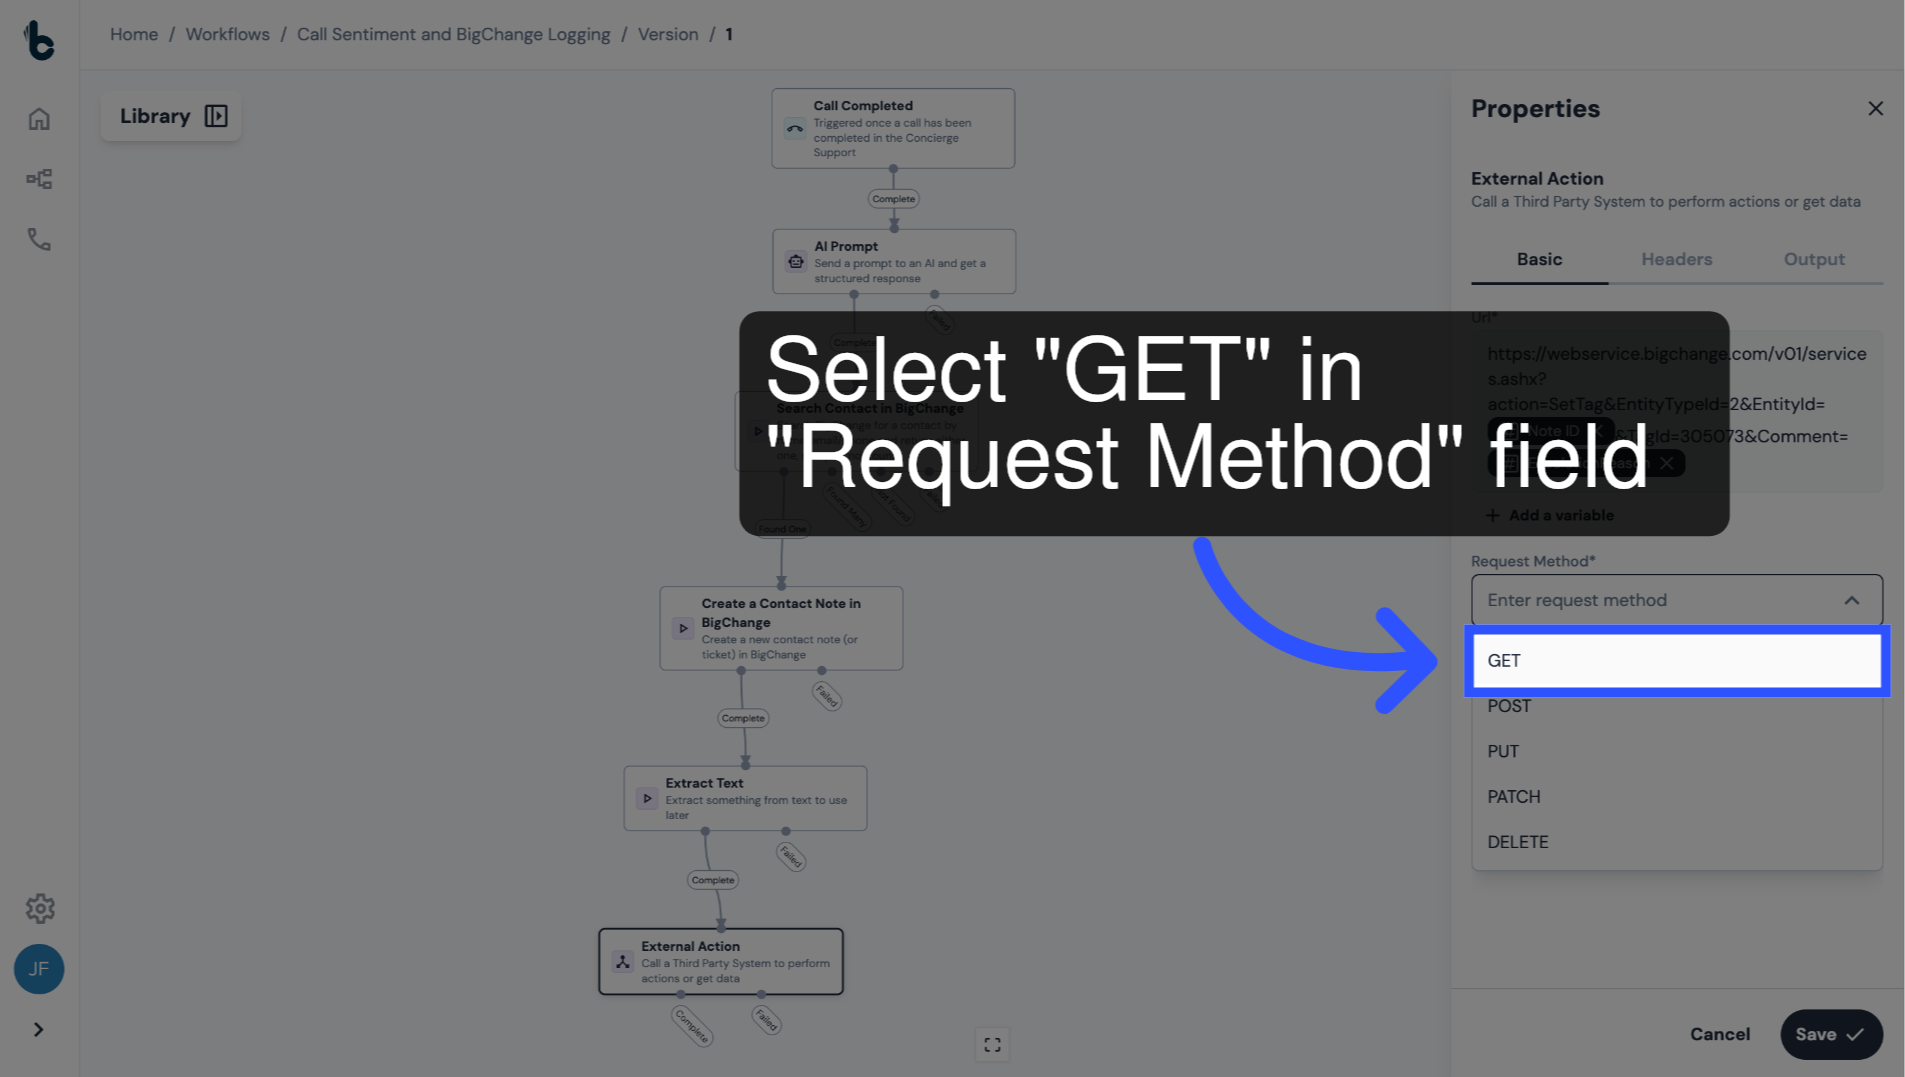
56. Select Request Method
Set the Request Method to GET.
57. Navigate to Headers tab
Navigate to the Headers tab.
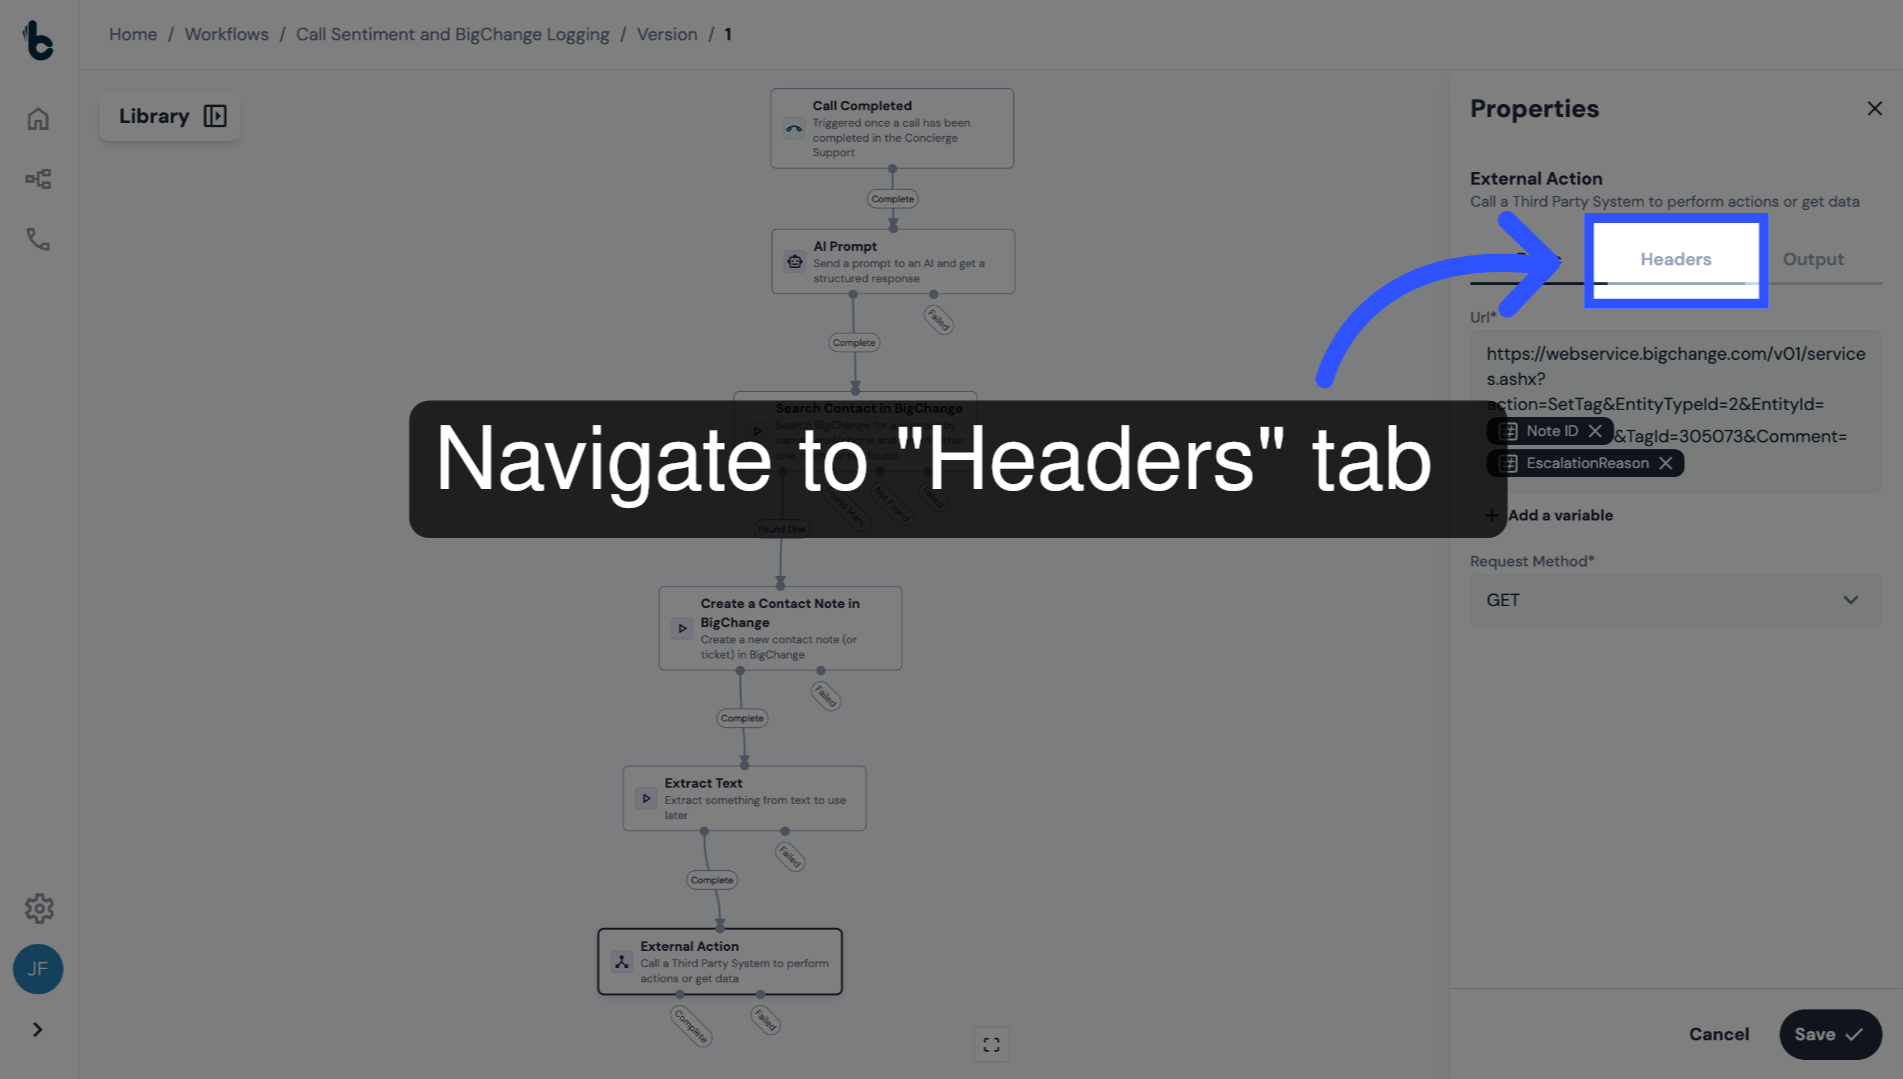
58. Introduction to Headers
We'll add the BigChange Authorization and Key as headers. These should already be setup as secrets in your account settings.
59. 📚 Learn more
You can learn more about how to do this in the guide entitled Secrets Management.
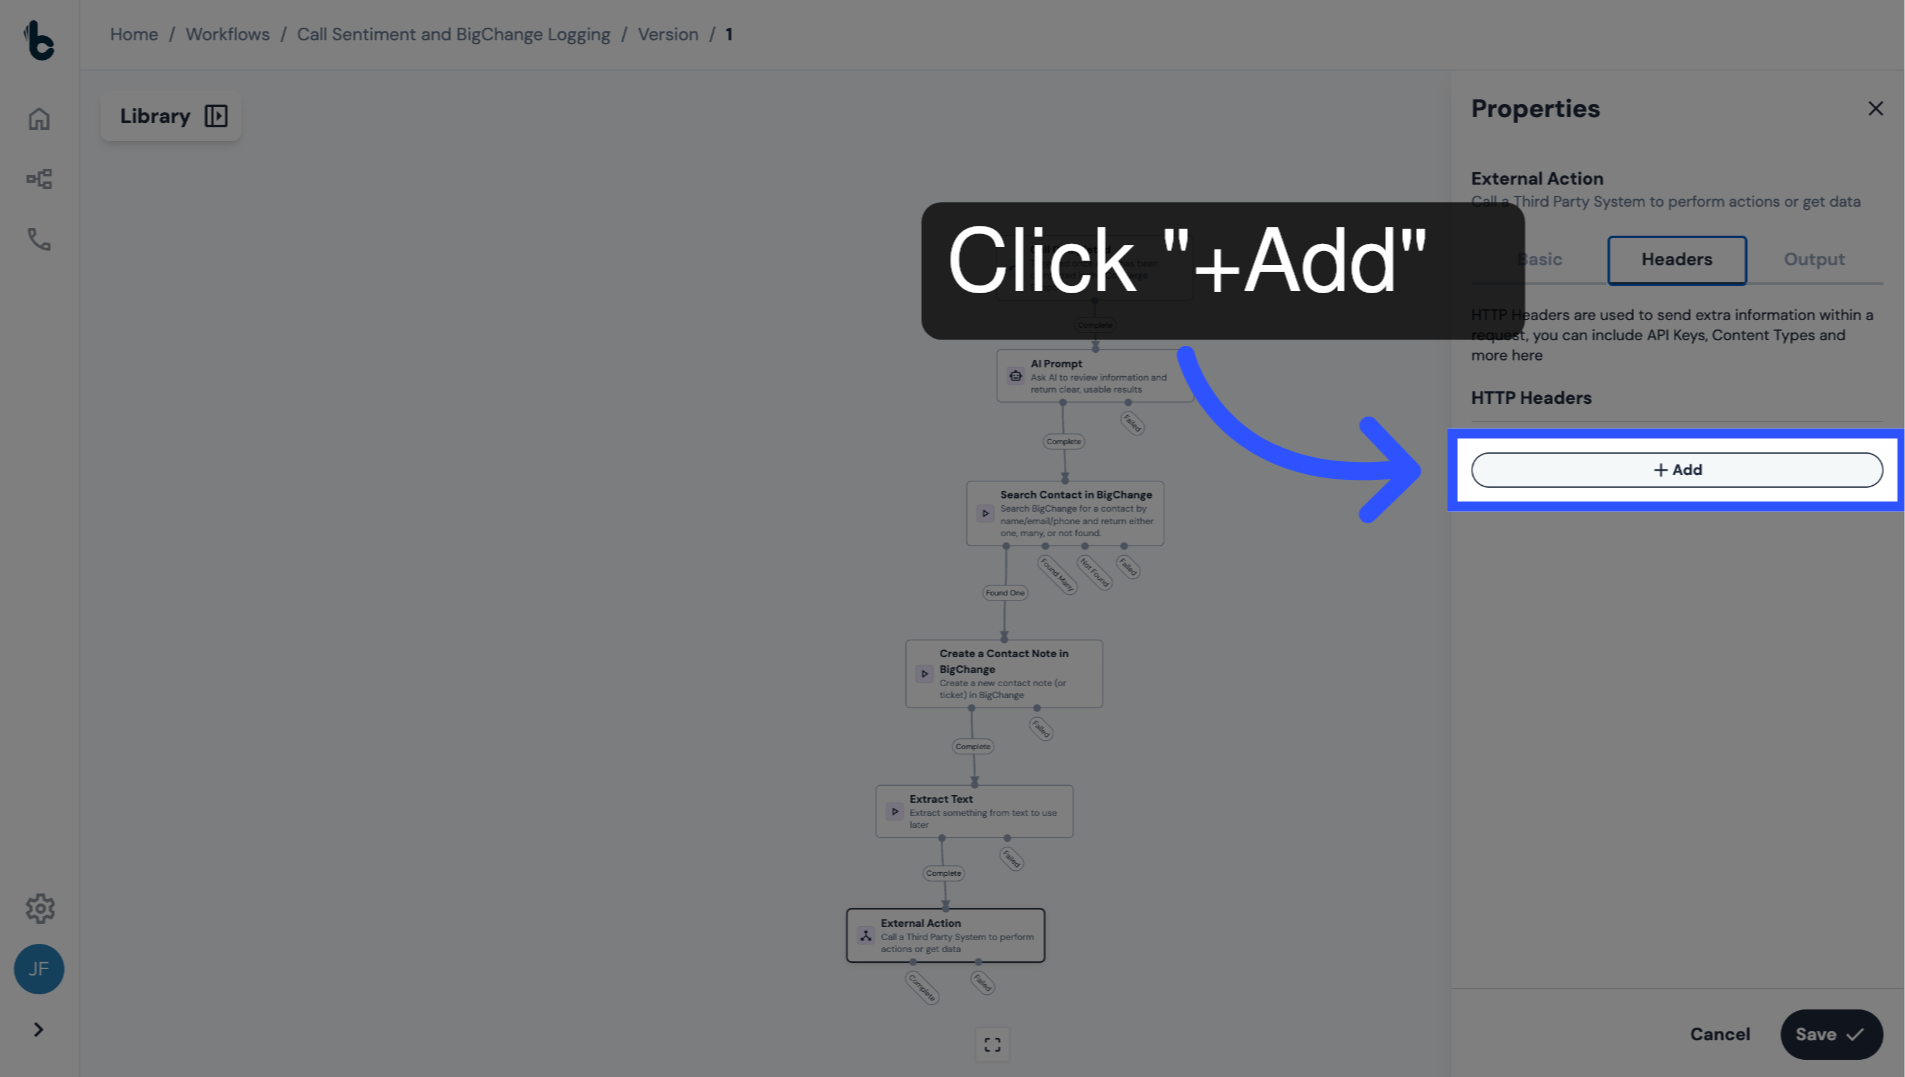
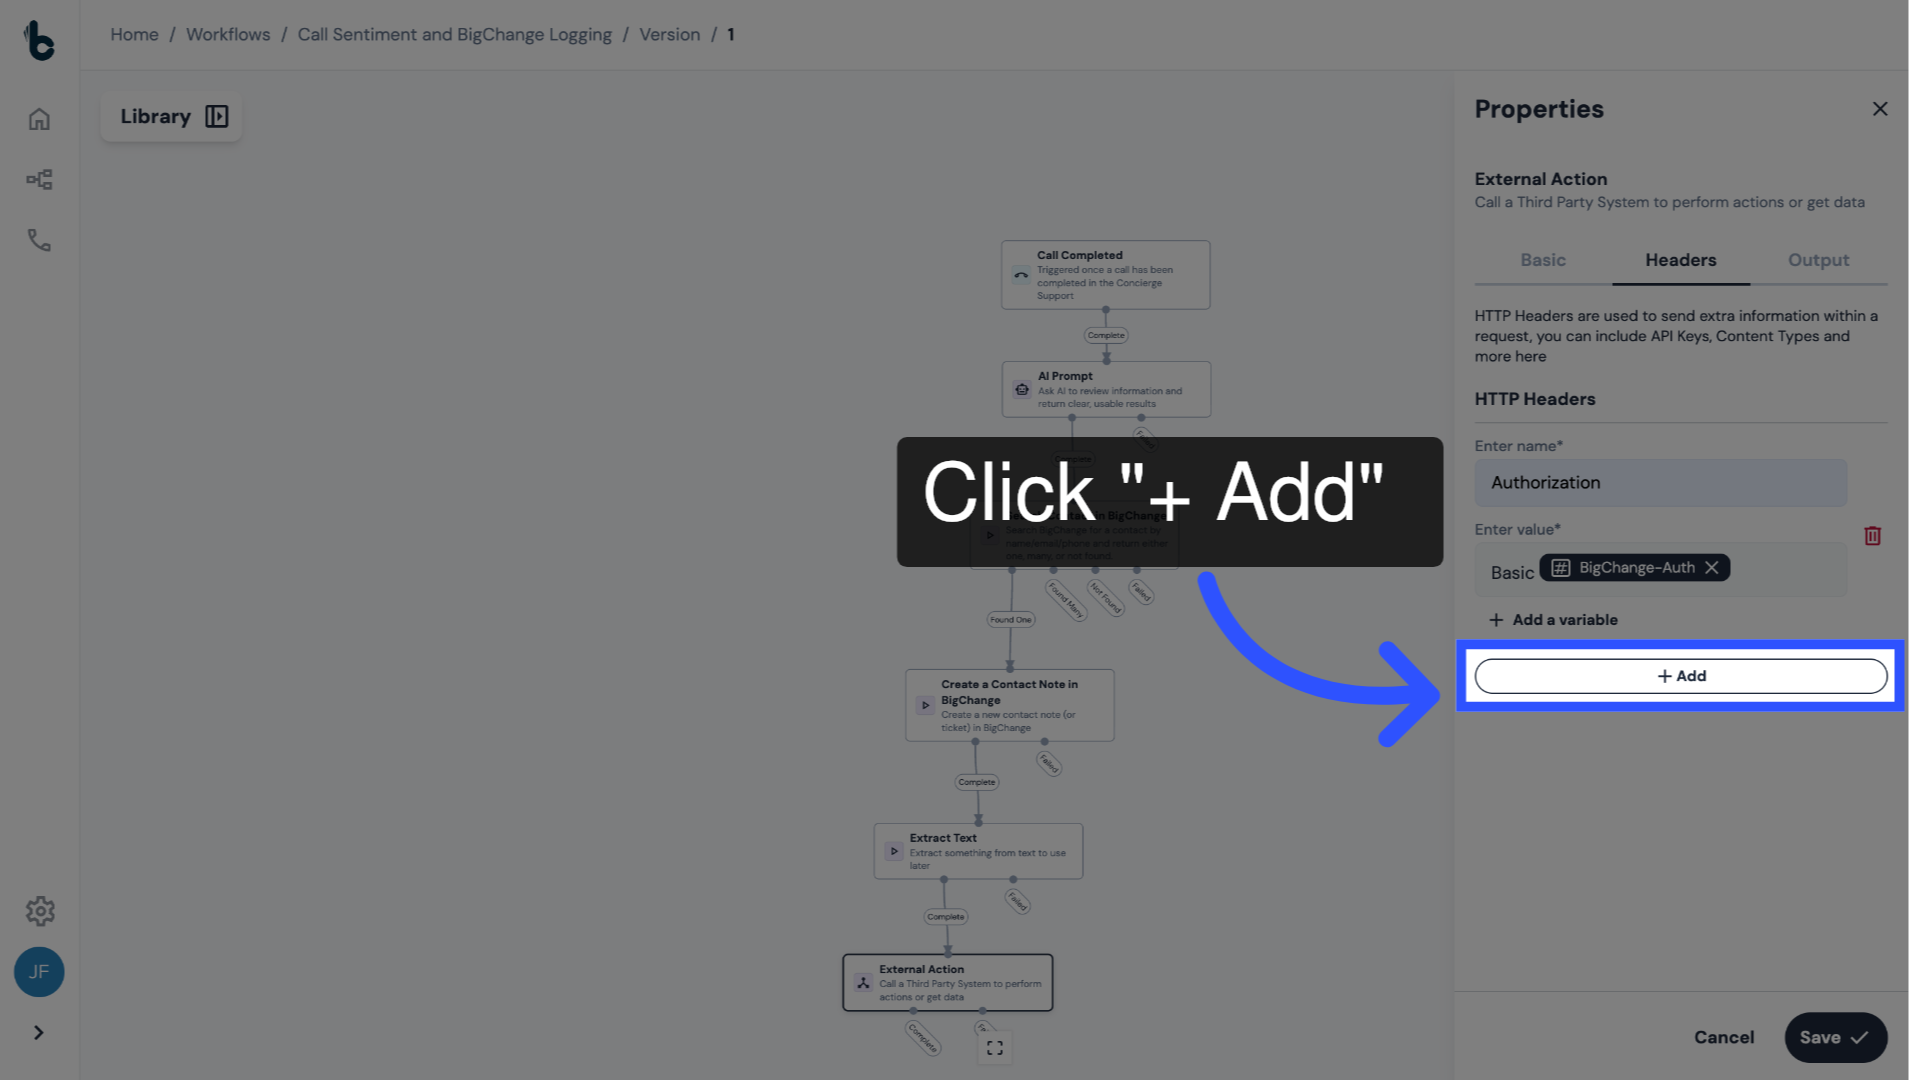
60. Add a HTTP Header
Click on the + Add button.
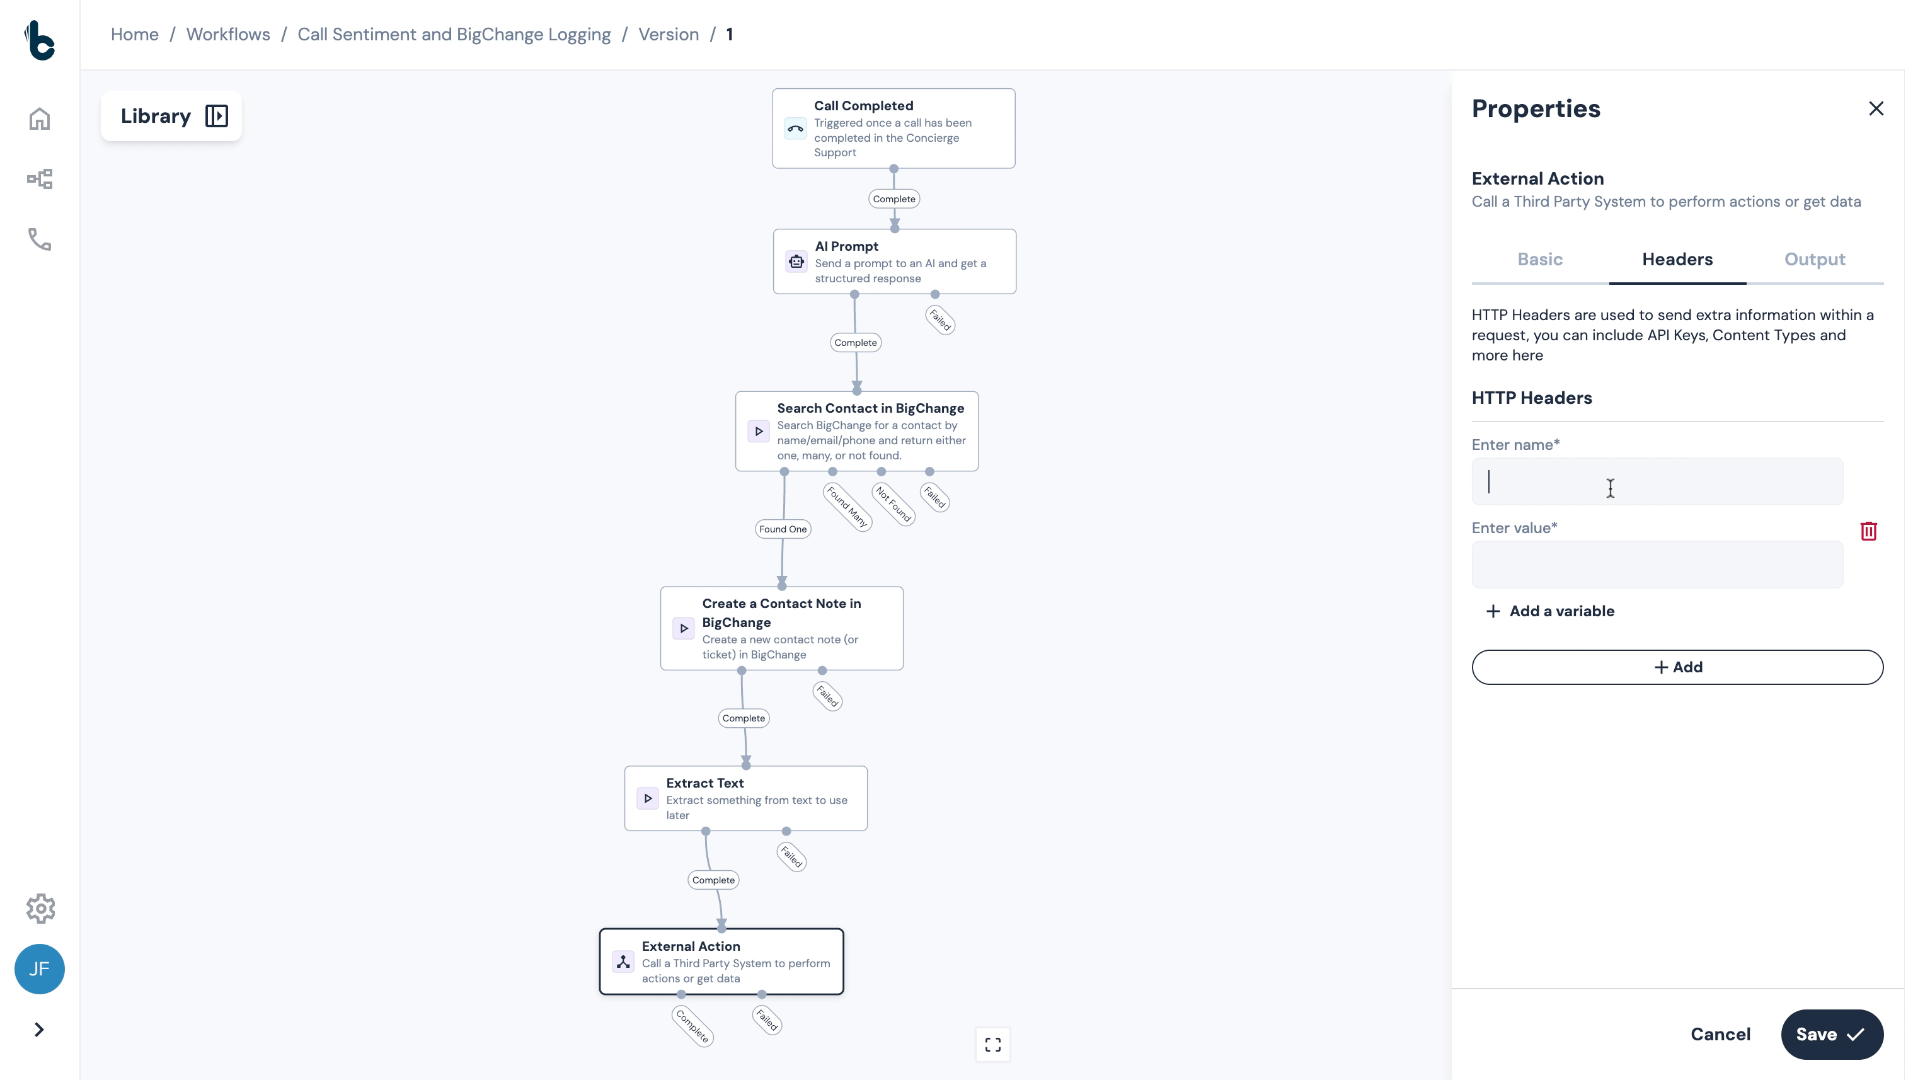
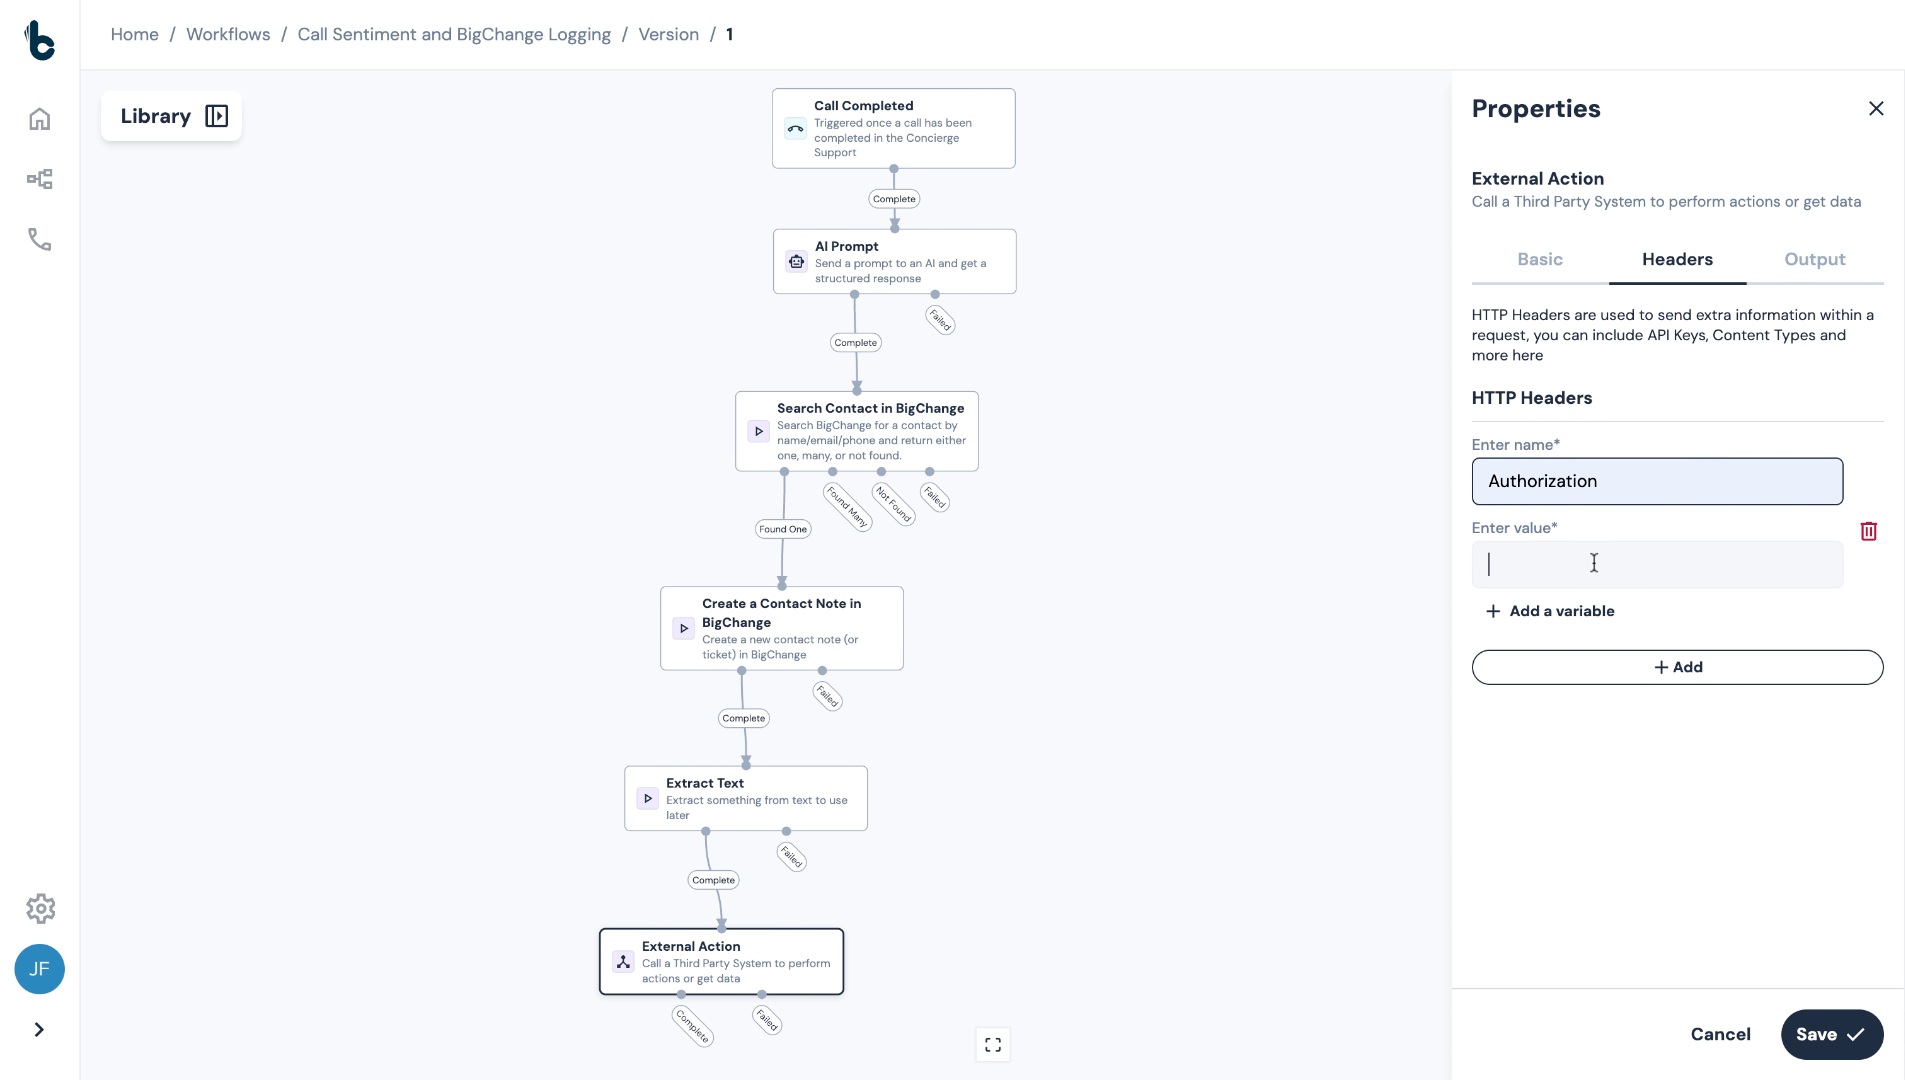
61. Configure Enter Name field
Enter Authorization under the Enter Name field.
62. ⚠️ Note
Spelling and capitalization matter here! Make sure you use the US-English spelling with a 'Z' for Authorization.
63. Enter the value
In the Enter value field:
type Basic then add a space
Click +Add a variable
Choose the relevant BigChange authorization secret variable from the dropdown.
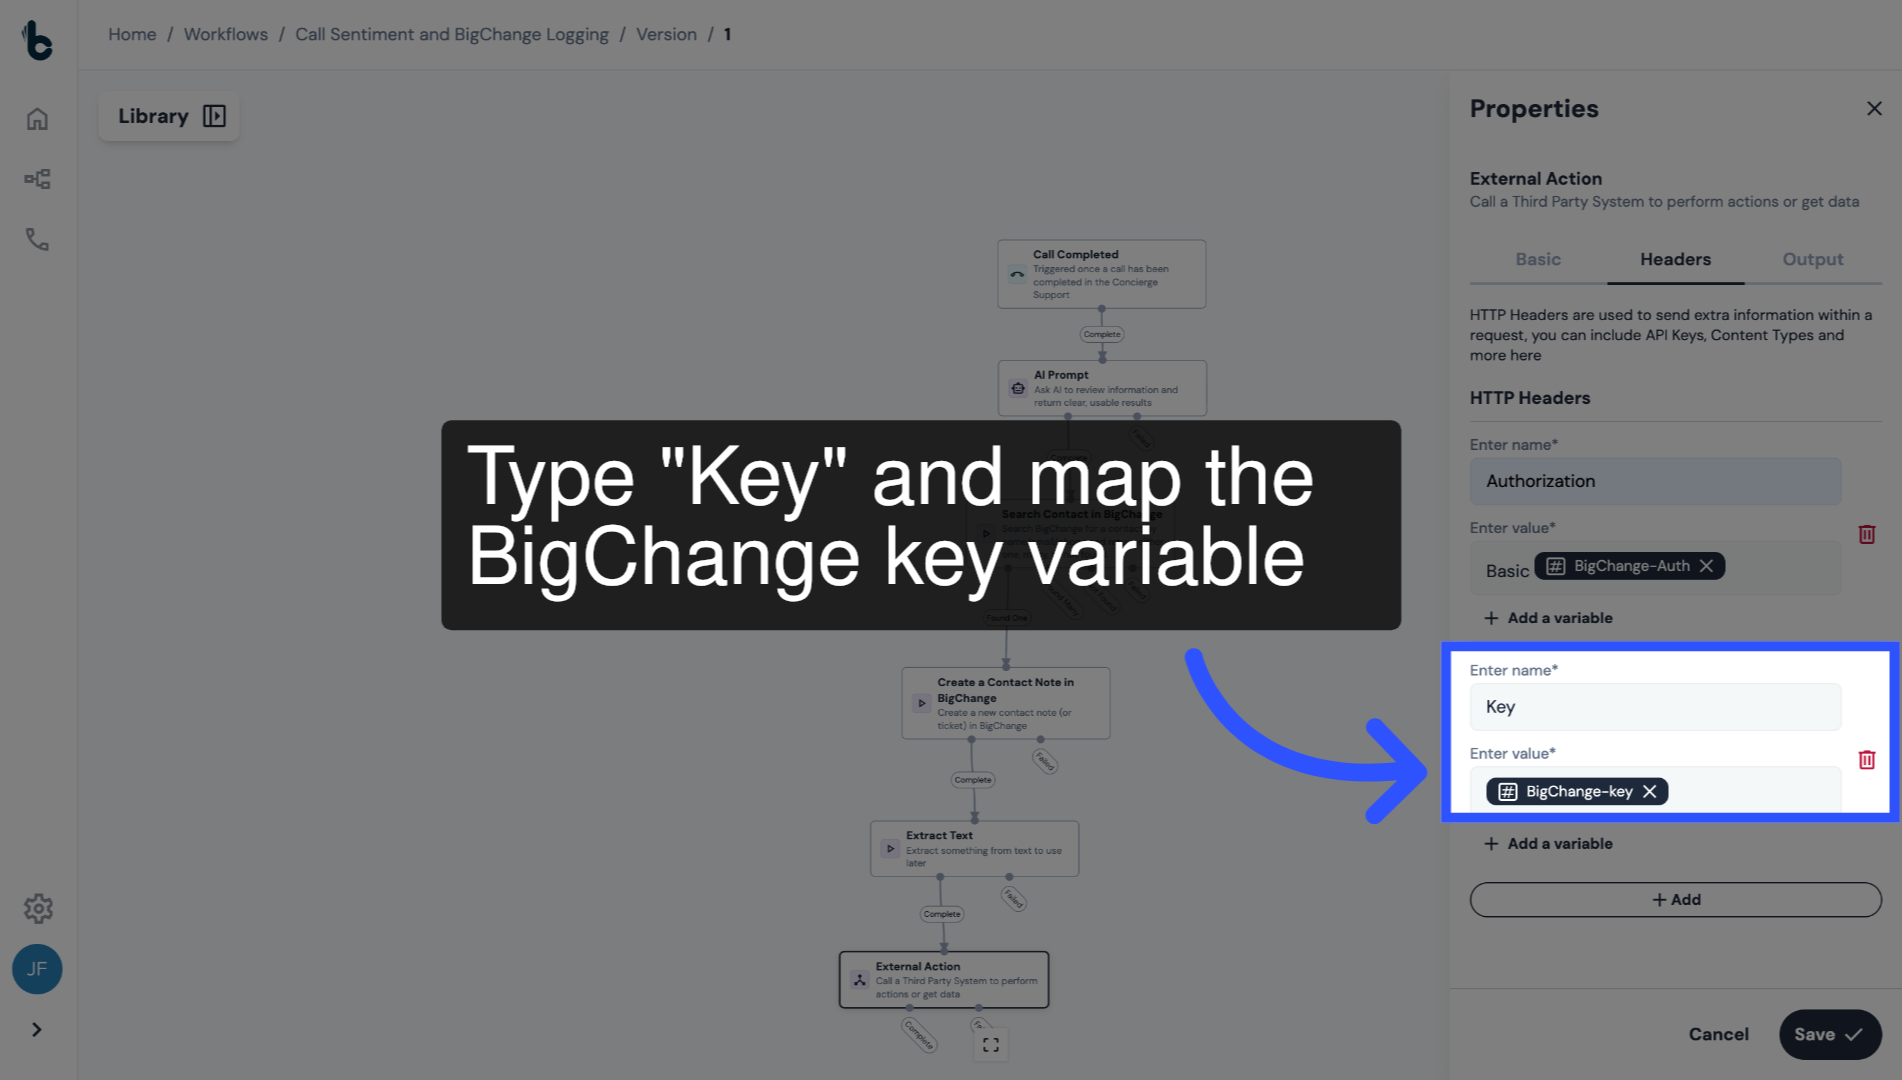
64. Add another HTTP Header
Click + Add again.
65. Name the Header
Name this header — Key in the Enter Name field.
In the Enter value field, map the BigChange key variable by:
Clicking + Add a variable
Selecting the BigChange key secret from the dropdown.
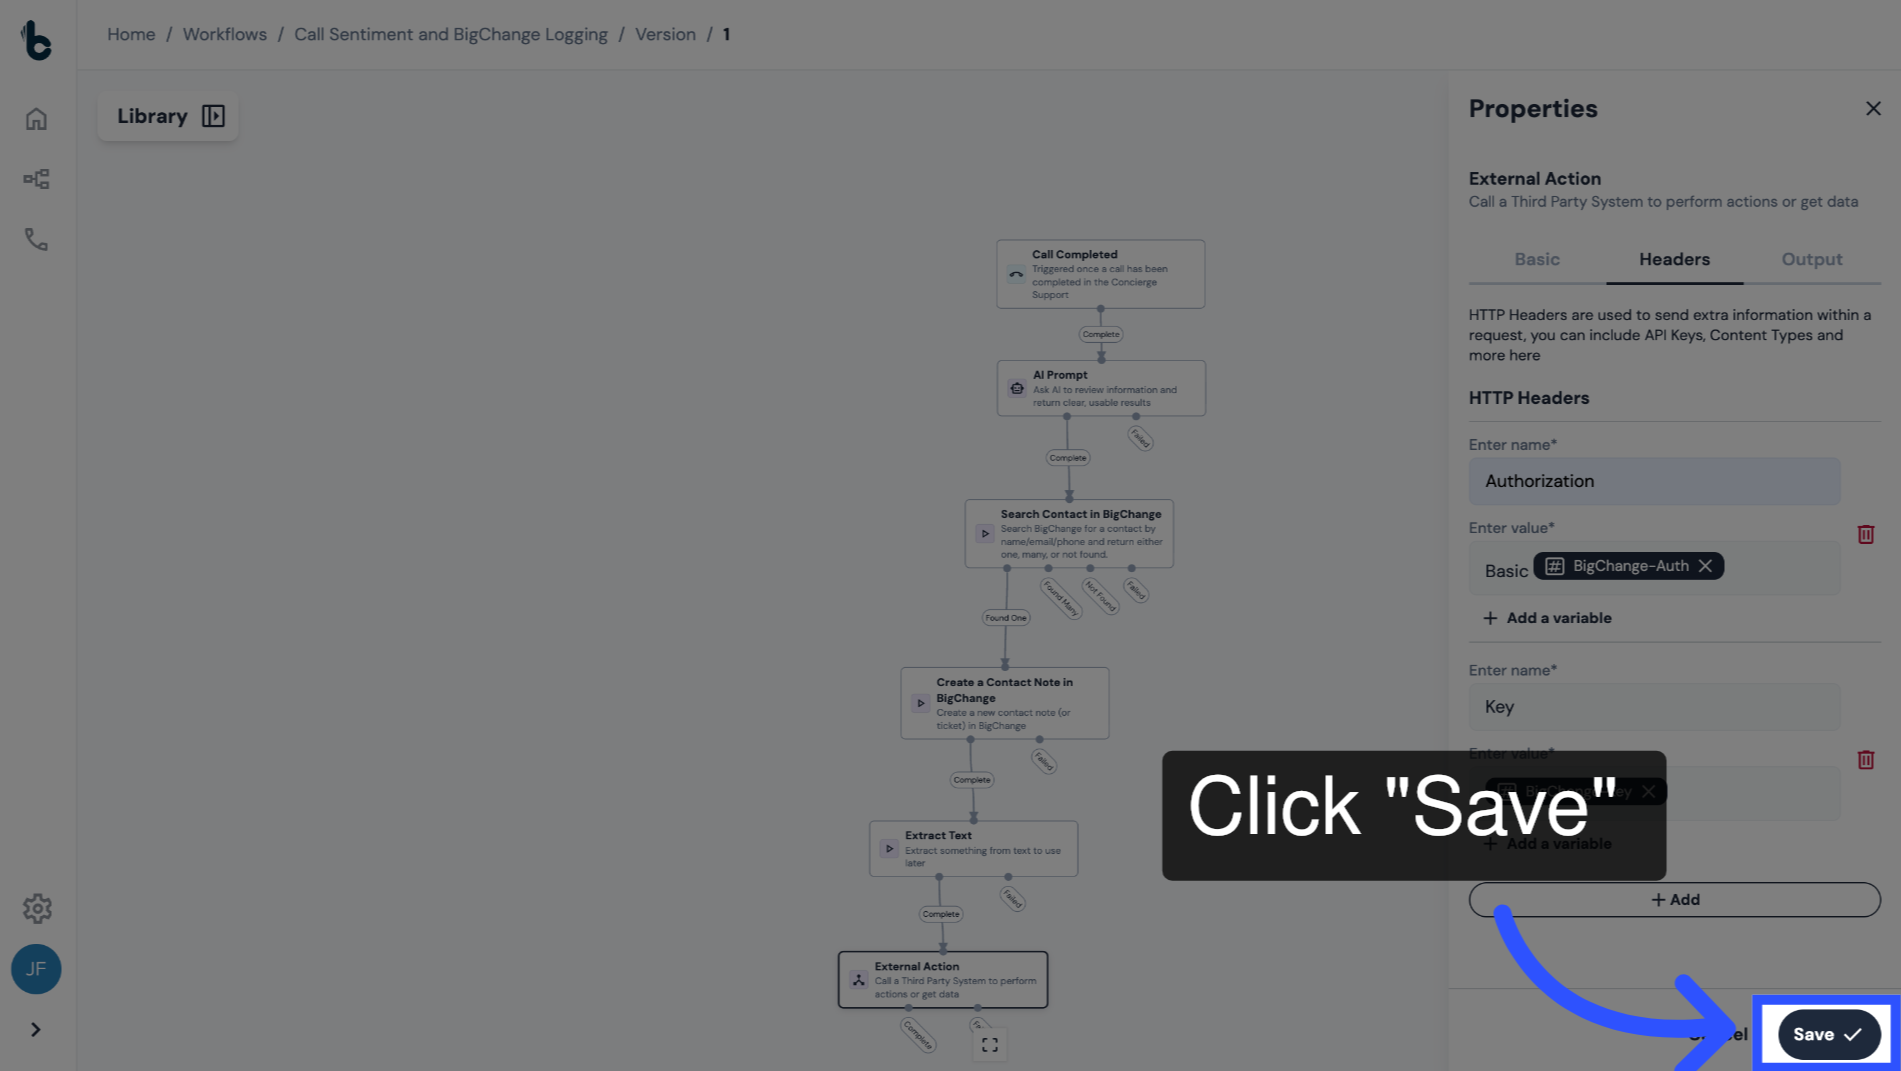
66. Save Configuration
Click Save.
67. 📚 Learn more
To learn more about the External Action node, read the guide entitled External Action action.
68. Conclusion
Now, whenever a call is completed by Greenshield's team, it will be analyzed for sentiment, logged as a note in BigChange and automatically flagged if escalation is needed, with no manual review required.
