
Automate job creation in BigChange
In this guide, we'll learn how to set up automatic job creation in BigChange using the Build Concierge Workflow Builder, saving your team hours of manual work every day.
1. Introduction to Smith & Co example
Smith & Co are a business providing electricians to retail customers throughout North West England.

2. Job request emails
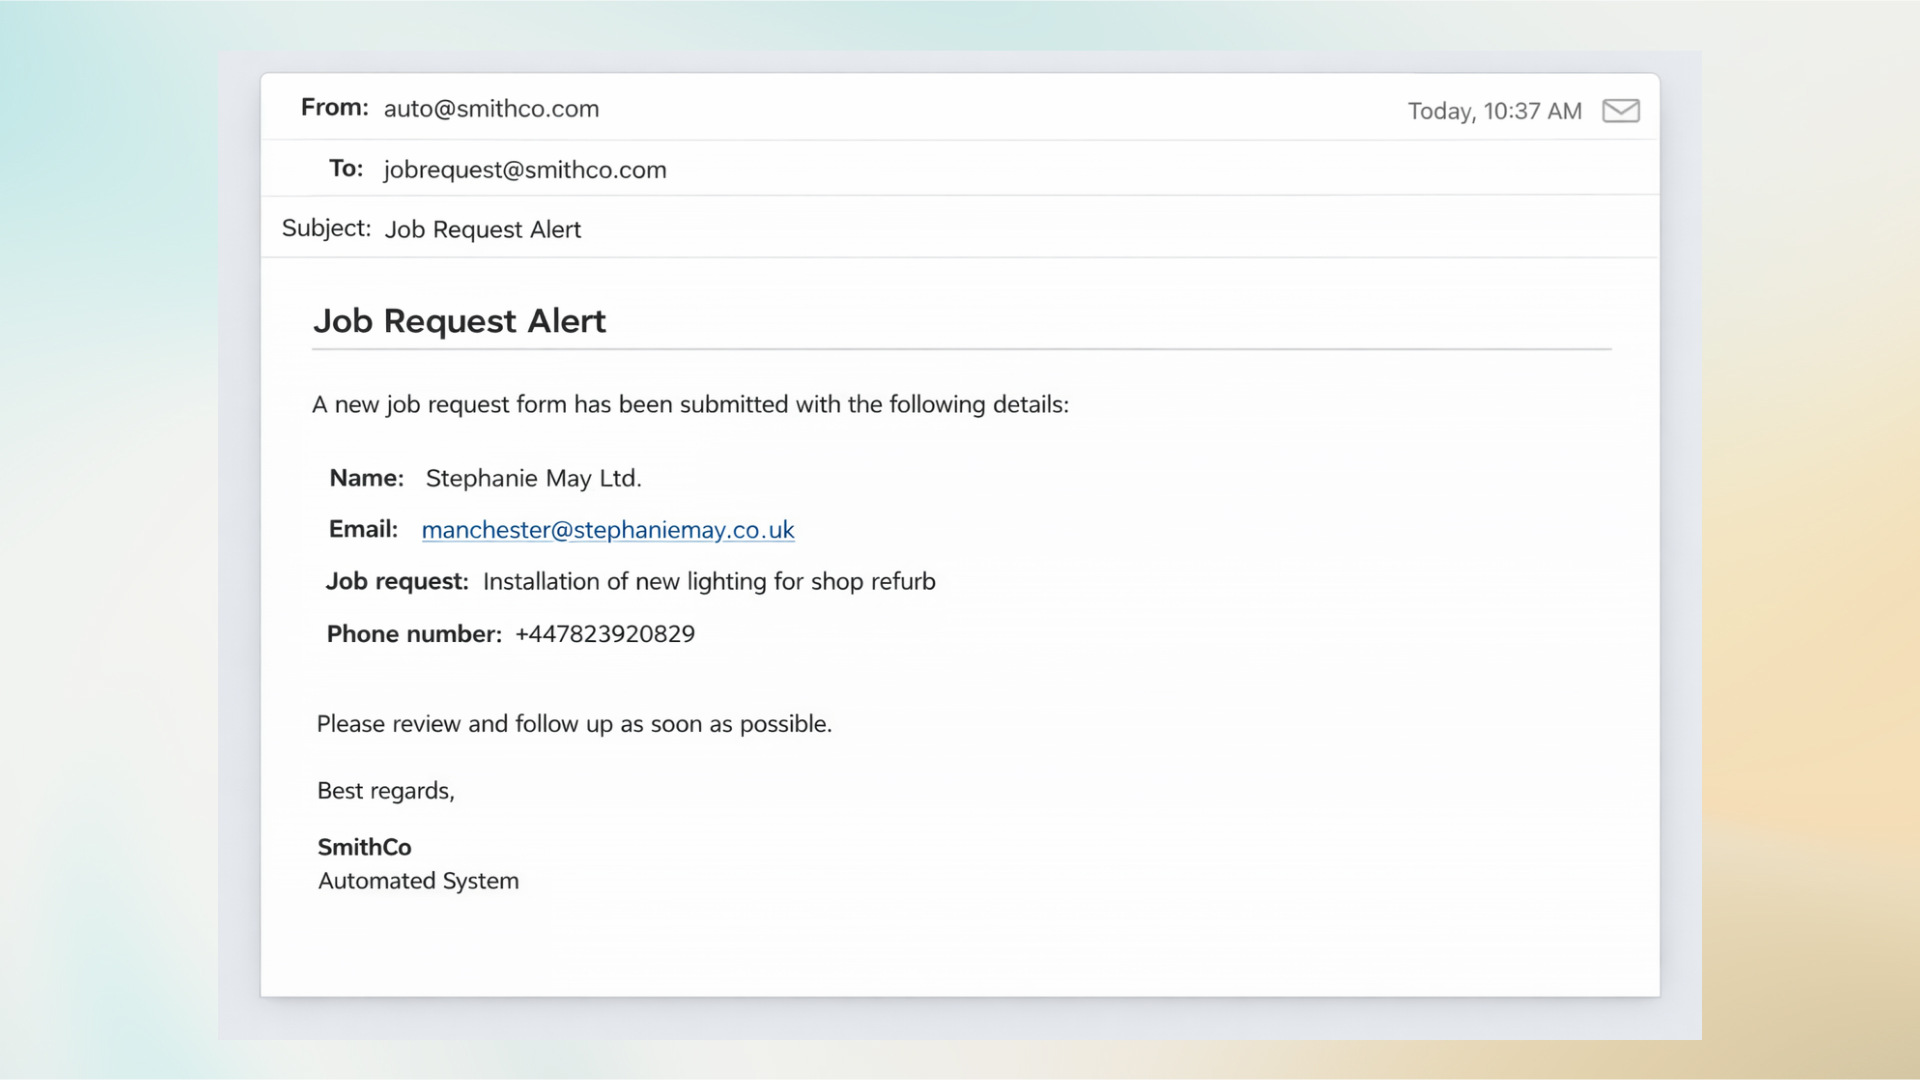
Their clients submit job requests via a form, triggering an auto-generated email to Smith & Co's support team.
3. Current process
Until now, their support team dealt with the requests manually by:
Reviewing the email
Searching for the contact in Big Change; and
When a contact is found, creating the job against it.
Now, by building this workflow in the Workflow Builder in Build Concierge, the process will occur automatically. Let's see how to set this up!
4. Log in
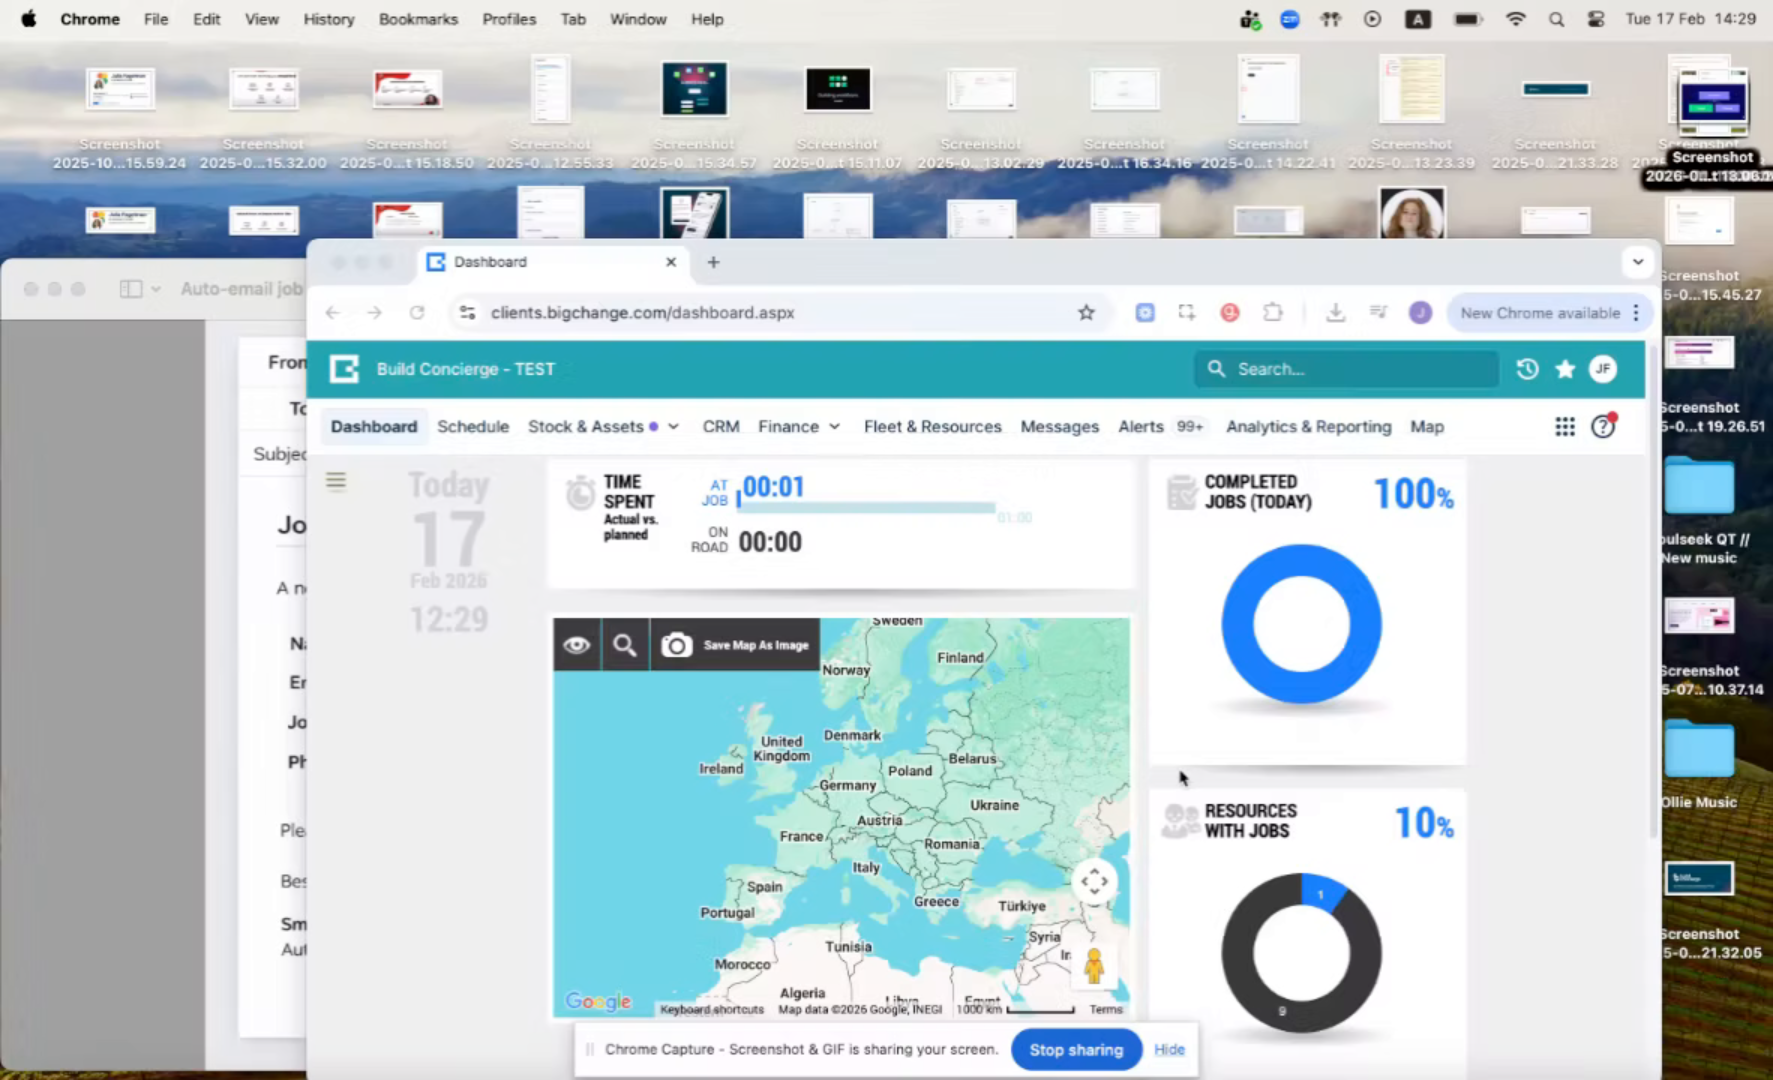
Log into your Build Concierge account.
5. Open Workflow Builder
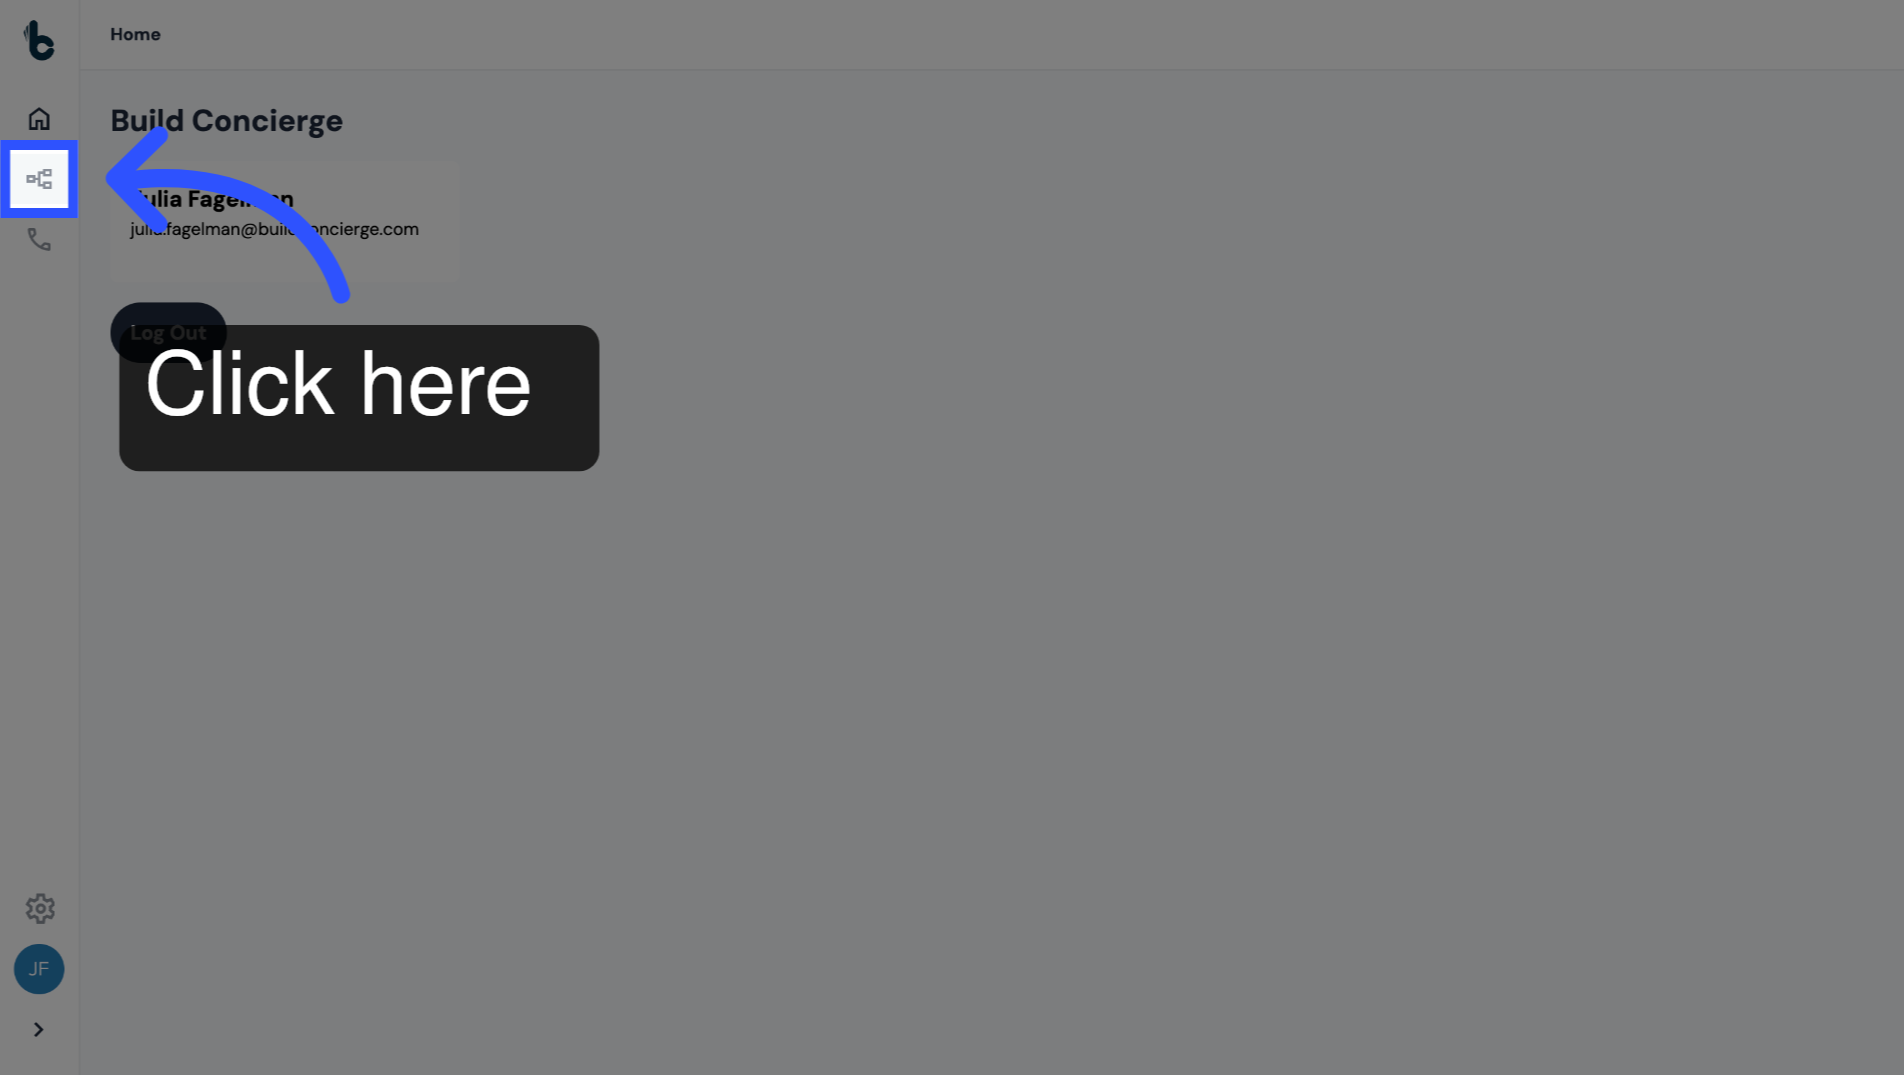
Click on the Workflow Builder icon.
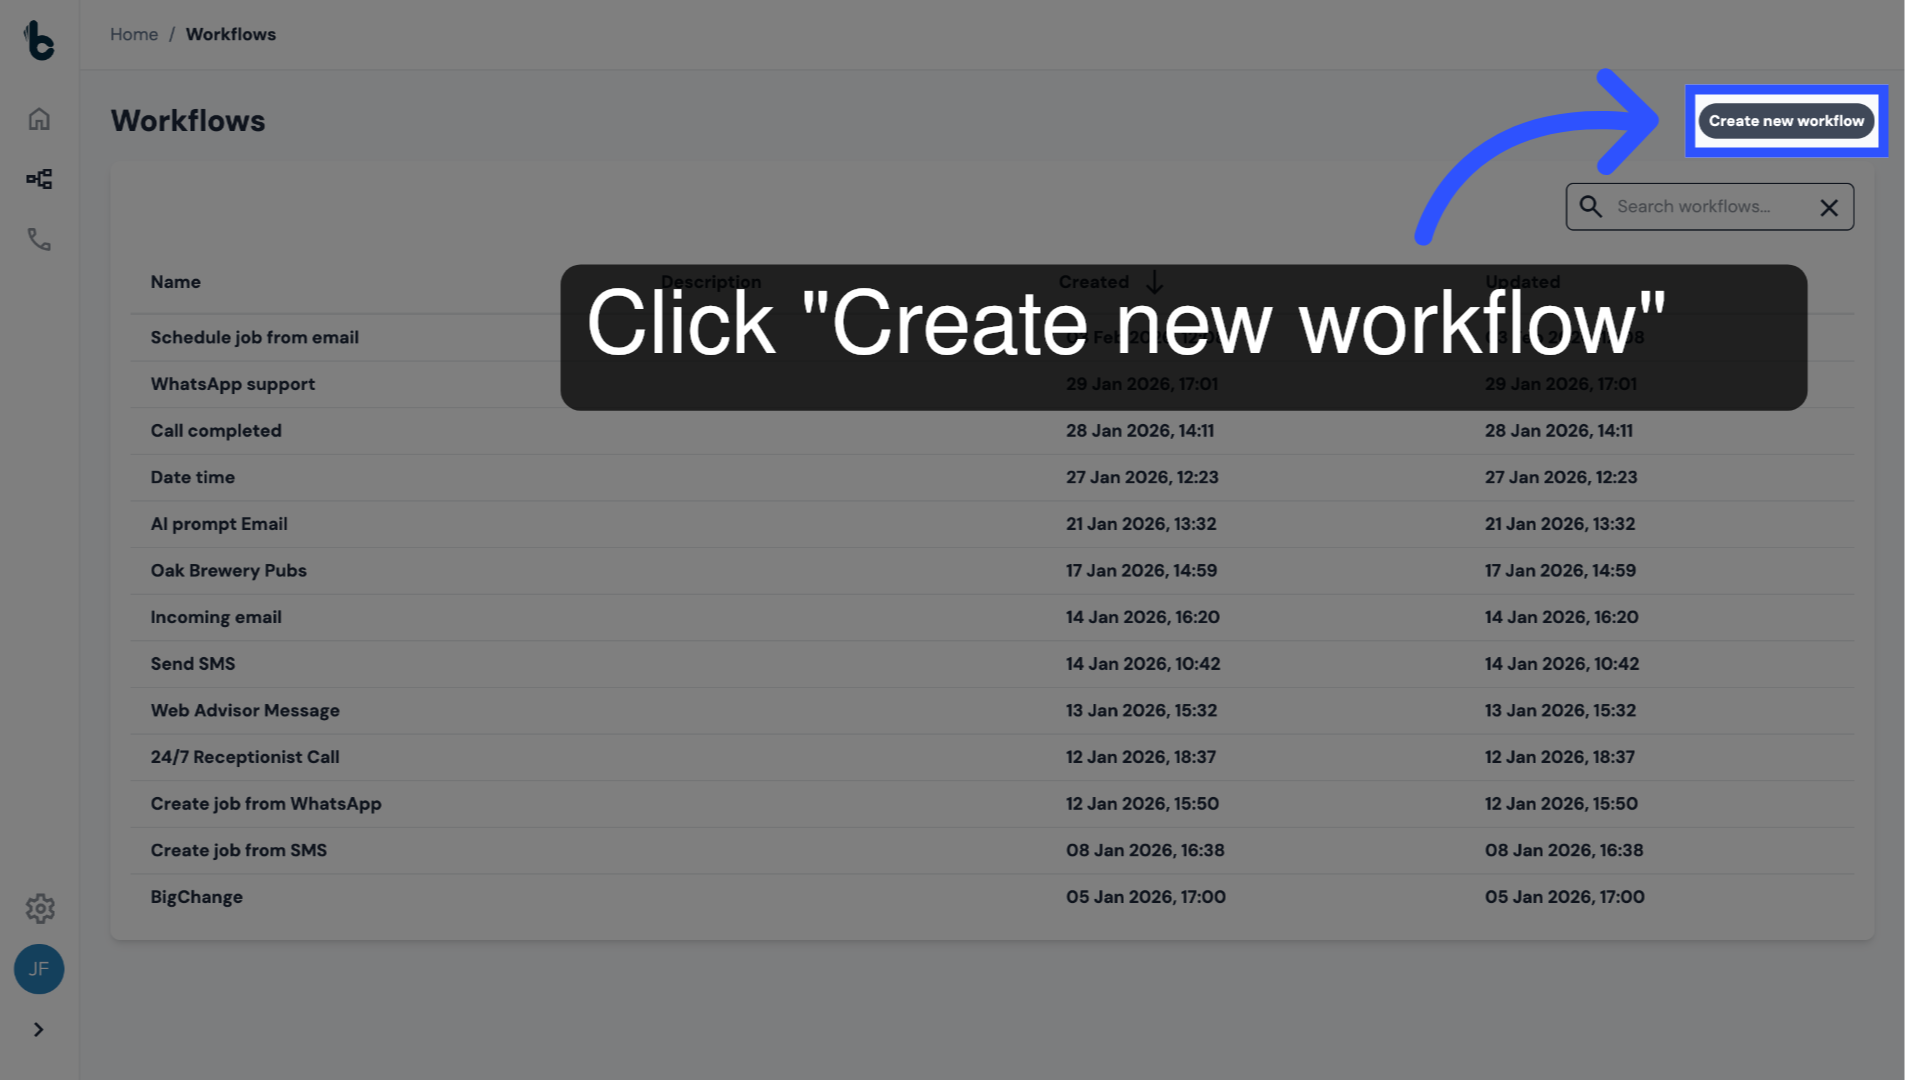
6. Create a new workflow
Click on Create new workflow.
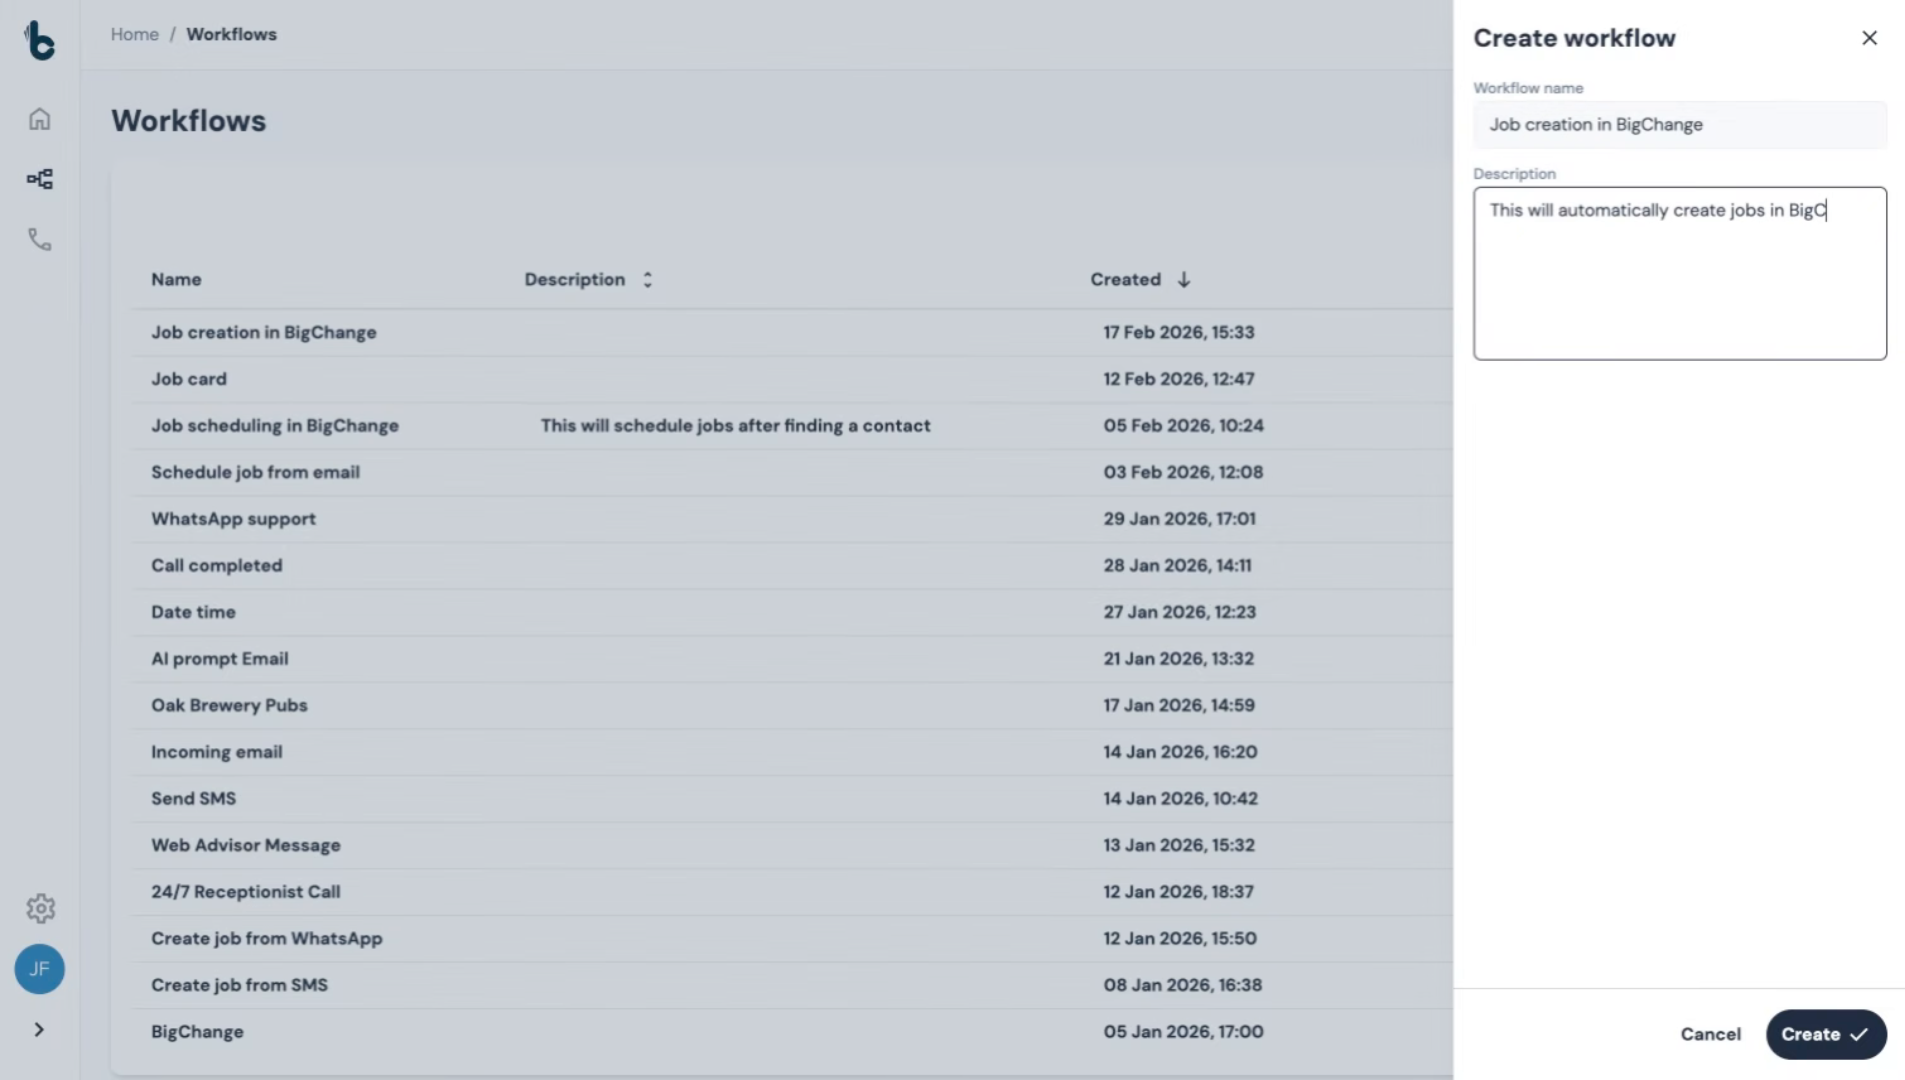
7. Name your workflow
Give the workflow a name such as "Job creation in BigChange."
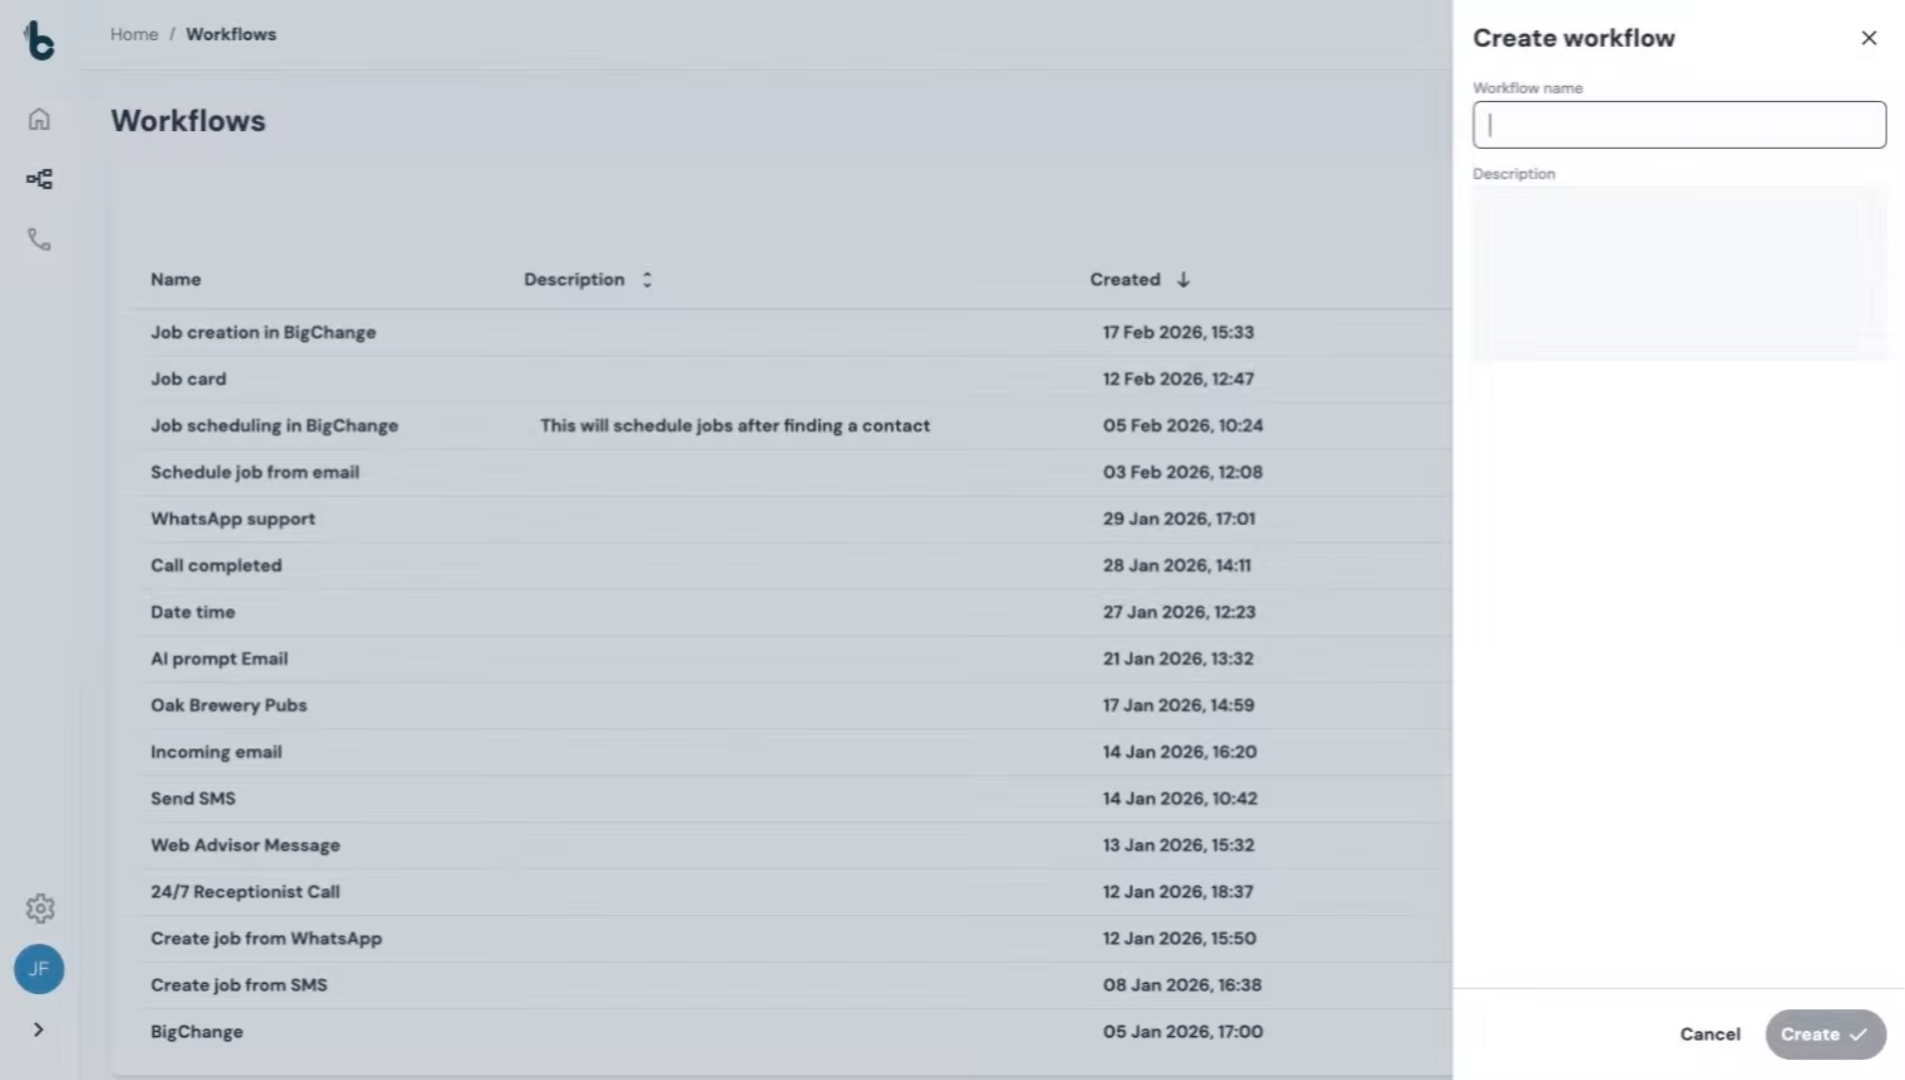
8. Add an Optional description
If you want, add a description too to give the name more context.
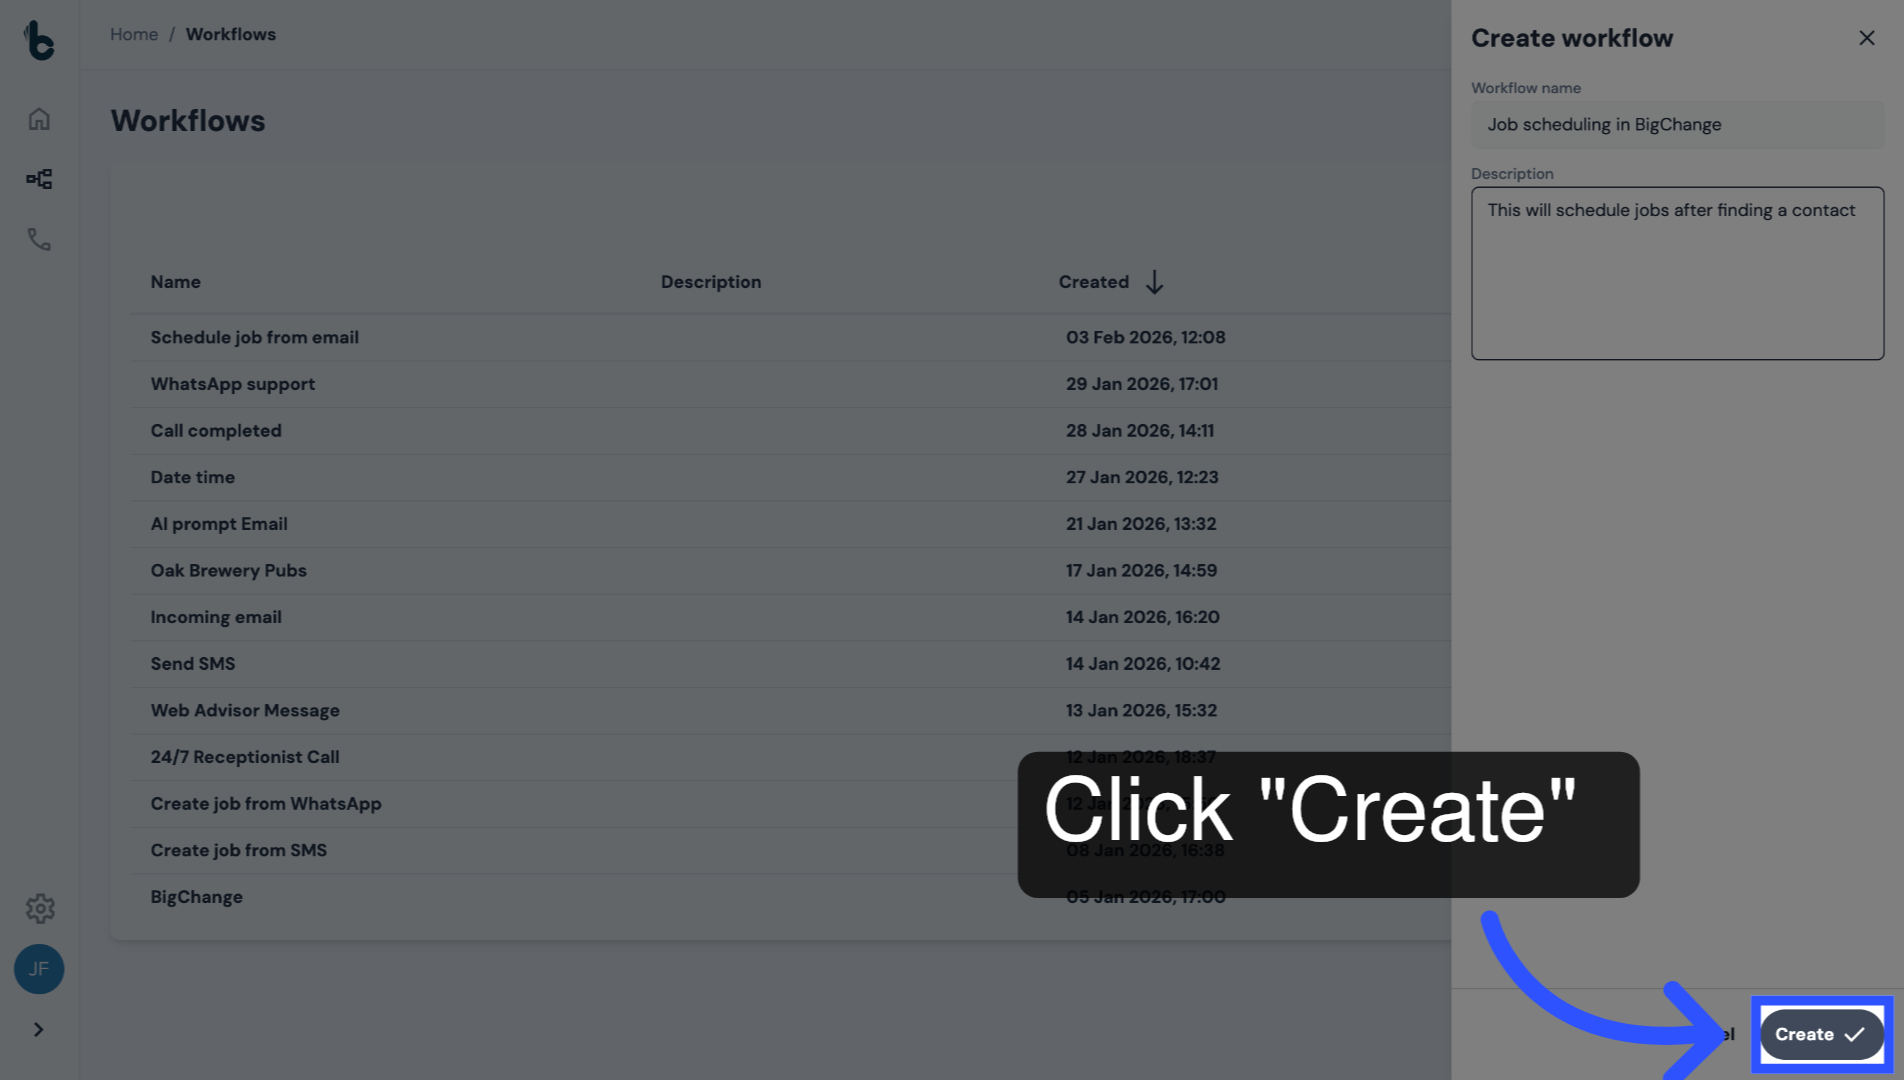
9. Create Workflow
Click Create to open the Workflow Editor.
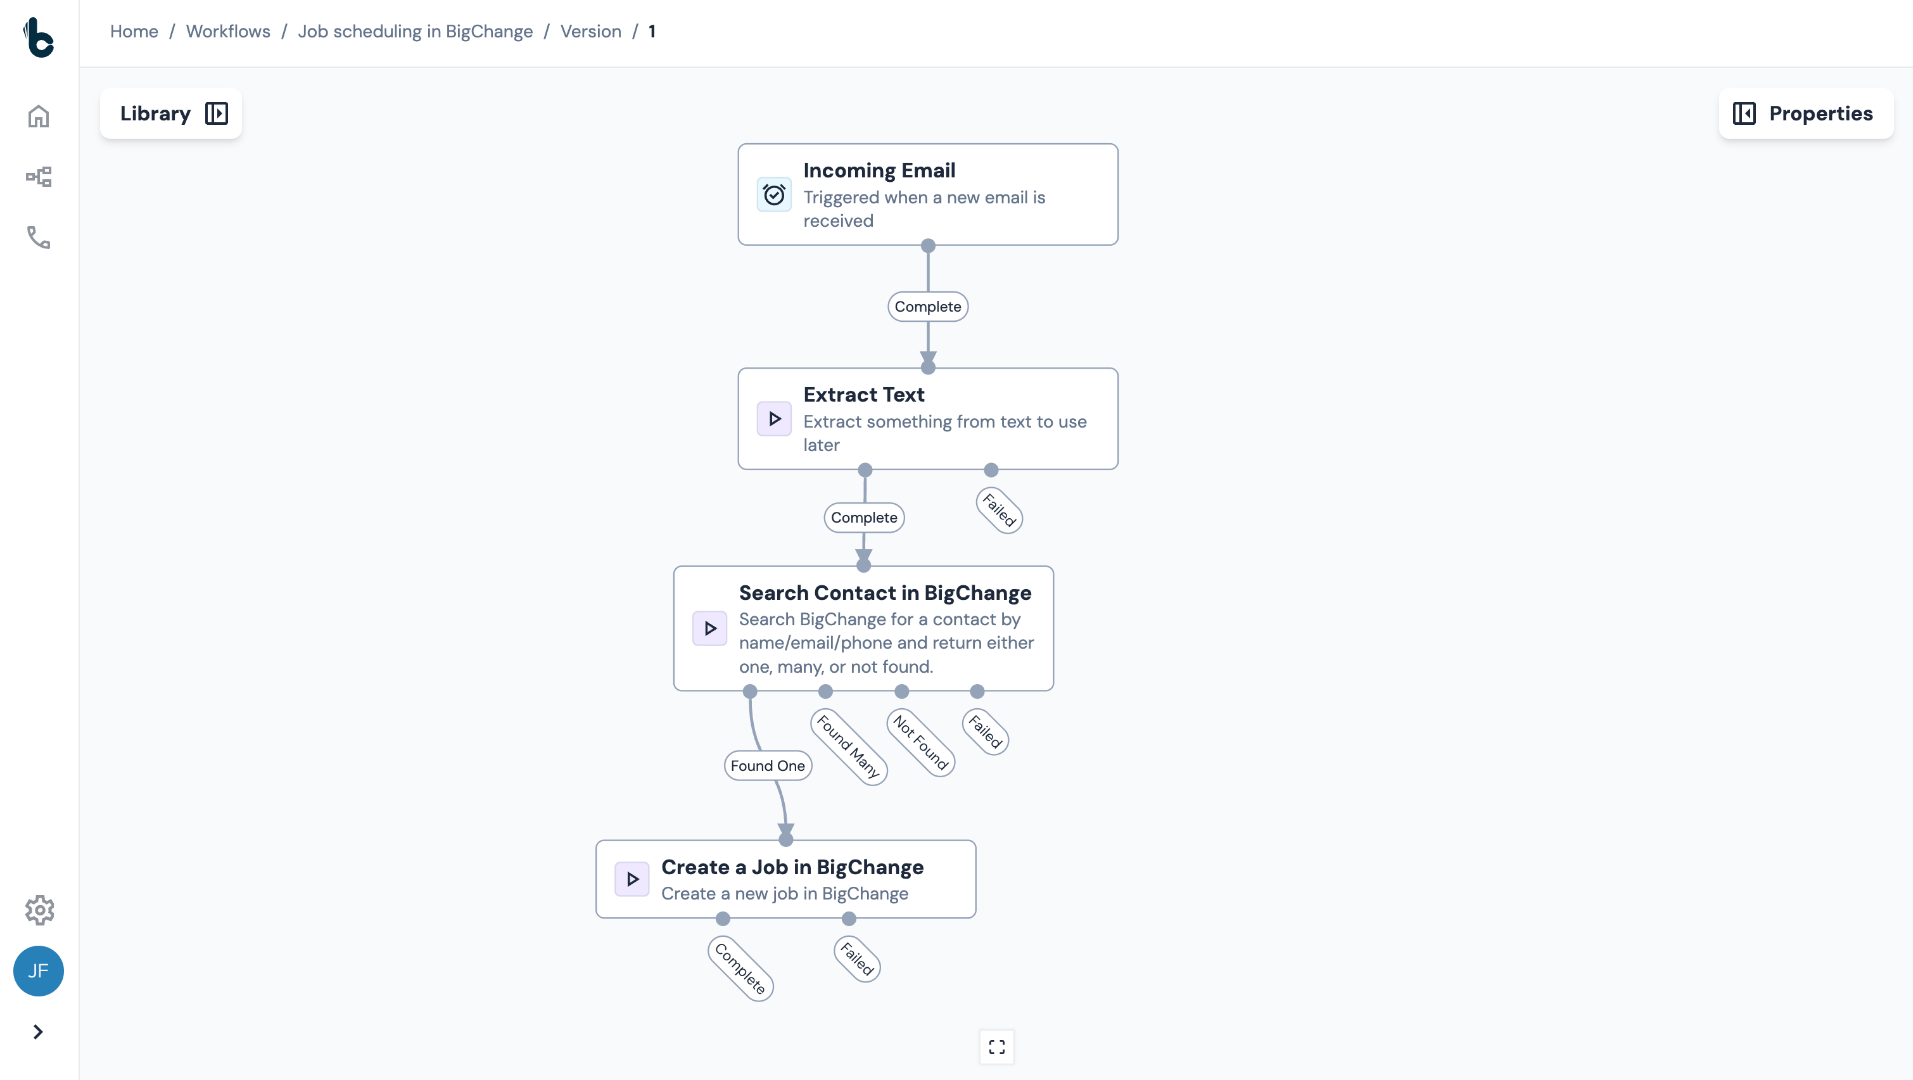
10. Add an Incoming Email node
Drag and drop the Incoming Email node as the starting action.
This will trigger the workflow whenever an auto-generated email is received from a form submission.

11. Click to configure the node
Click on the node to open the Properties panel.
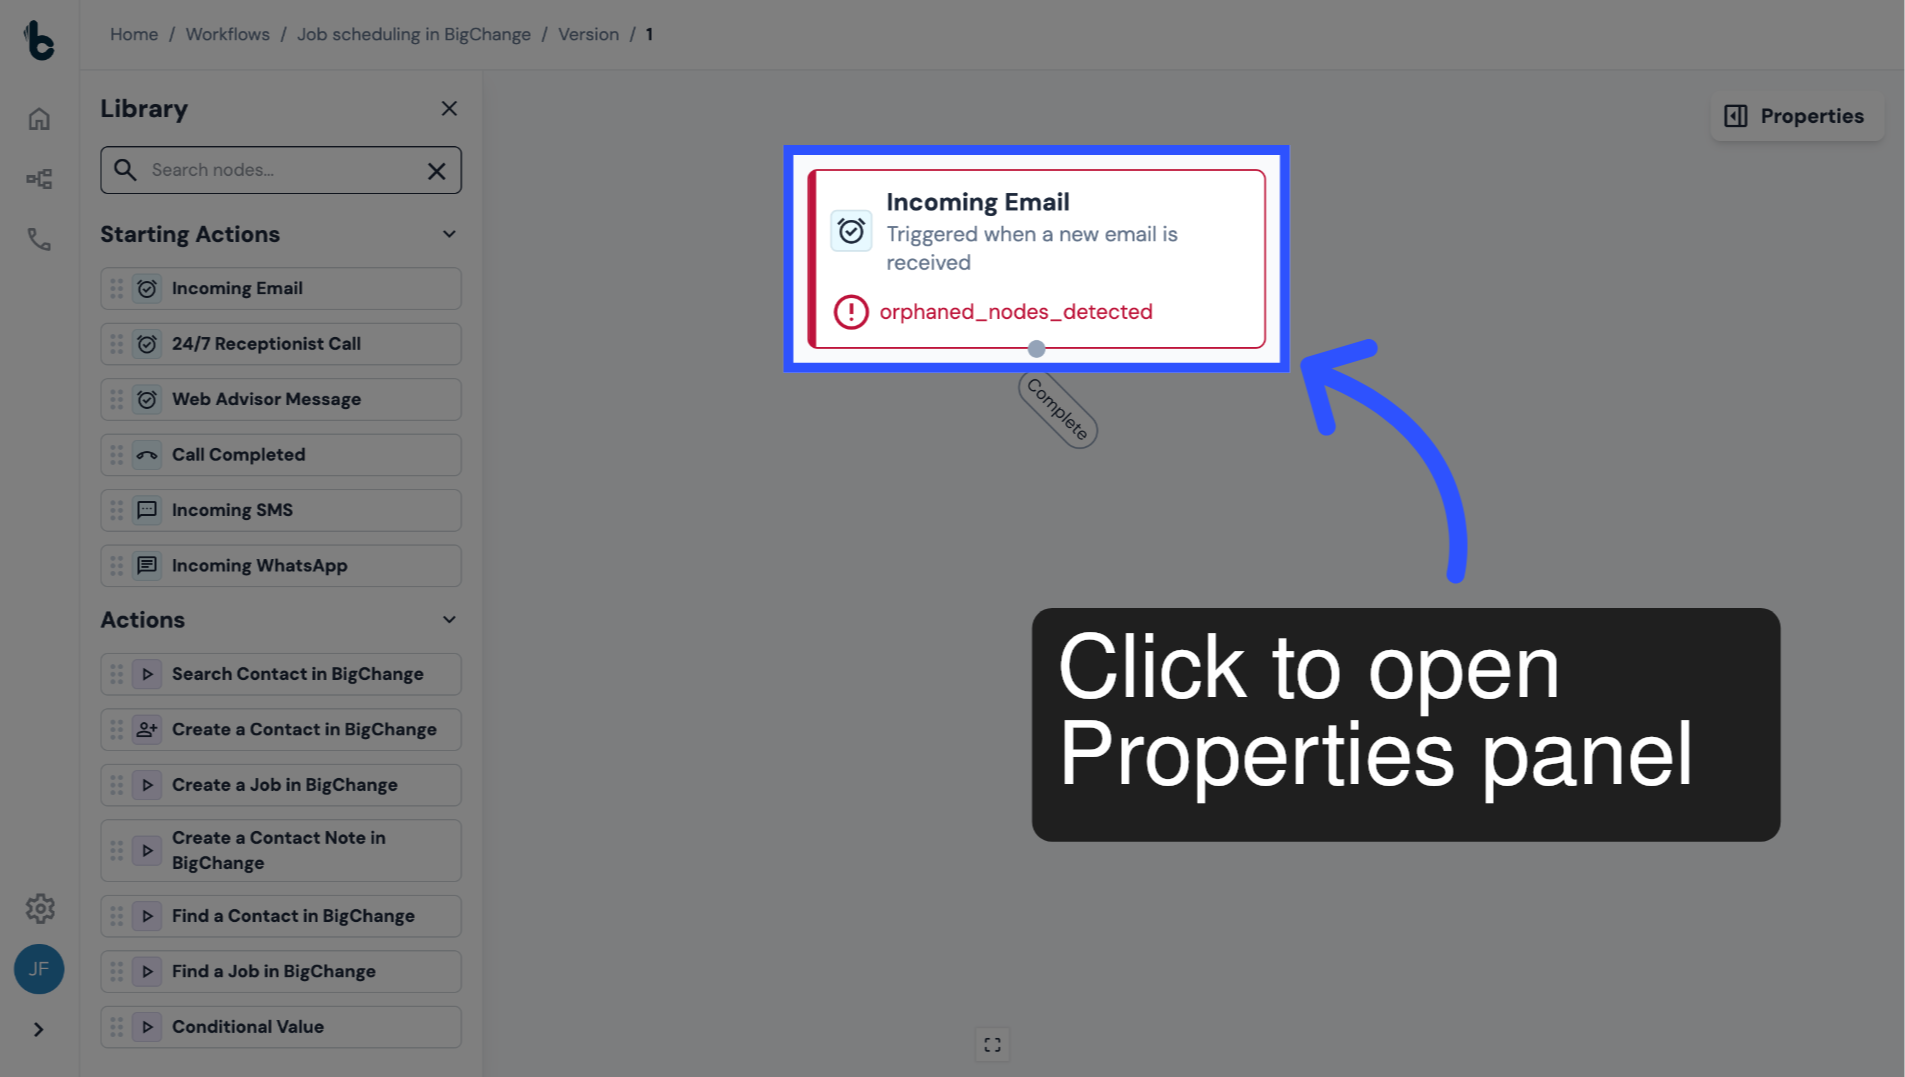
12. Select email address
In the drop-down, select the Email address that will trigger the workflow when a new email is received.
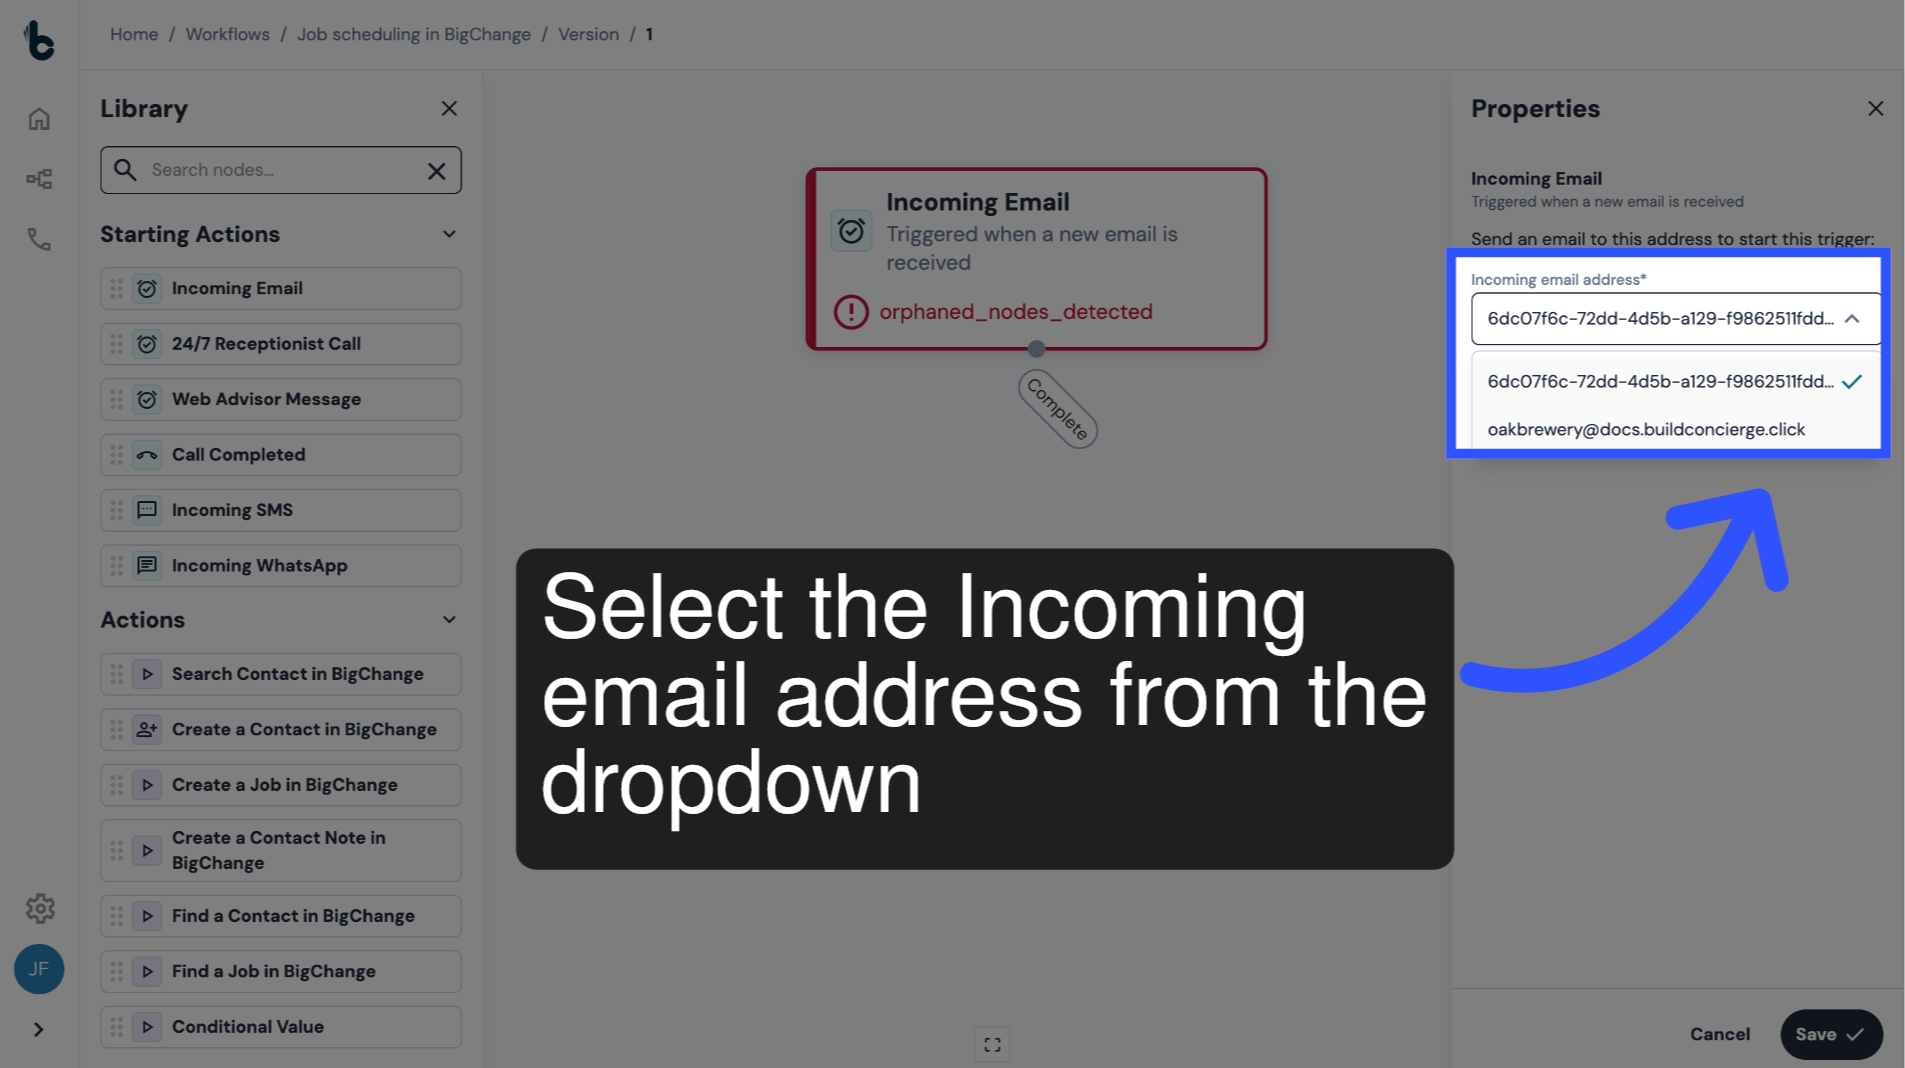
13. Email Management
If the email address where emails are received has not been added as an inbound email address, you will first need to add and configure it through the Email Management section of your account settings.
You can read about it in the guide entitled Email Management.
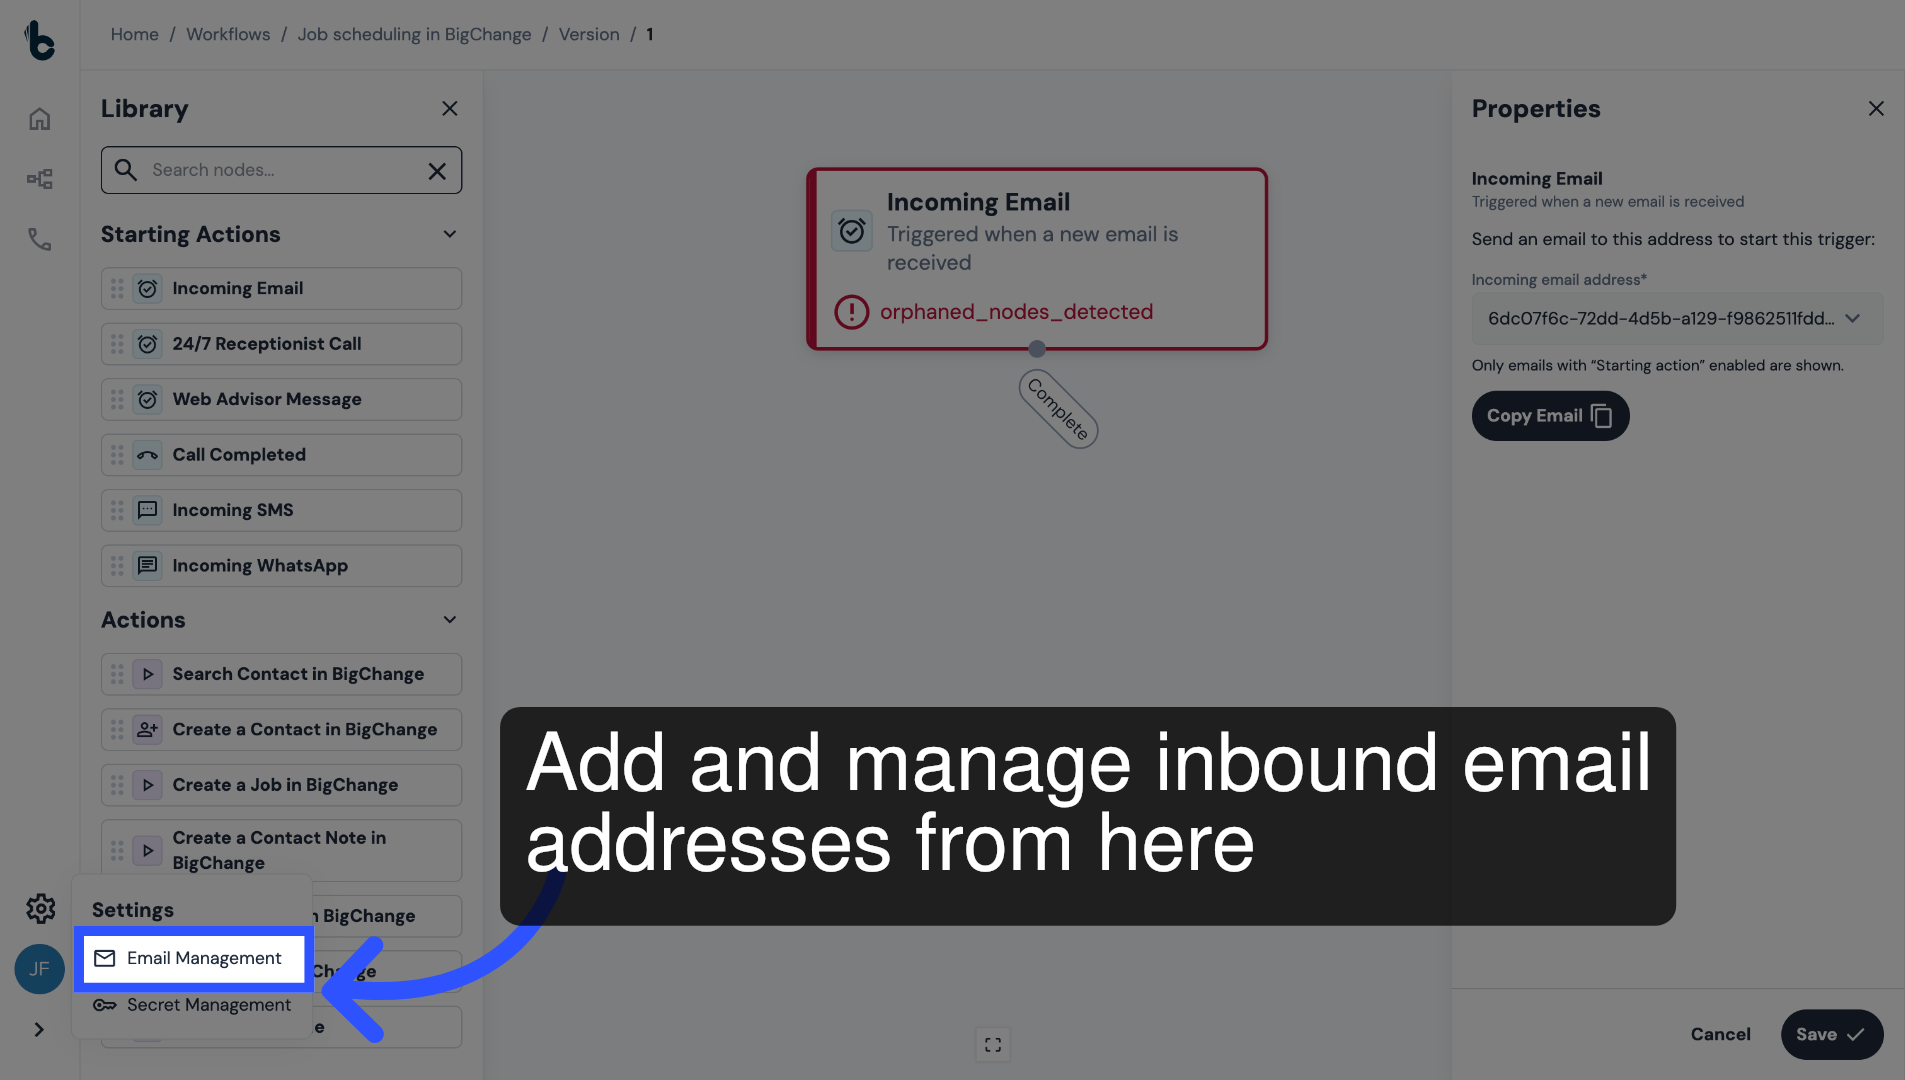
14. Default email address
If you have not set up an inbound email address, select the default email address provided by the Incoming Email node.
Then, set up forwarding rules to forward the auto-generated emails to the default email address in order to trigger the workflow.
You can read more about this in the Incoming Email Starting action guide.

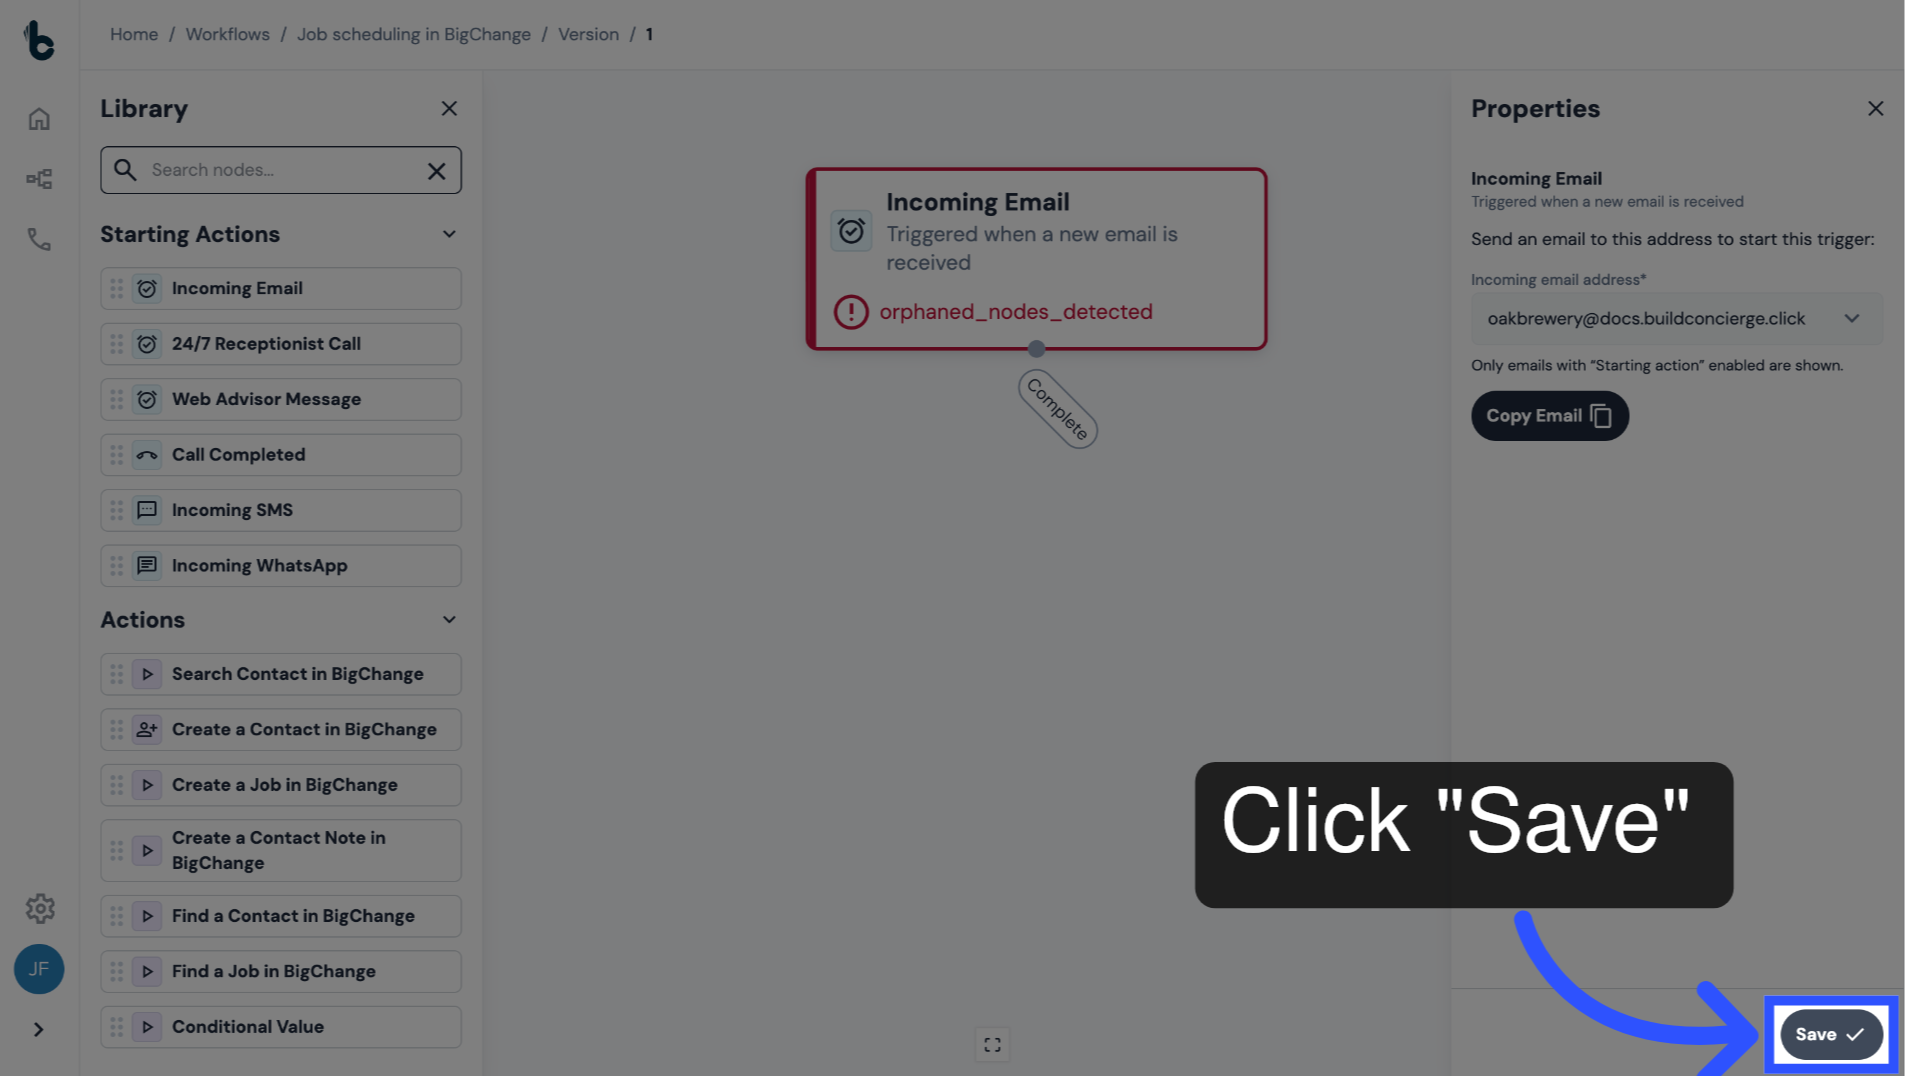
15. Save configuration
Click Save to apply the configuration.
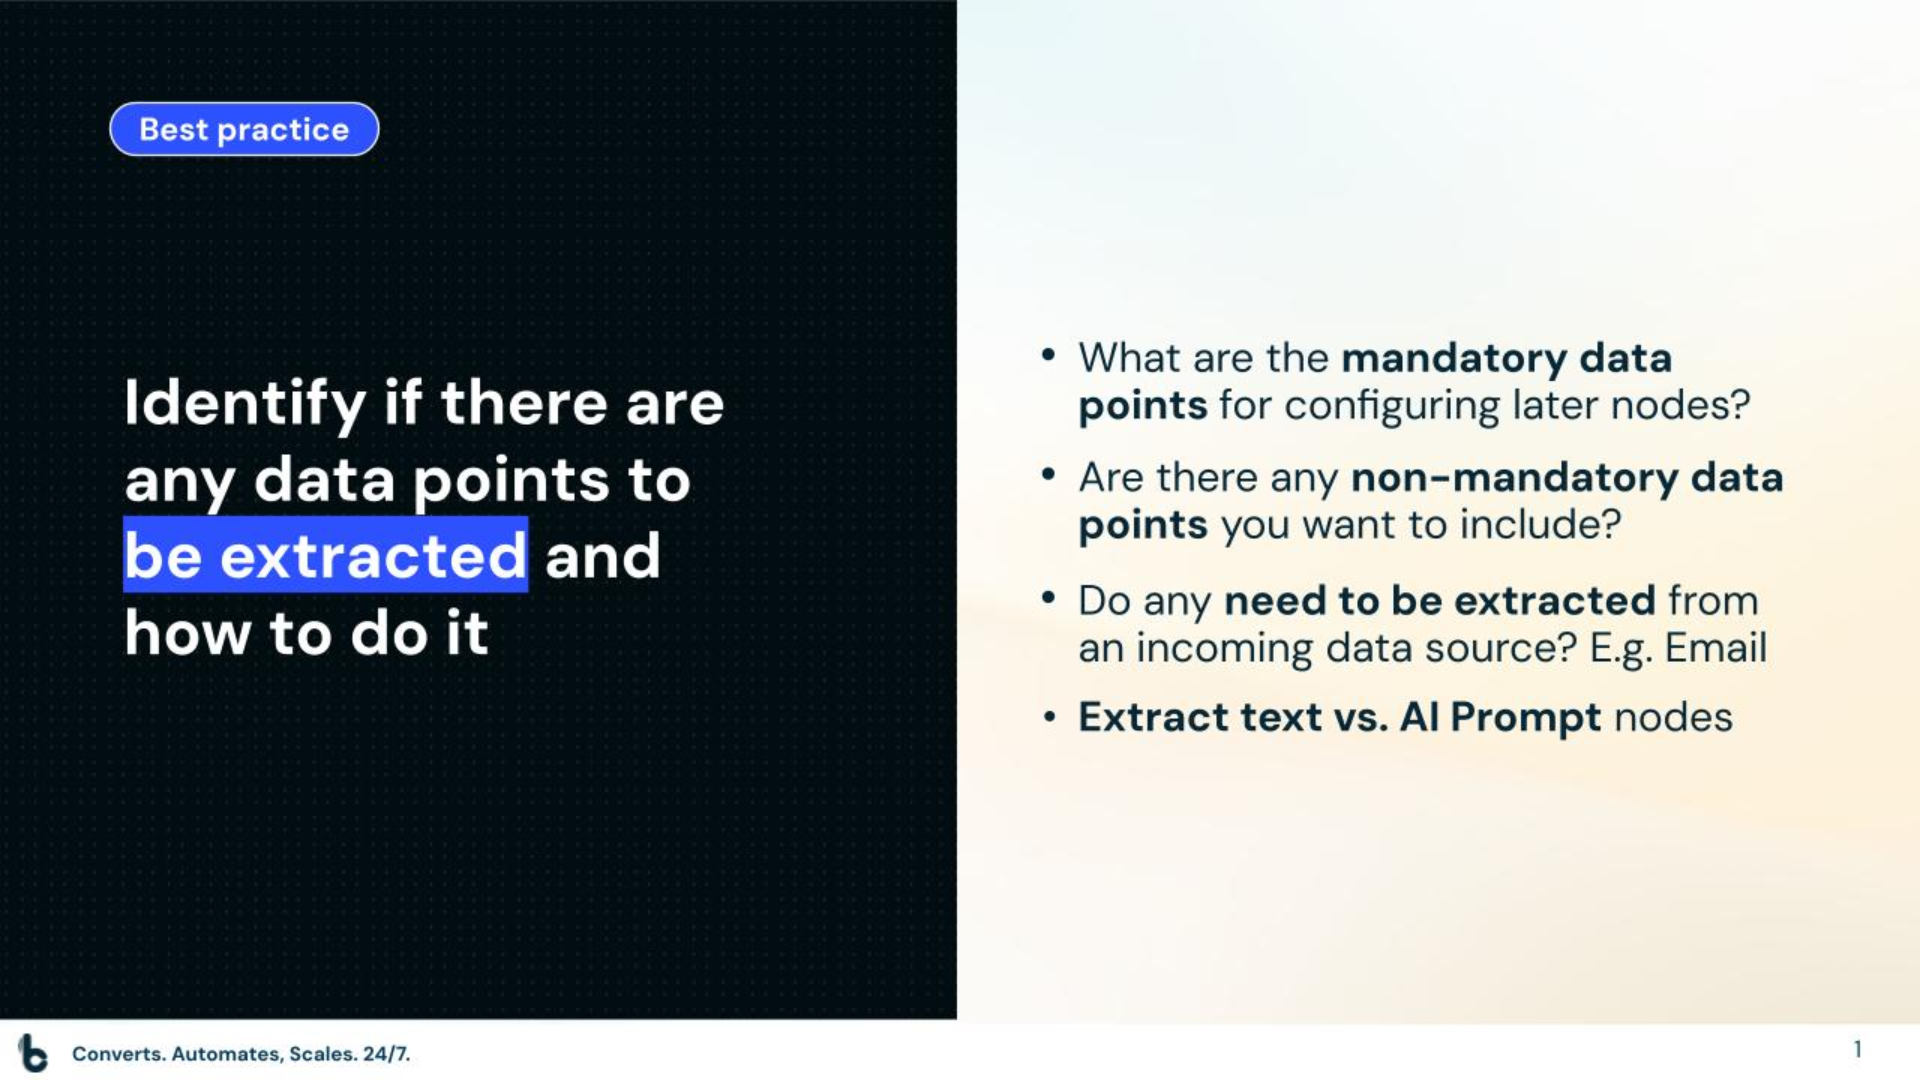
16. Theory: Defining extraction needs
A best practice when building a workflow is to identify if any data points must be extracted from earlier data sources in order to configure later nodes in the workflow.
To do this:
Identify which data points are mandatory for configuring the actions that make up your workflow.
Define which data points you want to include in later actions, even if they are not mandatory.
Check which of these are defaults outputs coming from other actions and which, if an, should be extracted from incoming data.
Finally, if you do need to extract data decide which extraction node should be used — an Extract text or an AI prompt node.
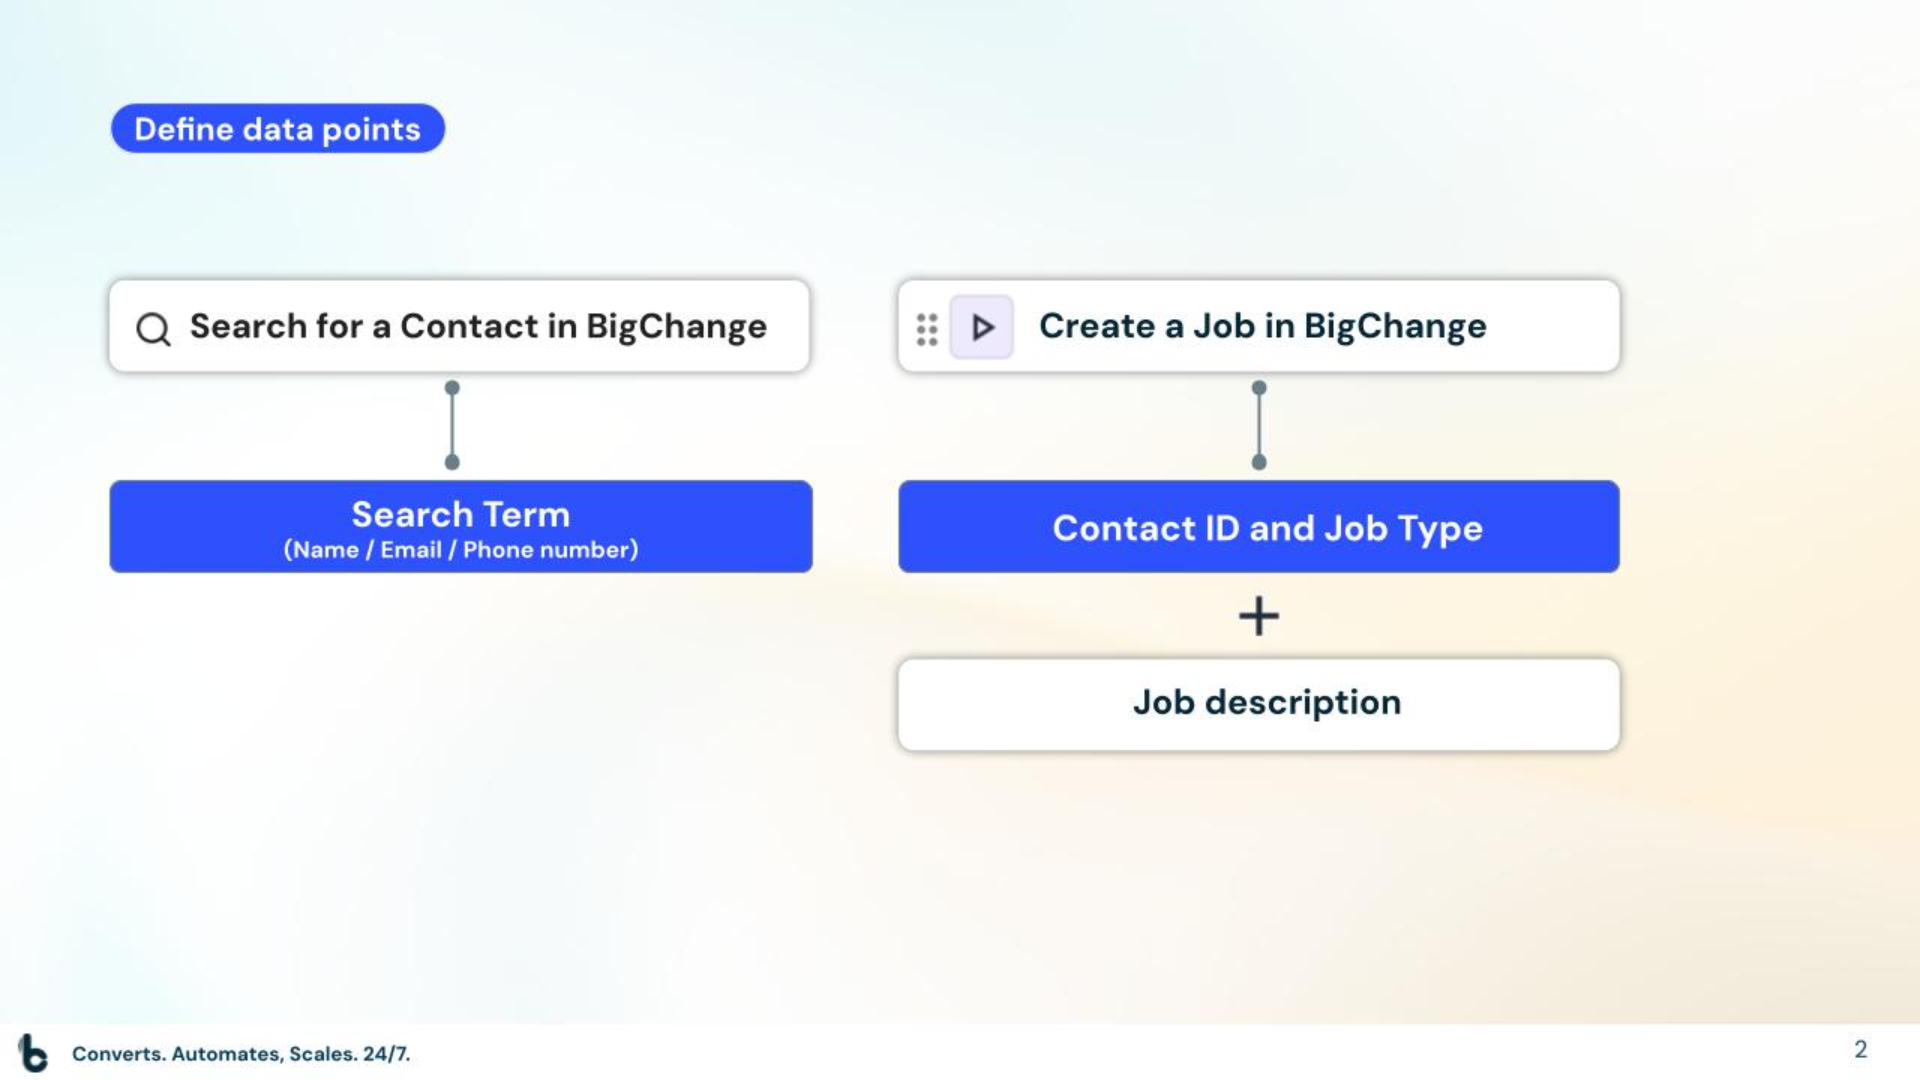
17. Defining extraction needs in this example
Mandatory fields:
To configure the Search Contact in BigChange node, one Search Term — either Contact Name, Email or Phone number is mandatory.
For the Create a Job in BigChange node, the Contact ID and Job Type are mandatory.
Non-mandatory fields:
Smith and Co want to include the Job Description, which are the customers' requests in the form.
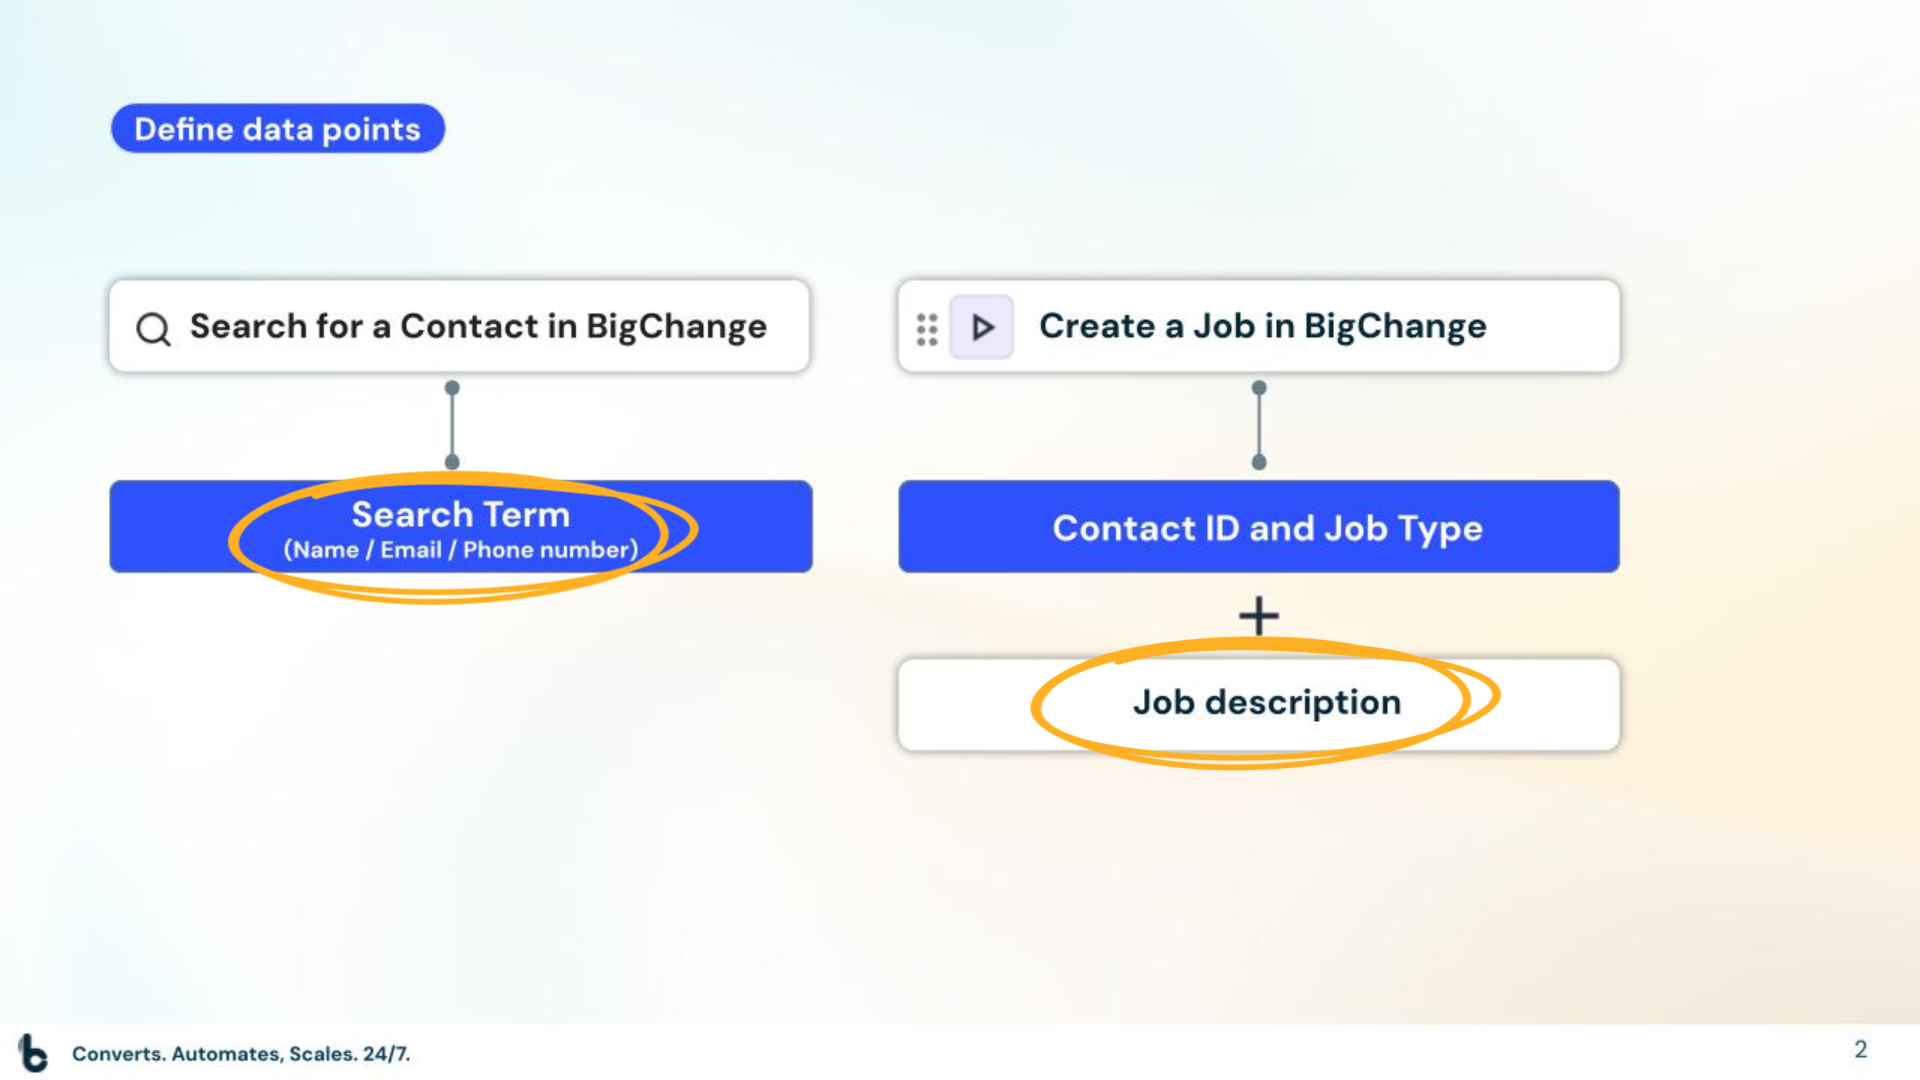
18. Defining extraction needs
Extraction not needed:
The Contact ID is output as default when a contact is found using the Search Contact in BigChange node.
Job Type can be inserted manually.
Extraction required:
The Search Terms used to search for a contact must be extracted (in this case, we will extract the Email address)
Job Description, while not mandatory, is something that should be included in this workflow when creating a job in BigChange and must also be extracted.
19. Defining extraction needs
Since the emails are in a structured format, the Extract Text node can be used to define the data points to be extracted.
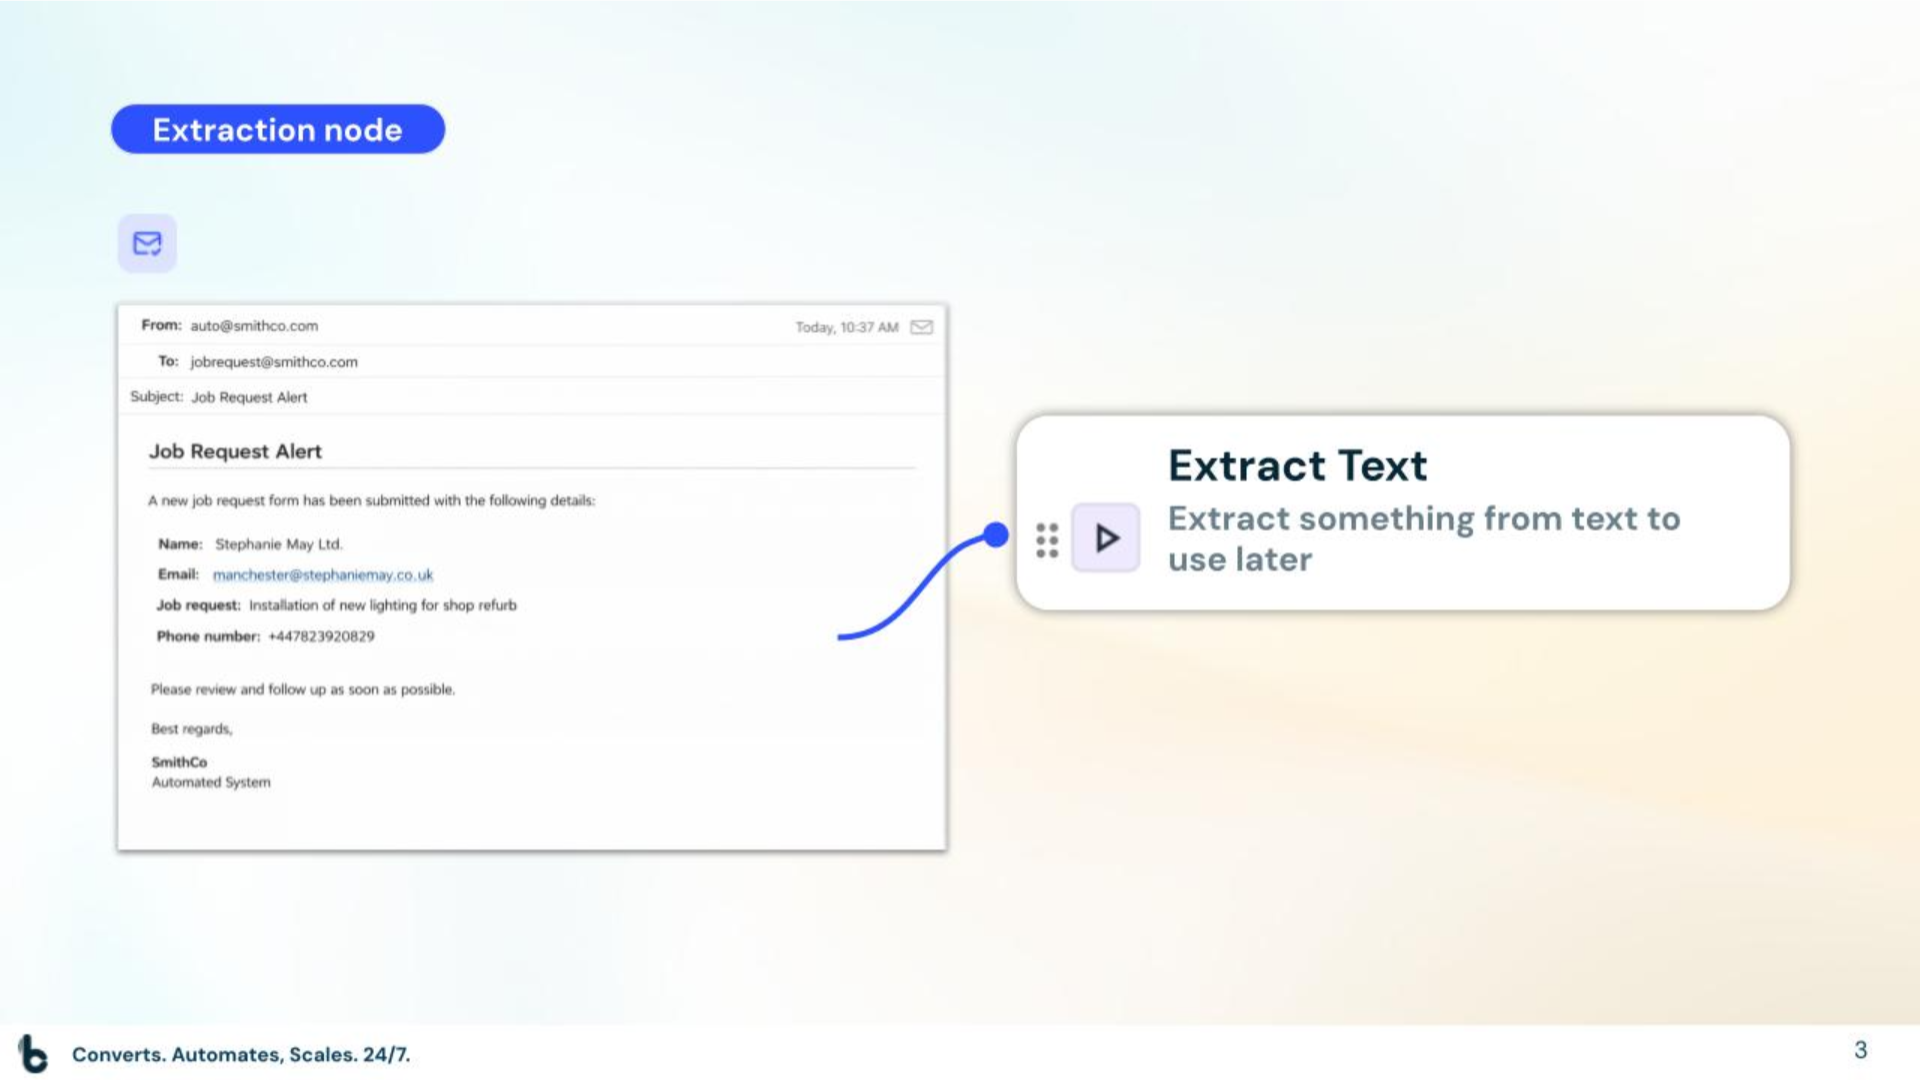
20. Add an Extract Text node
Drag and drop the Extract Text node into the editor.
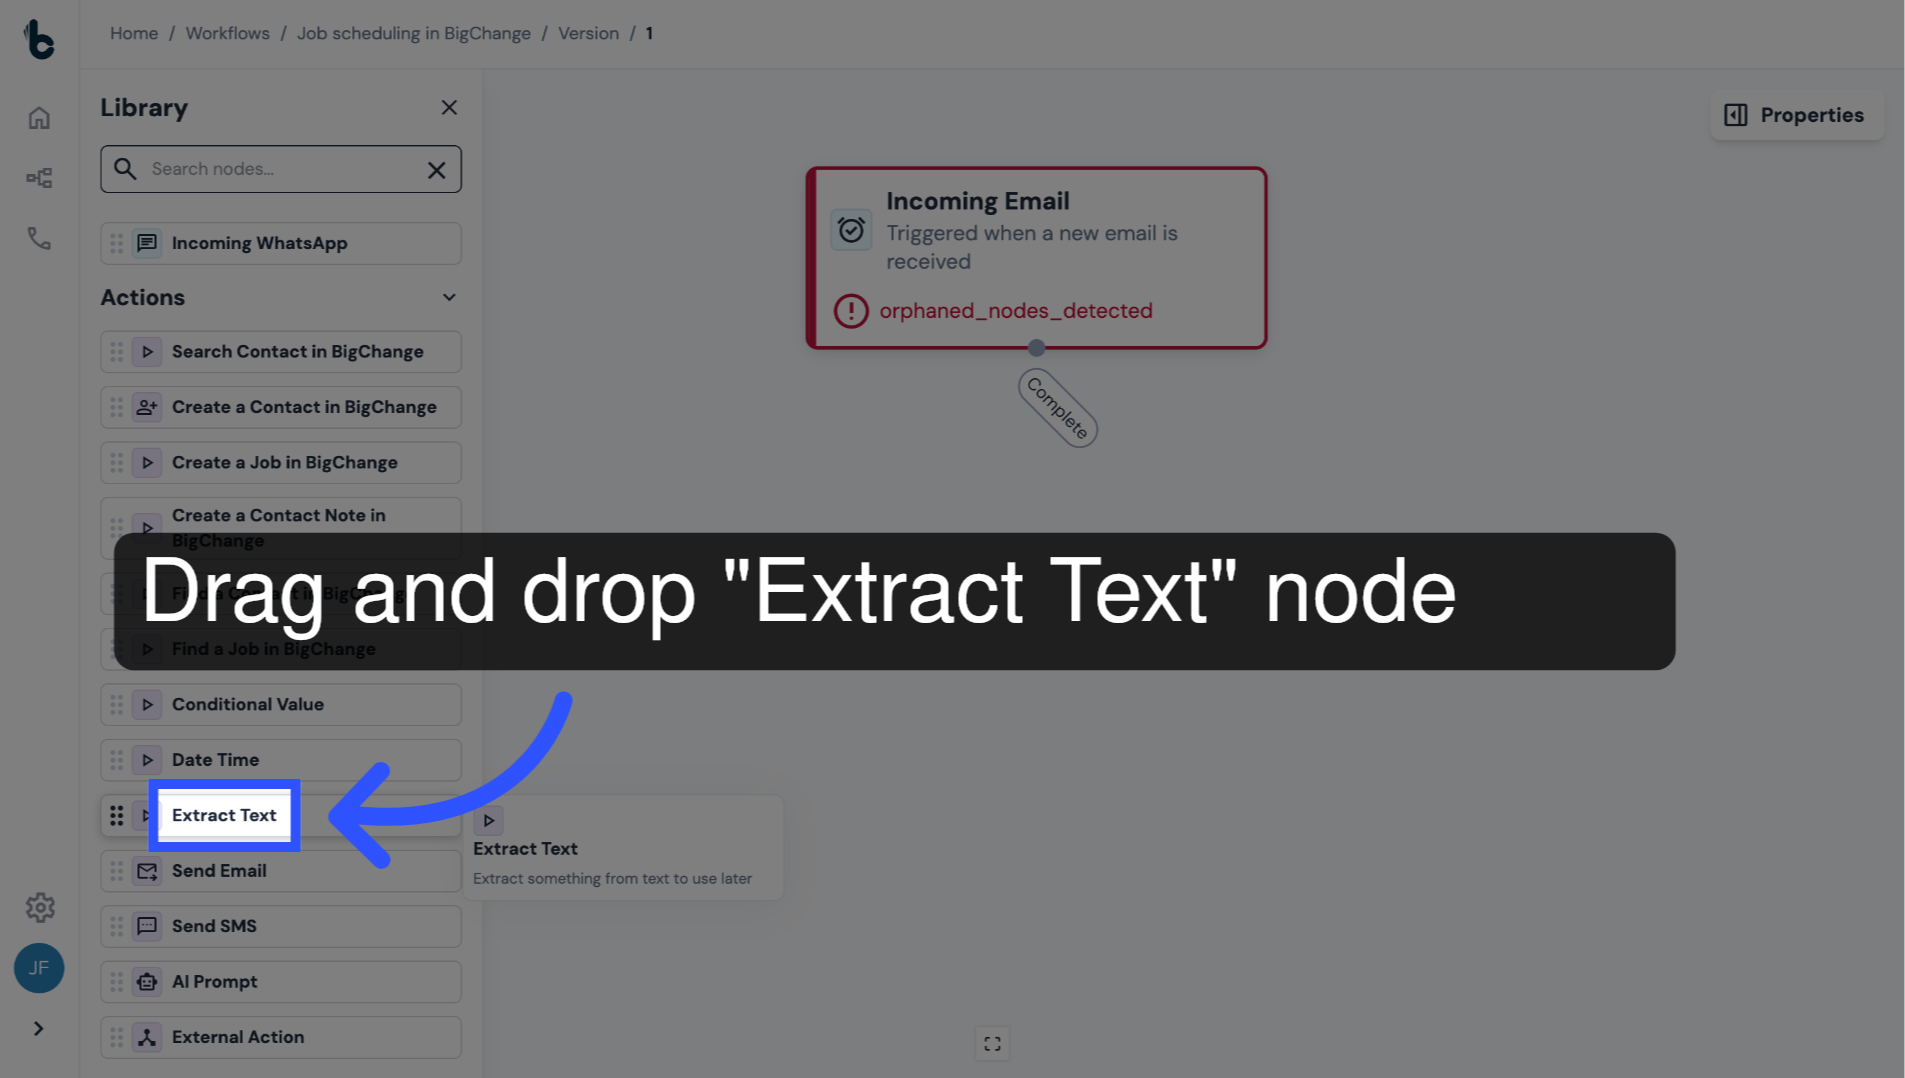
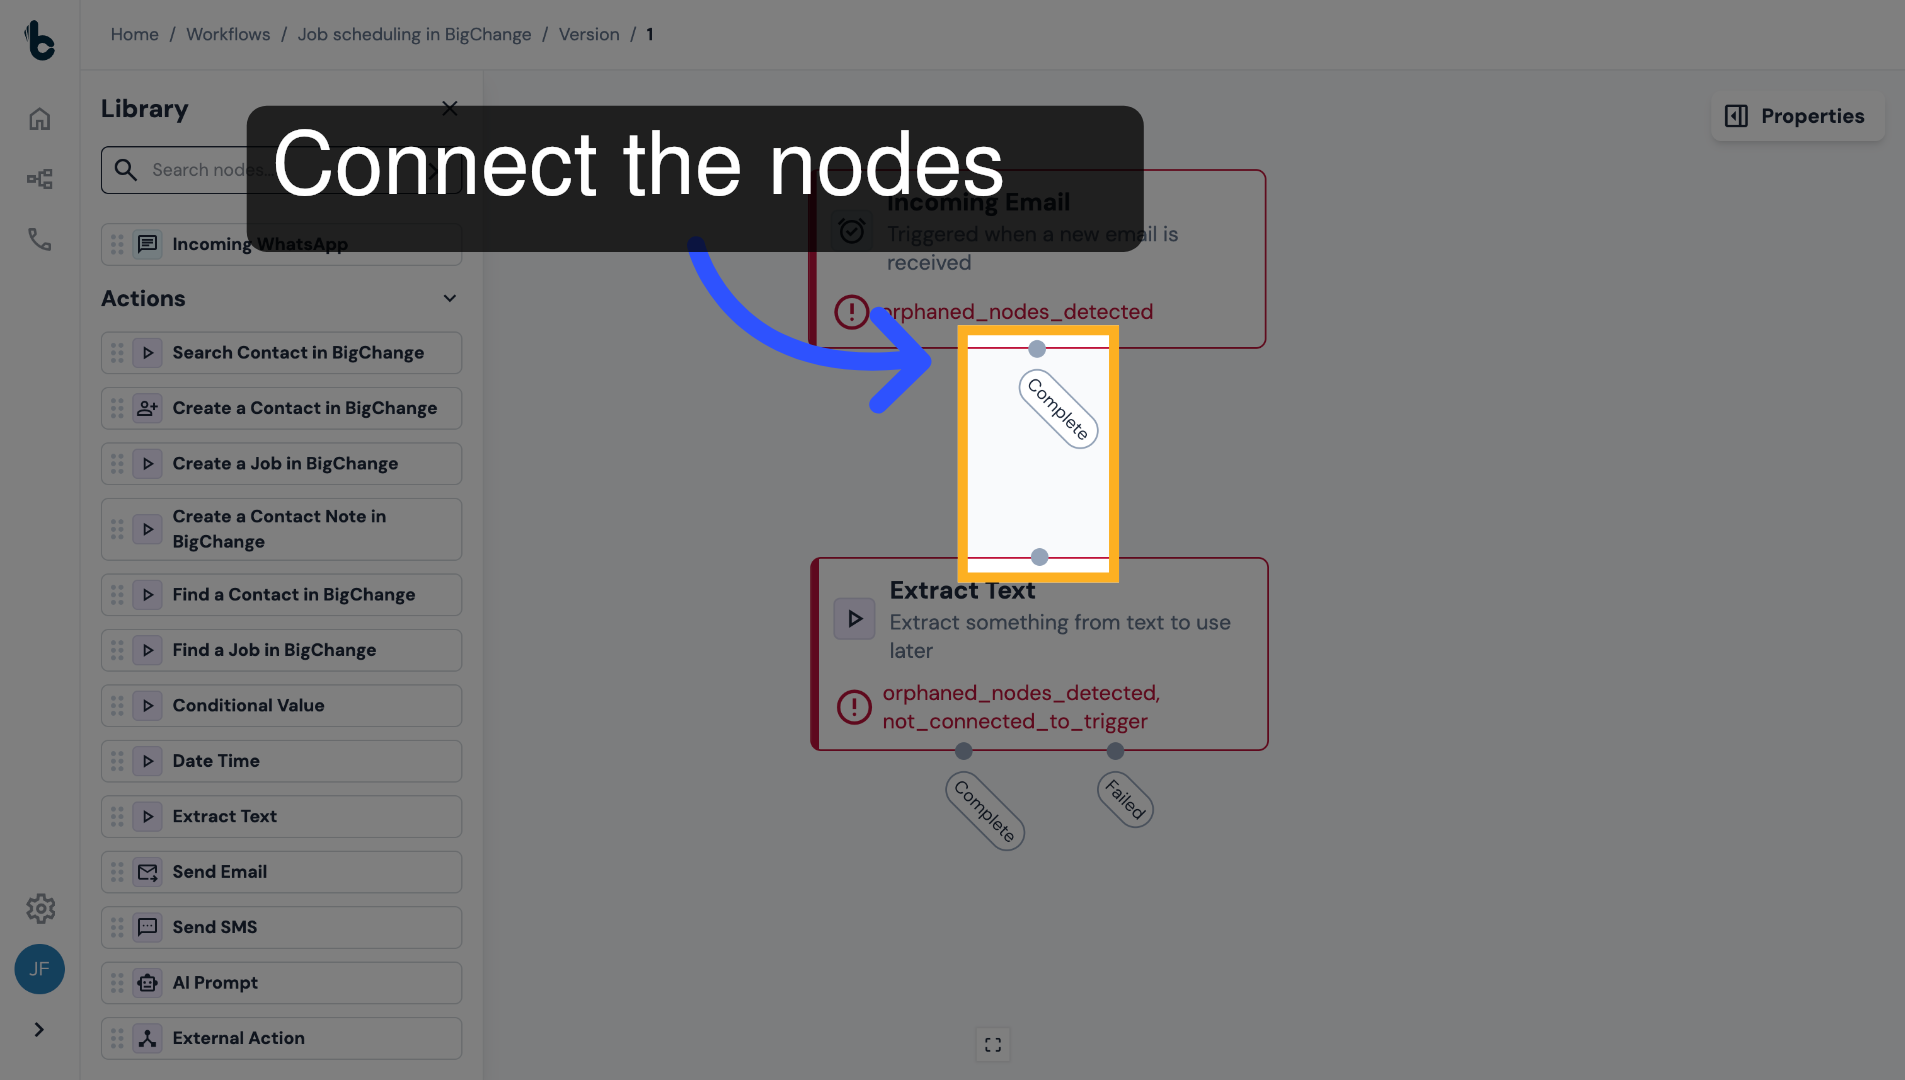
21. Connect the nodes
Connect it to the Incoming Email node.
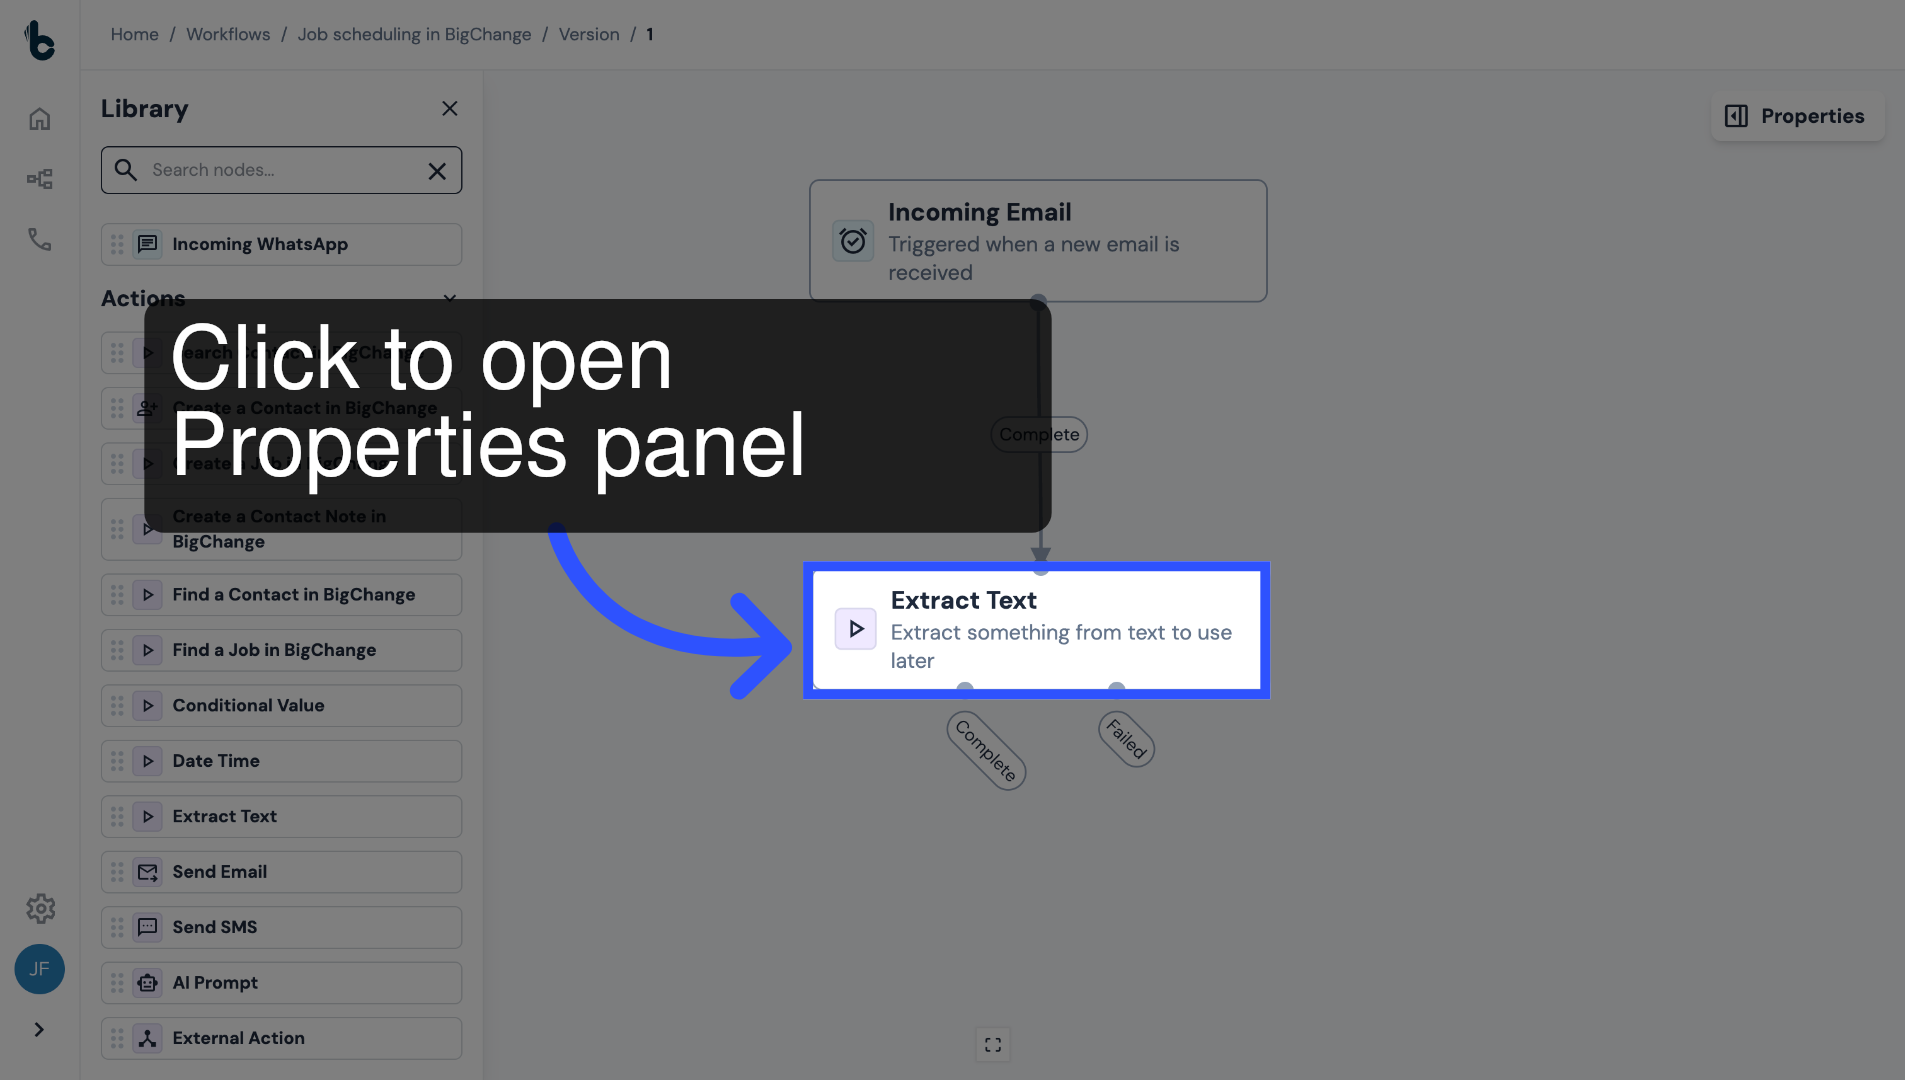
22. Click to configure
Click on the node to open the Properties panel.
23. Map Text to extract from field
To map the relevant variable into the Text to extract from field, click + Add a Variable.
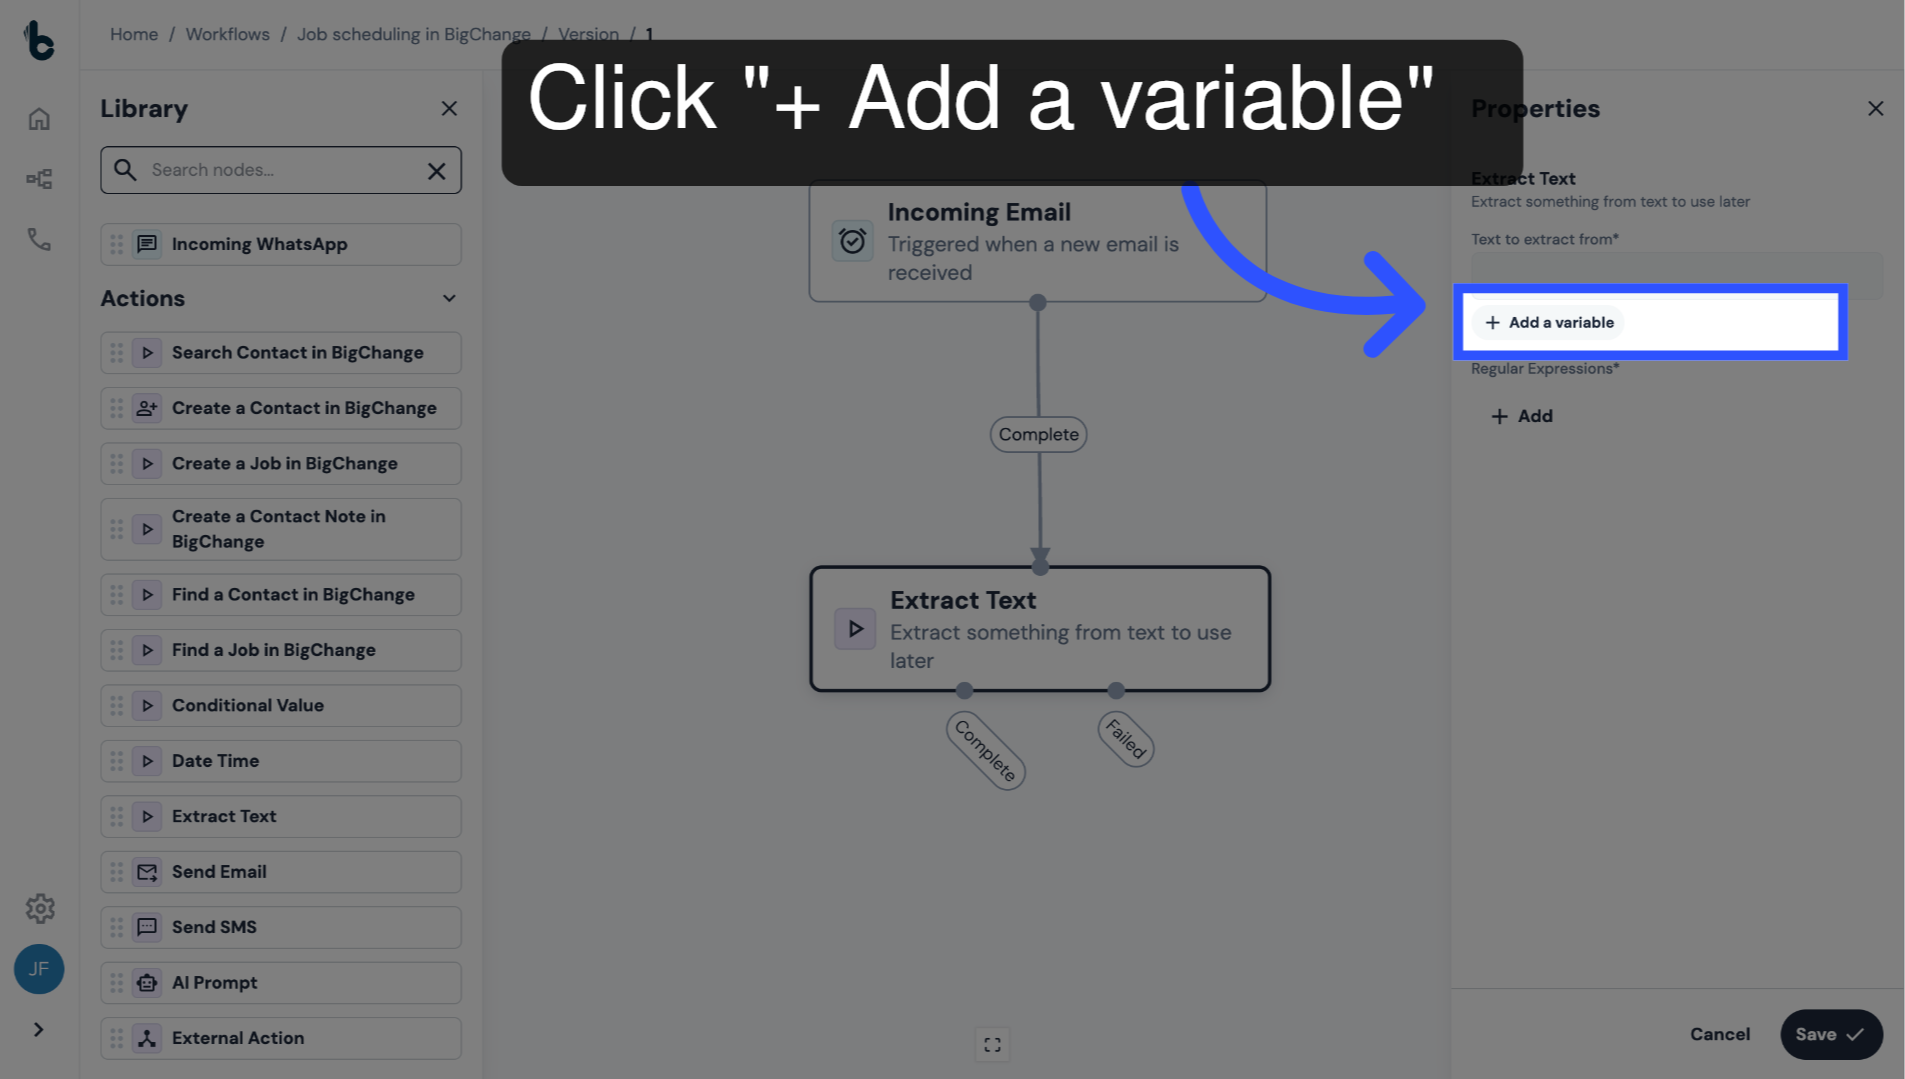
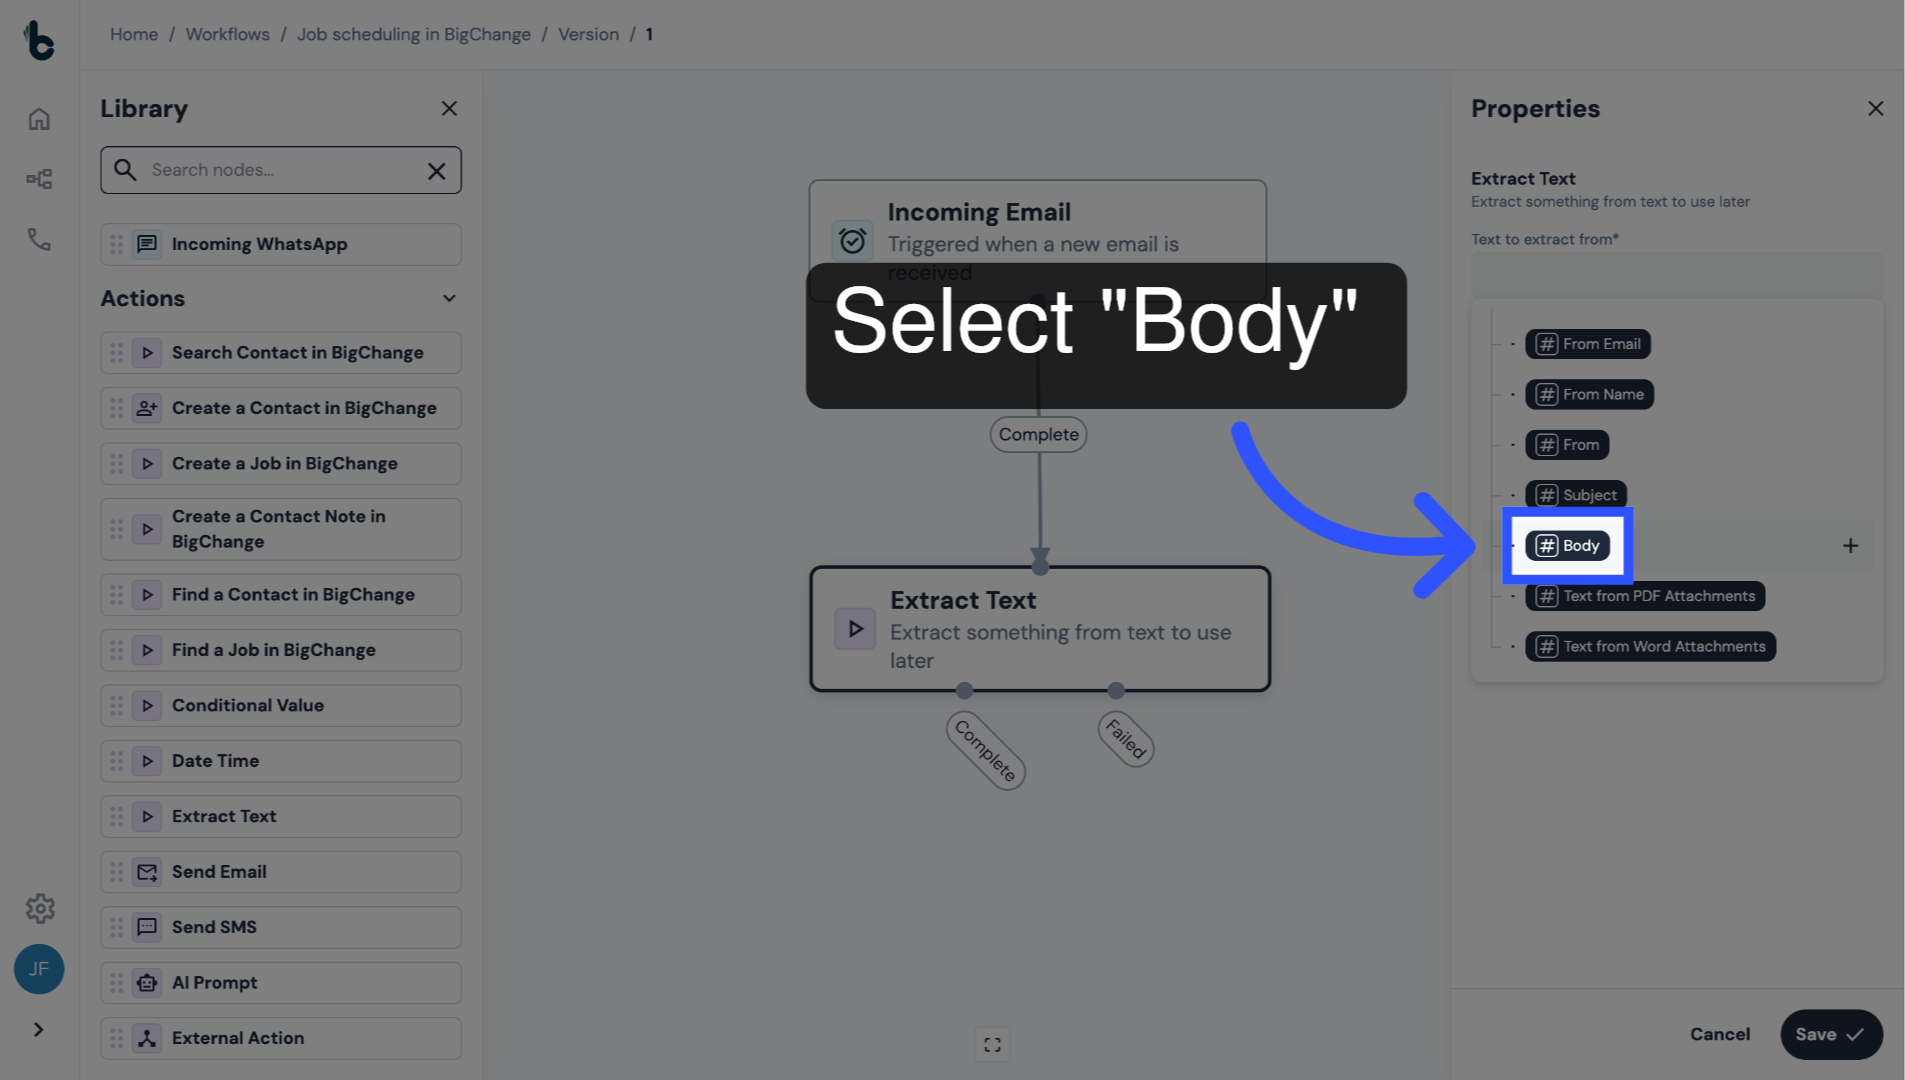
24. Select Body Variable
Select the Body variable from the dropdown.
In this example, the data points are being extracted from the body of the auto-generated emails.
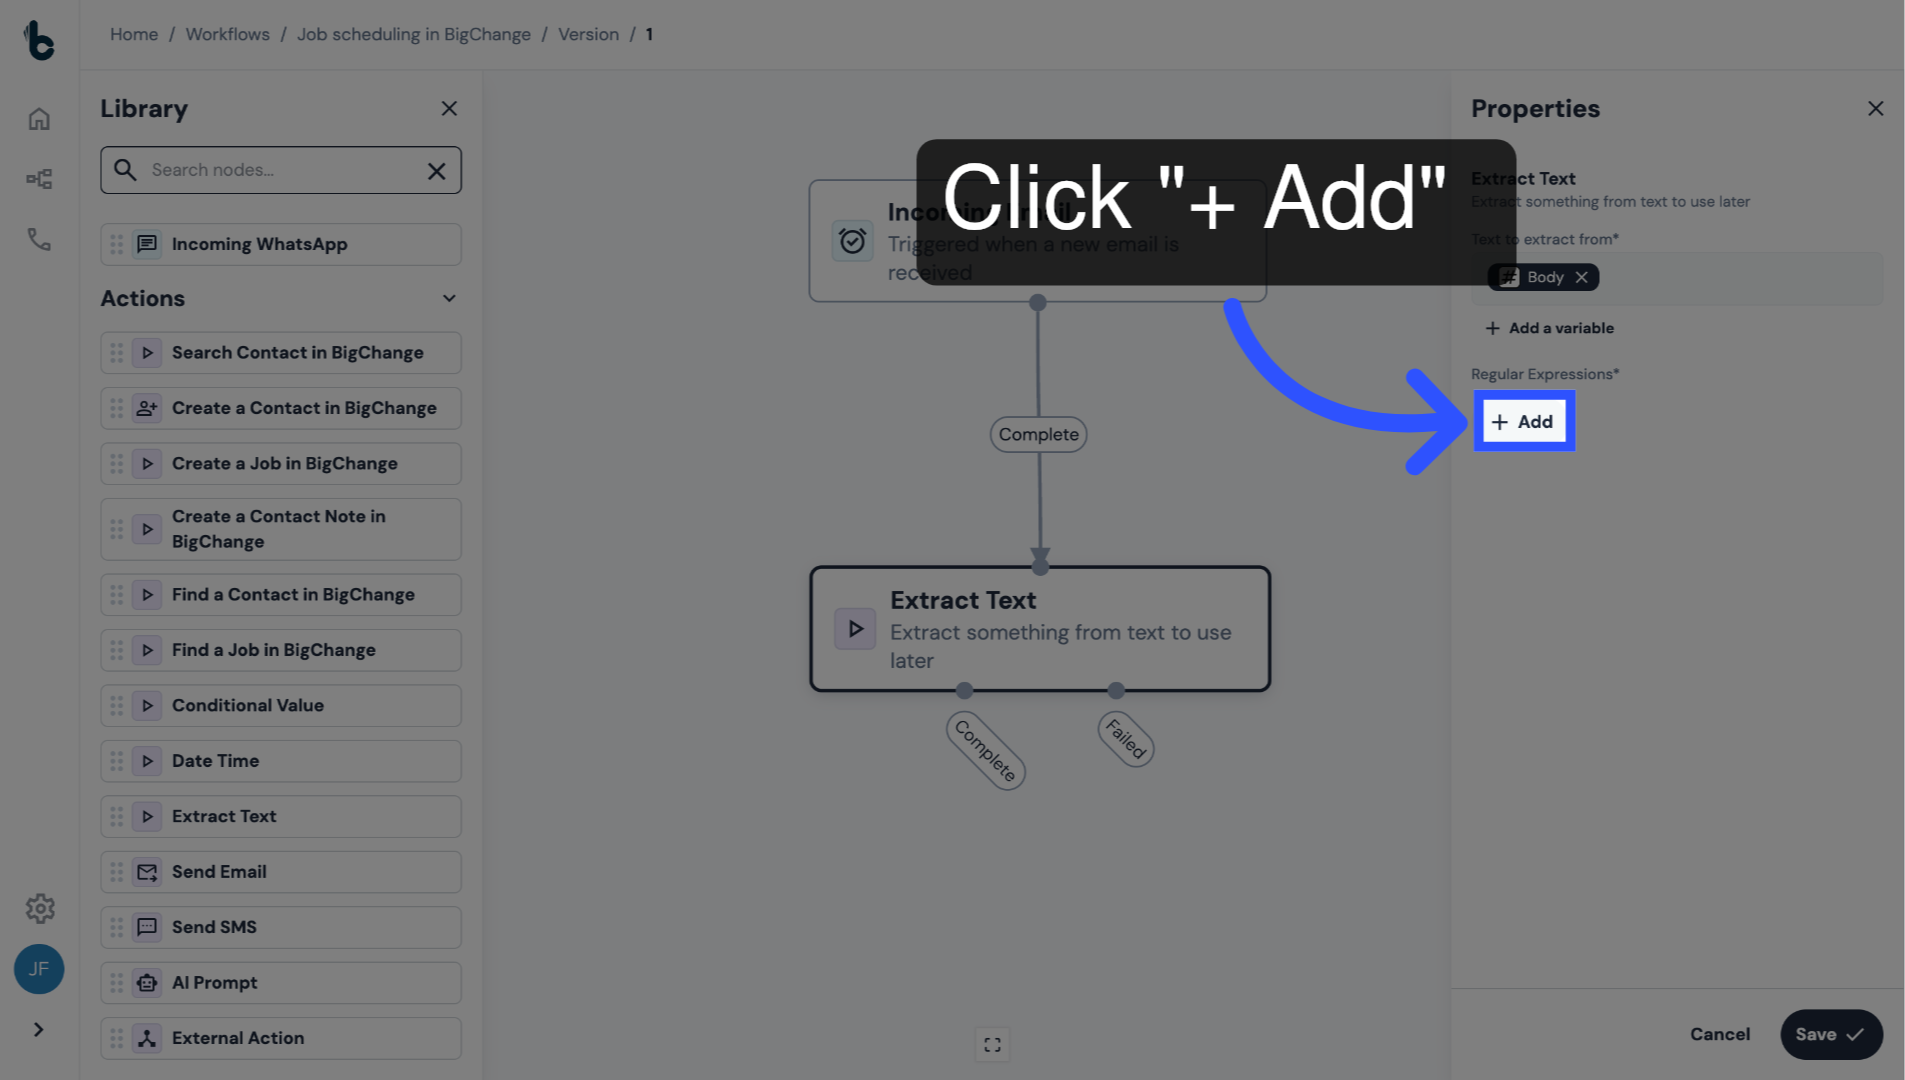
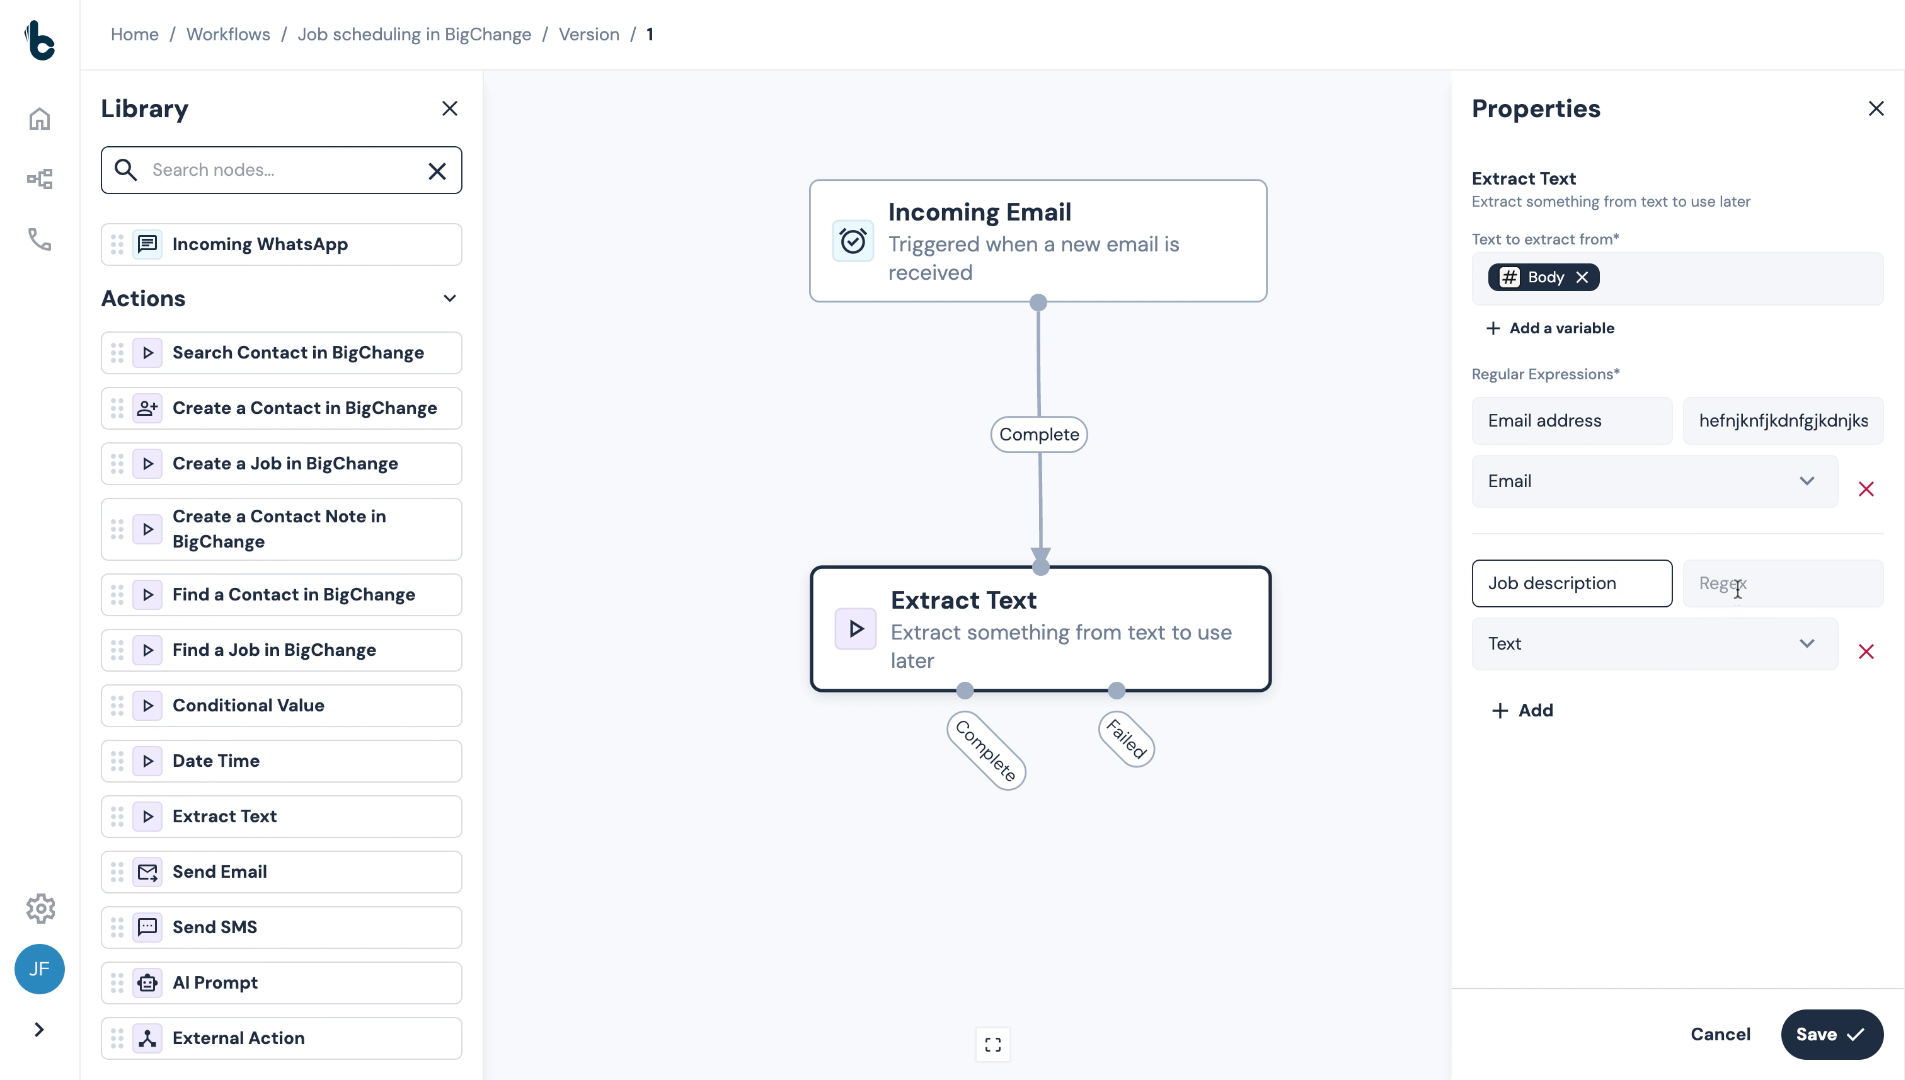
25. Regular Expression section
Click + Add to add the first output.
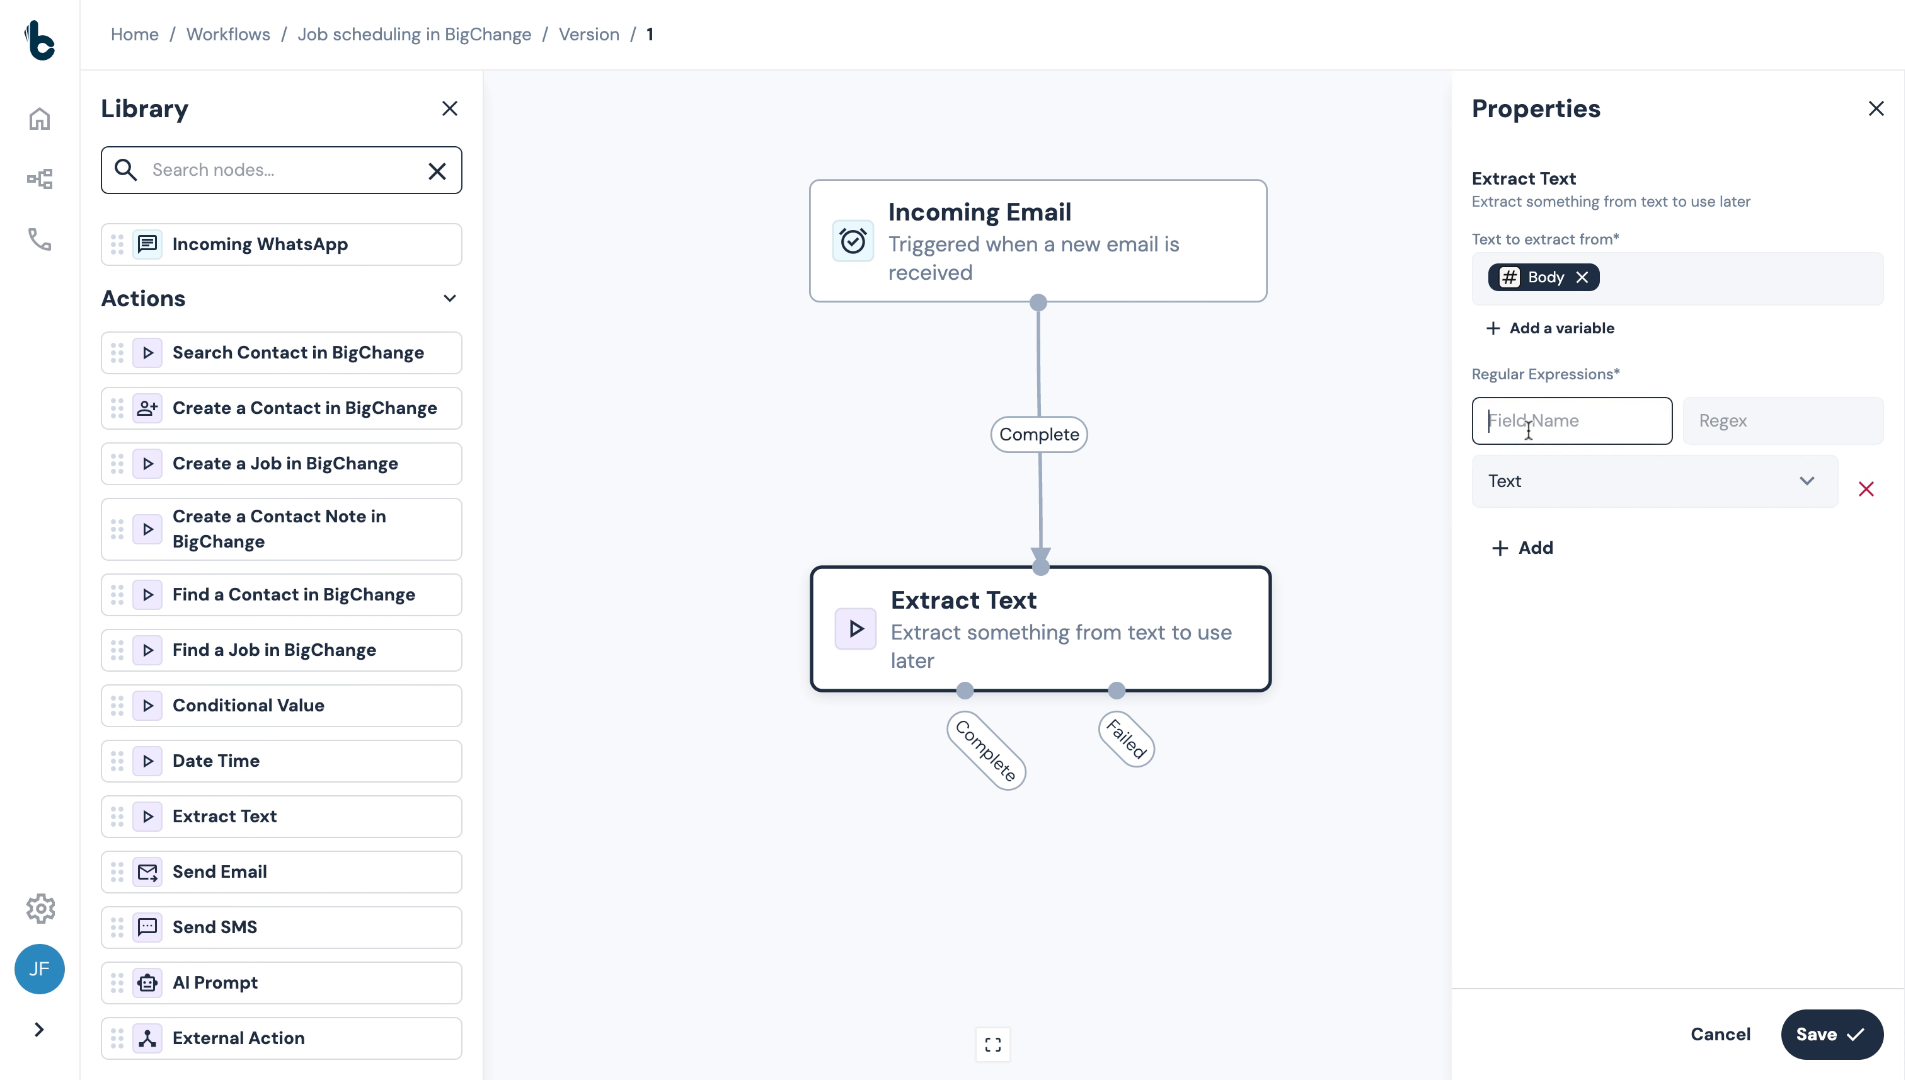
26. Name the first output
Add the name of the first output you want to extract from the email body, in this case, Email address.
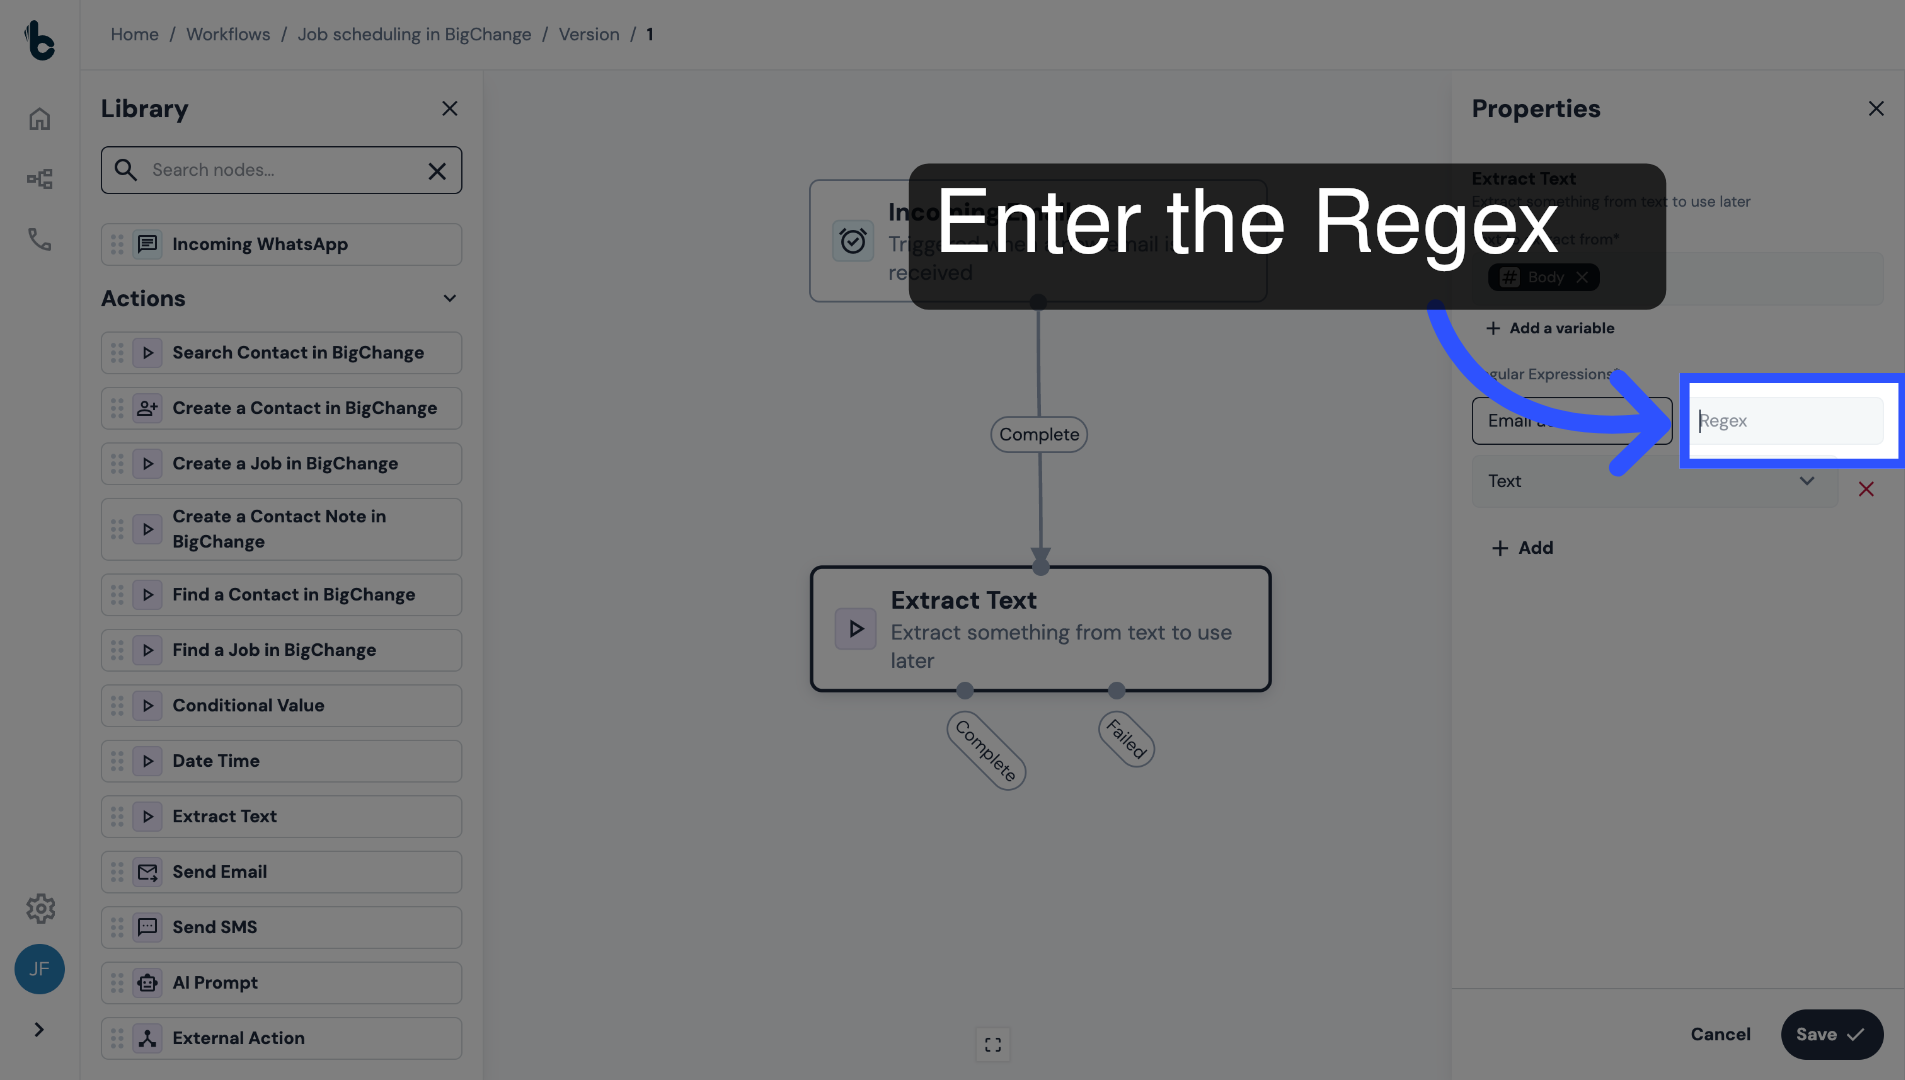
27. Enter the Regex
Then enter the regular expression that will extract the Email address from the email body.
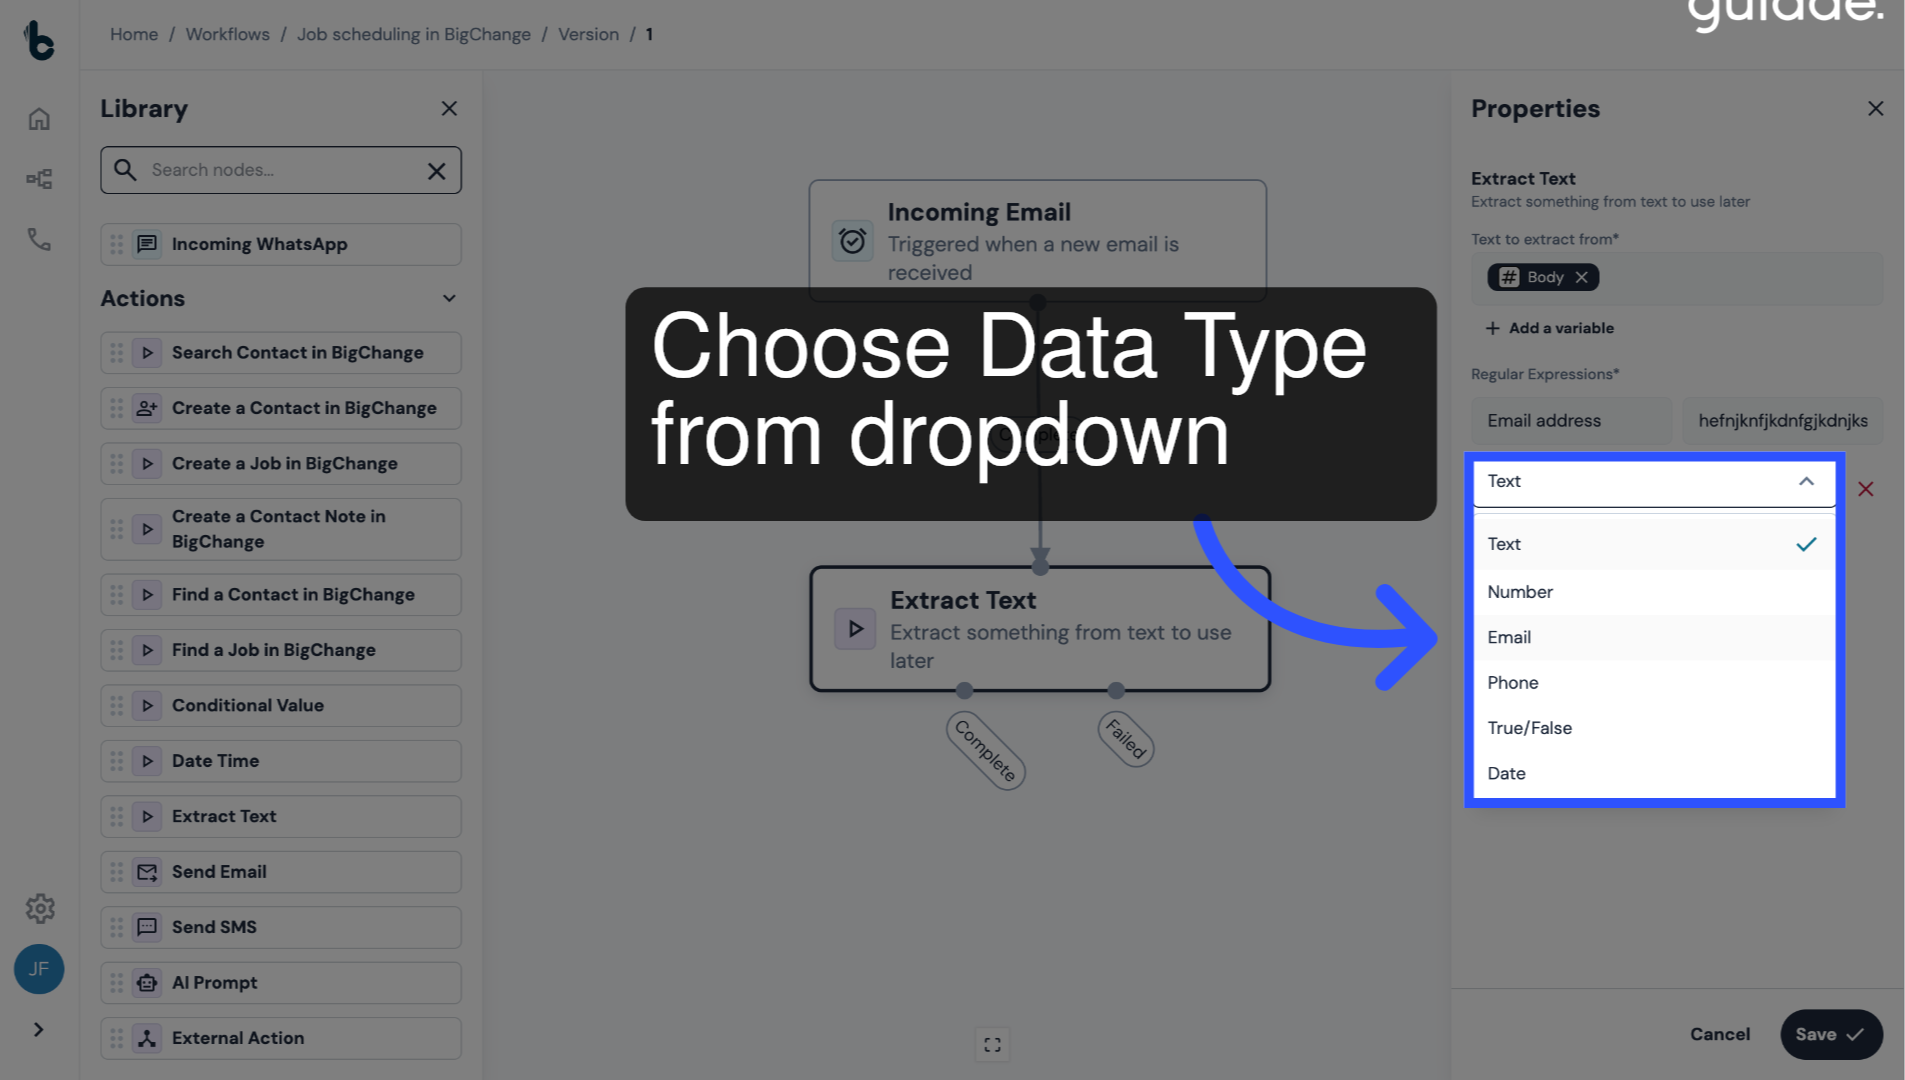
28. Choose Data Type
Finally, select the type of data being extracted, which would be Email in this instance.
29. Click + Add to define another data point for extraction
To add an additional data point, click + Add.
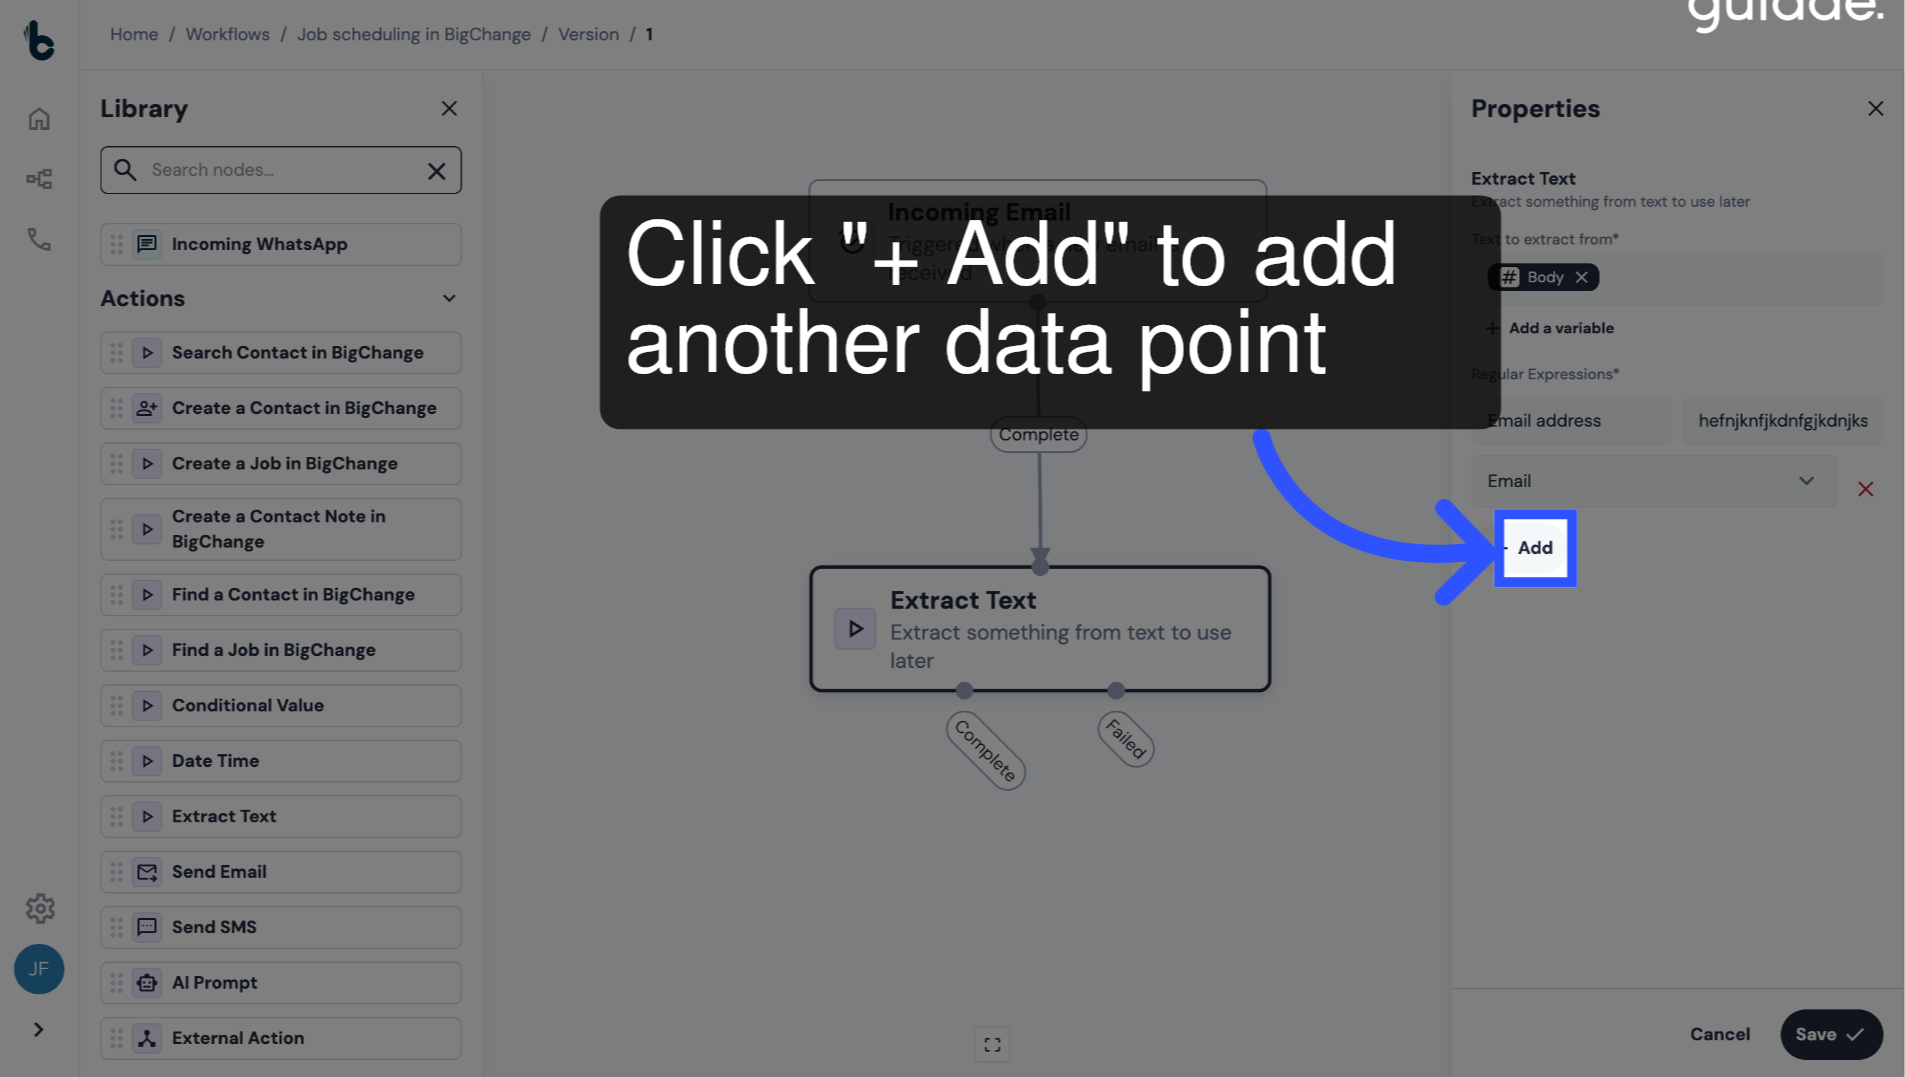
30. Populate the fields
Populate the Name, Regex and Data Type for the next variable, in this instance, the Job description.
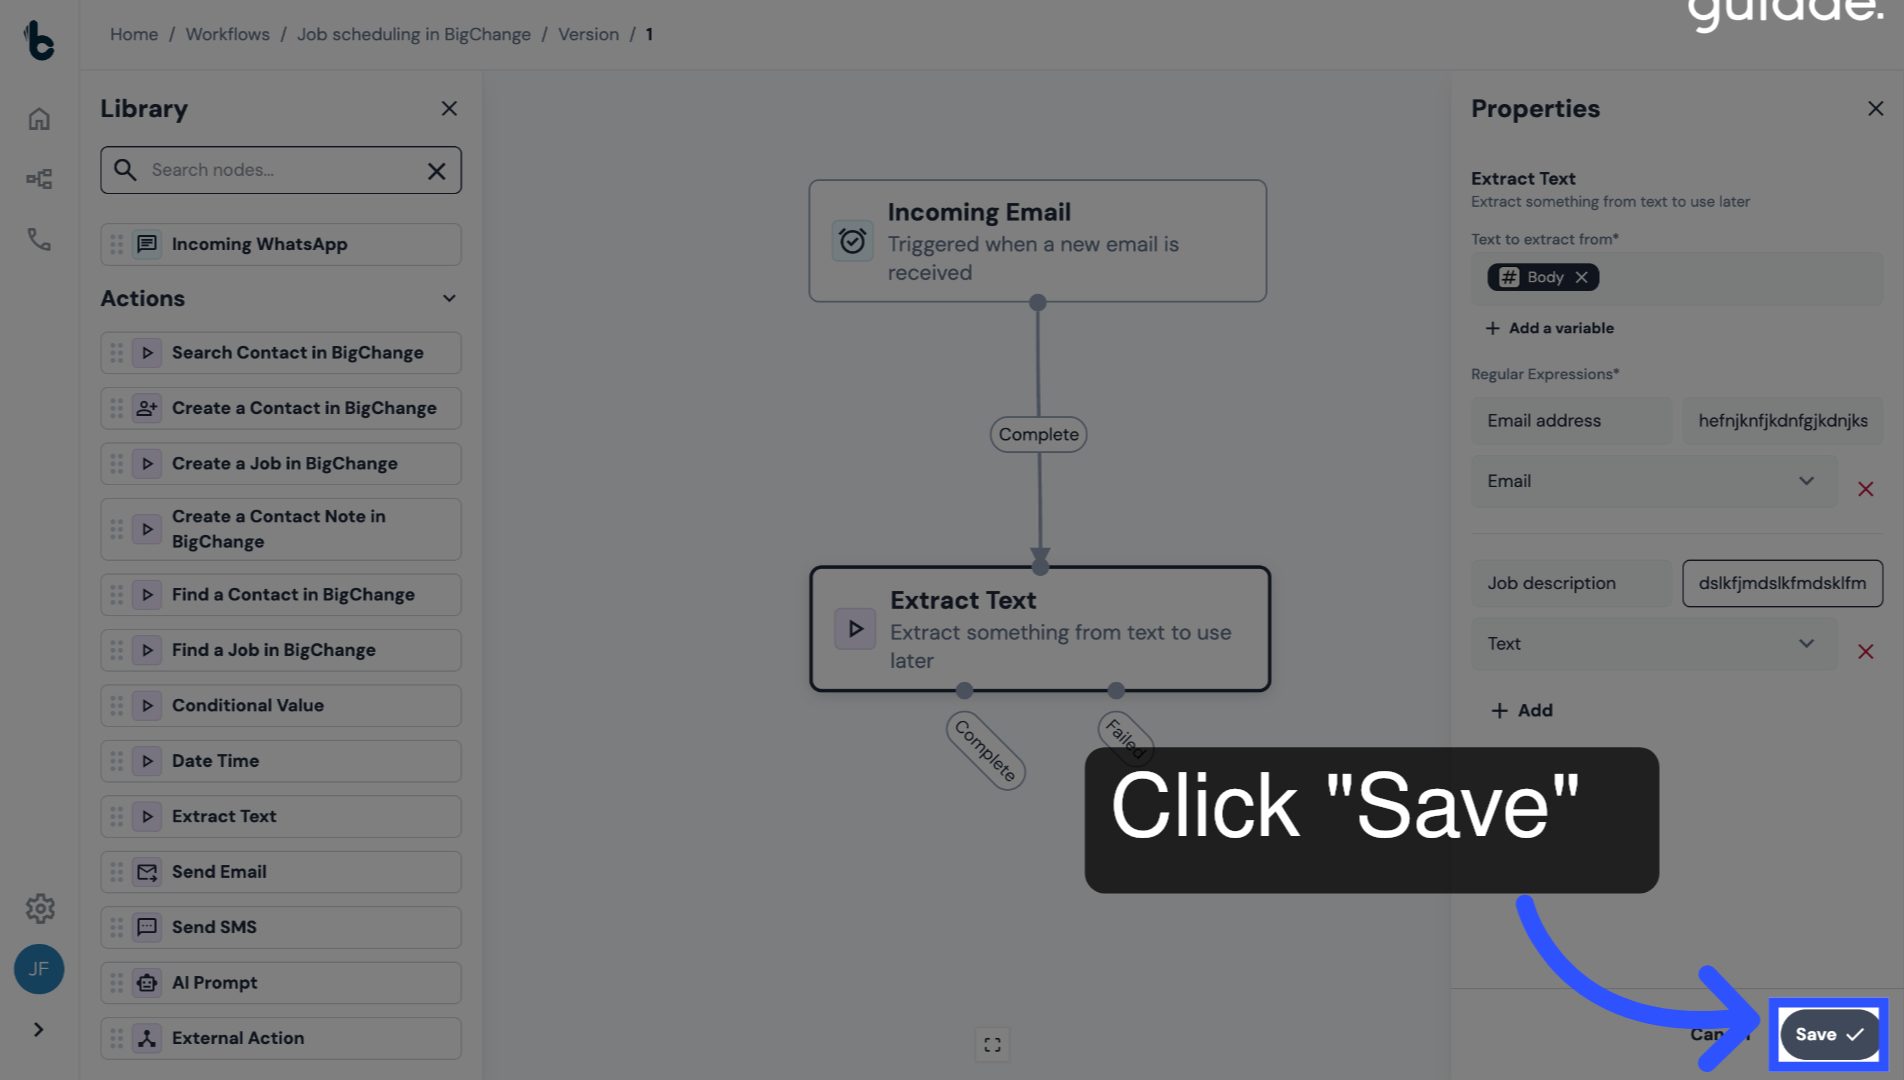
31. Save configuration
Click Save, to save the configuration.
32. 📚 Learn more
Learn more about configuring the Extract Text node in this guide.
33. Add a Search Contact in BigChange node
Drag and drop the Search Contact in BigChange node into the empty space.
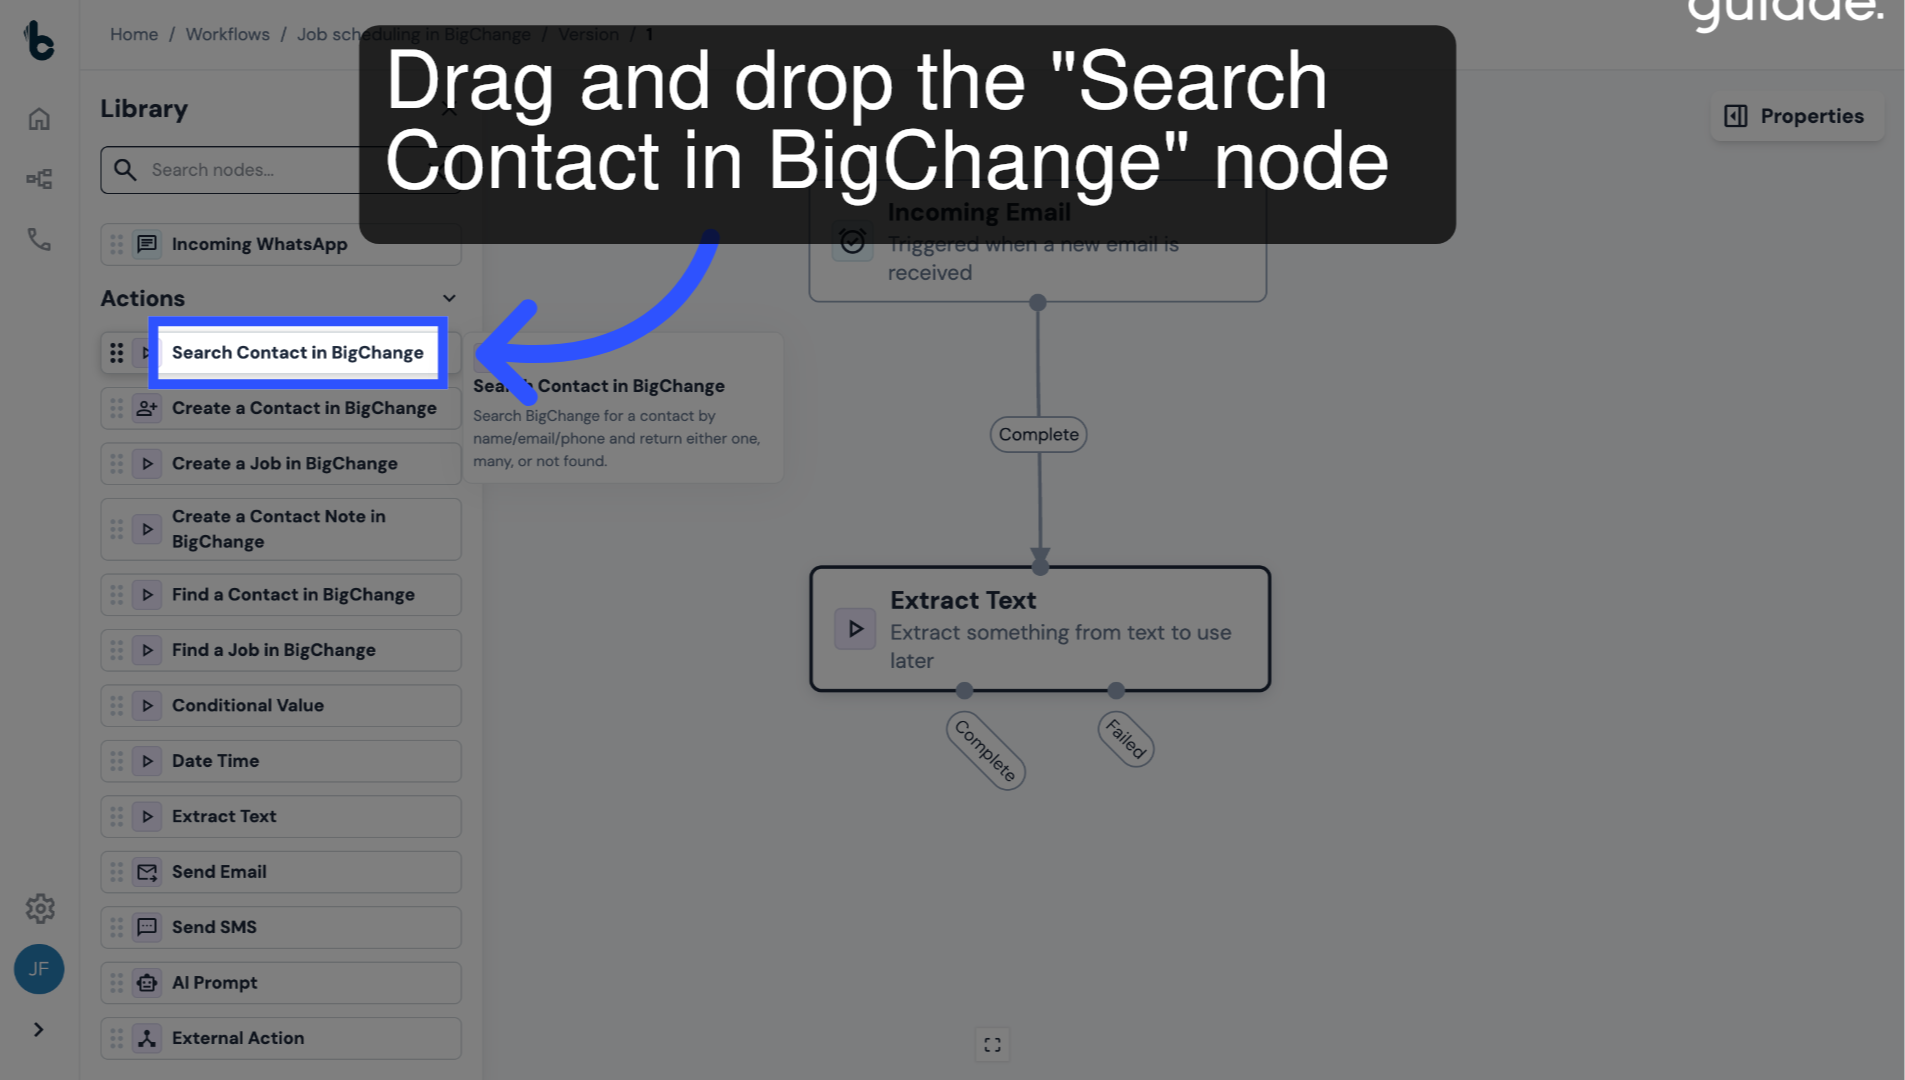
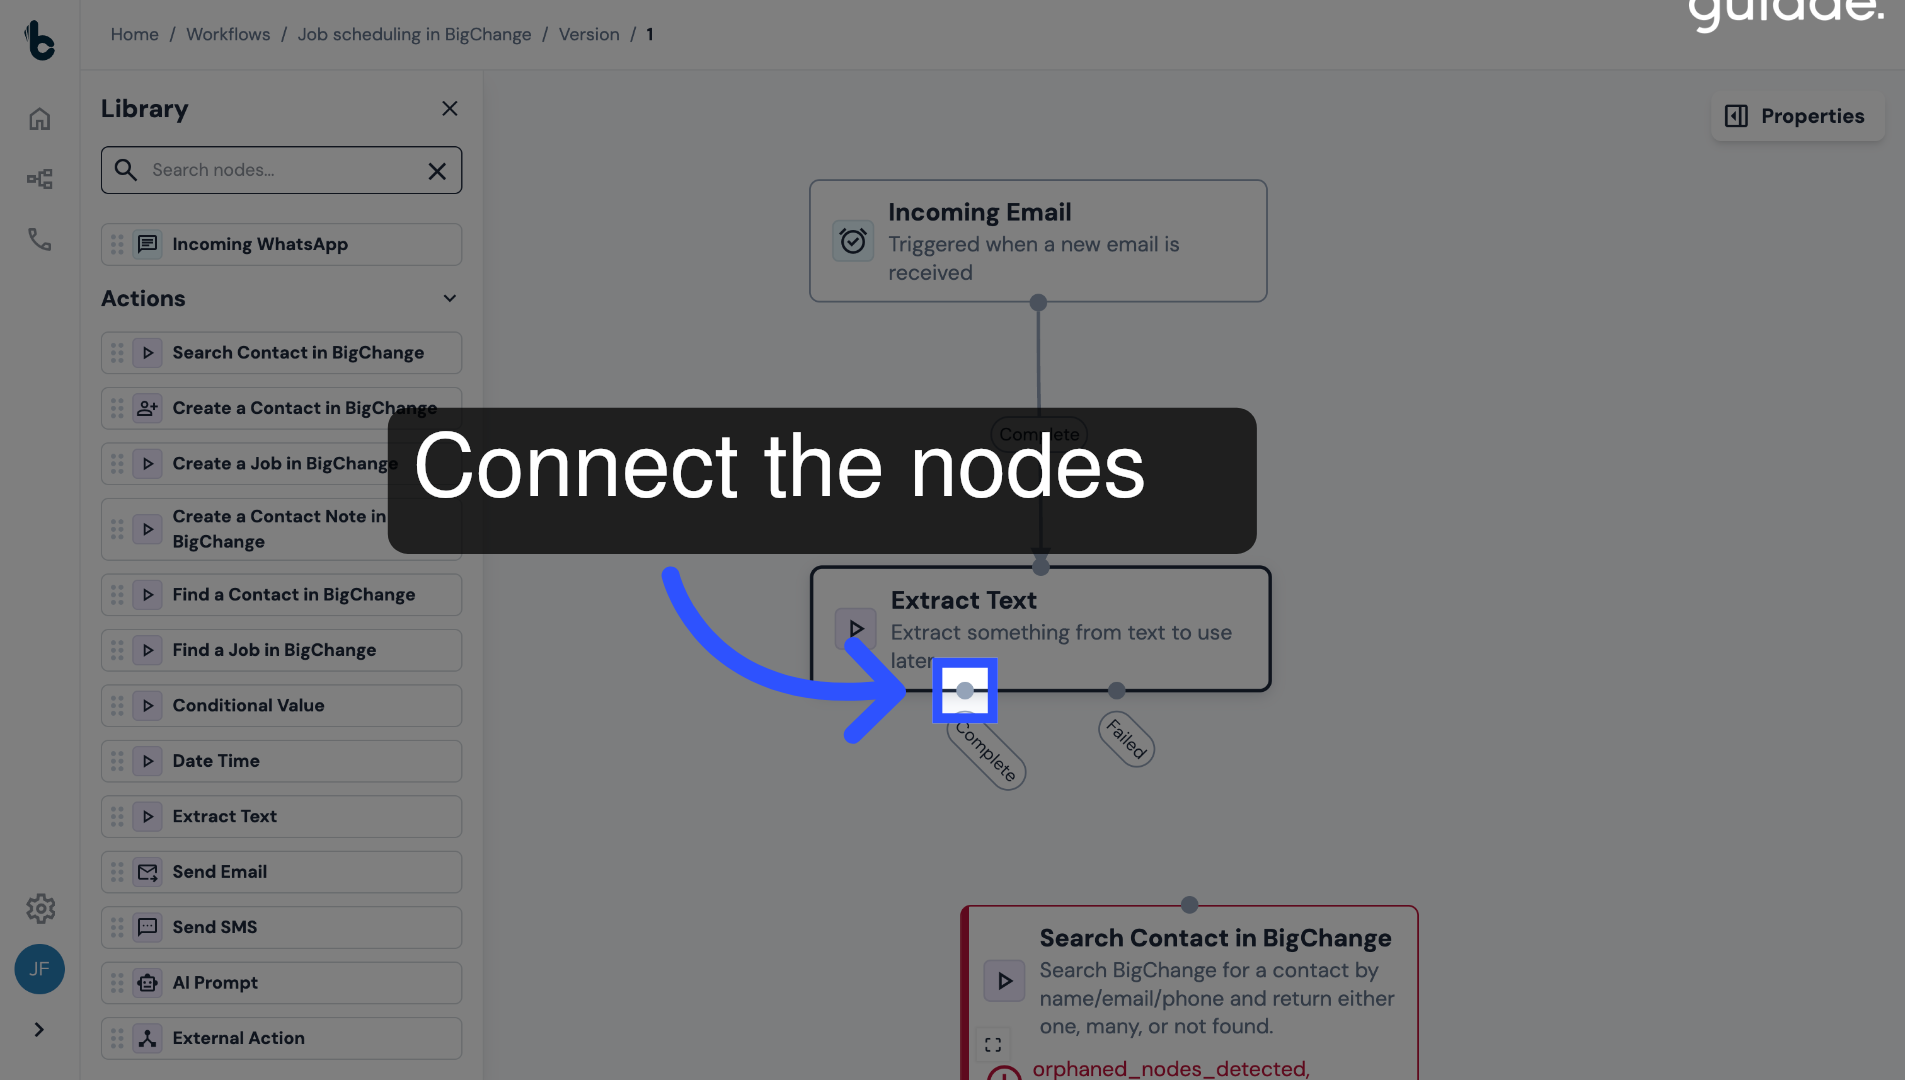
34. Connect nodes
Connect it to the Complete branch of the Extract Text node.
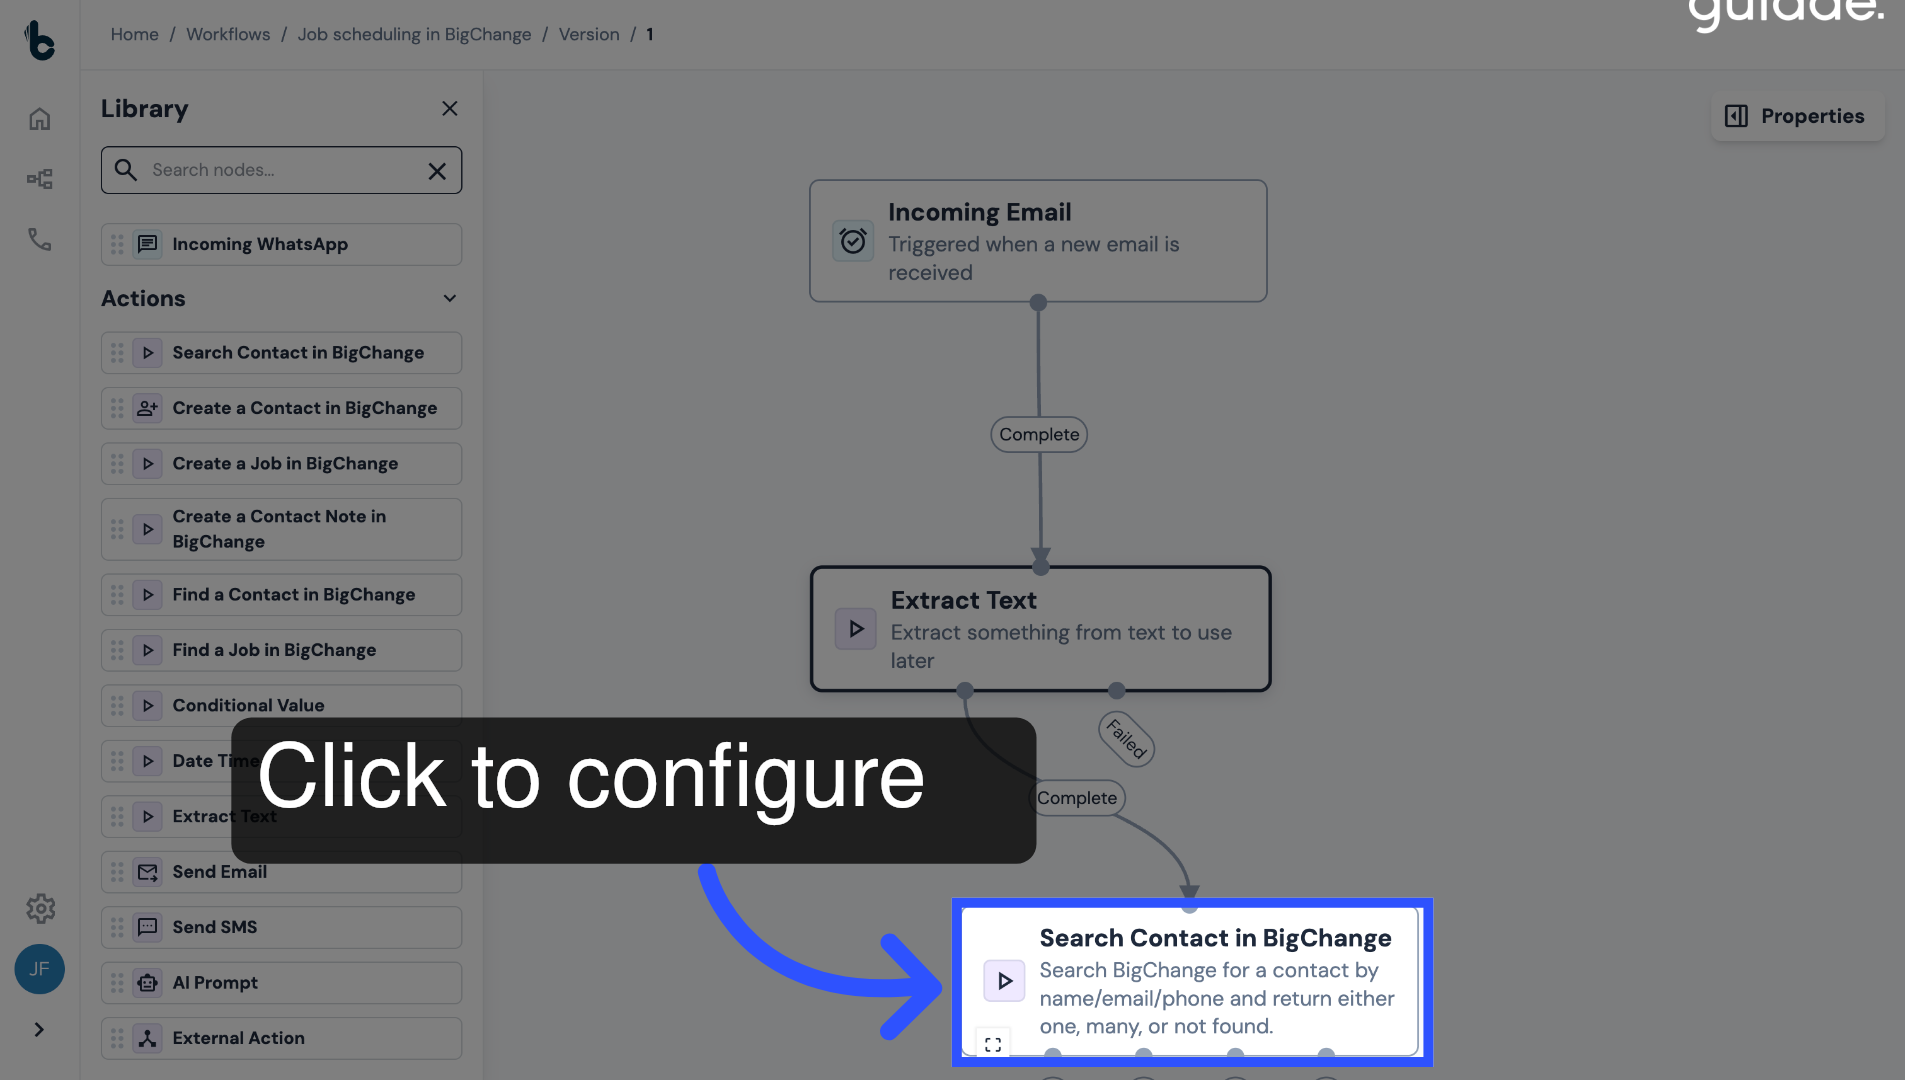
35. Open the Properties panel
Click on the node to open the Properties panel.
36. Configure the Search Term field
To map the relevant search term, click + Add a variable.
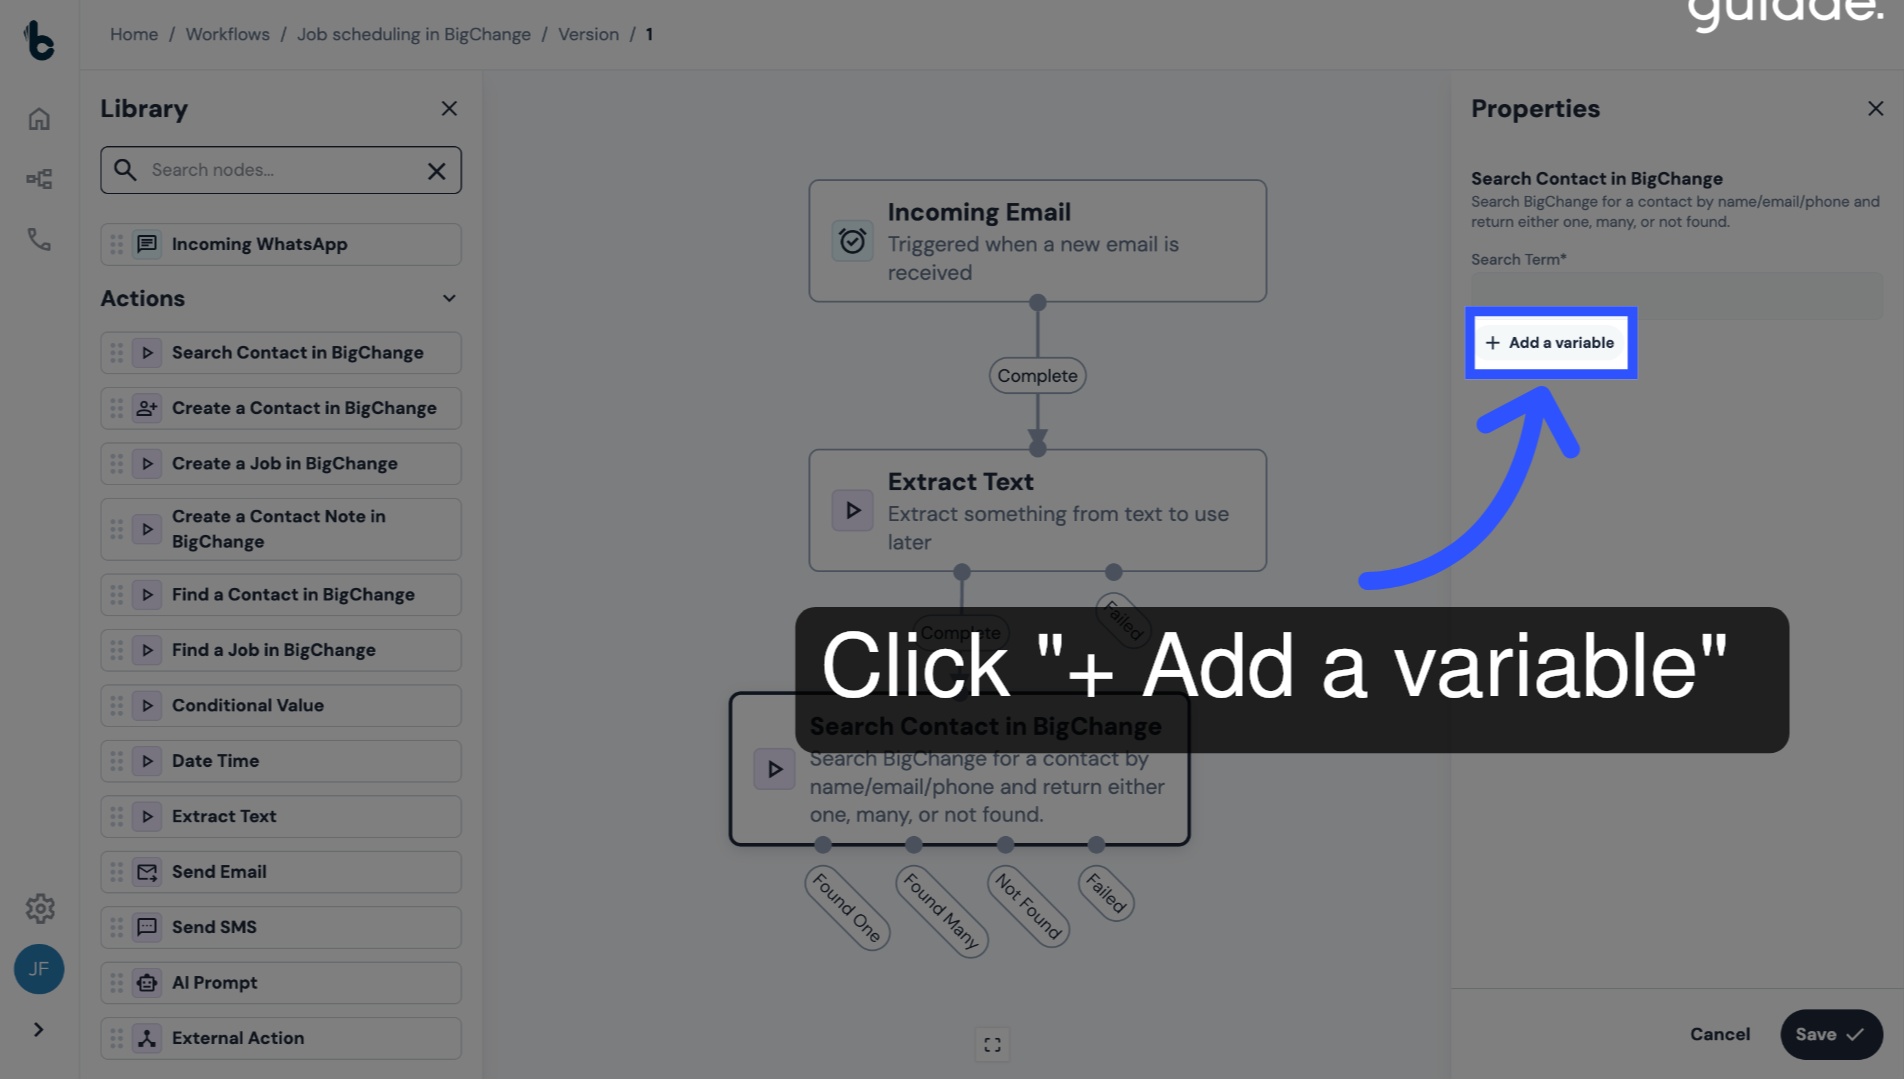
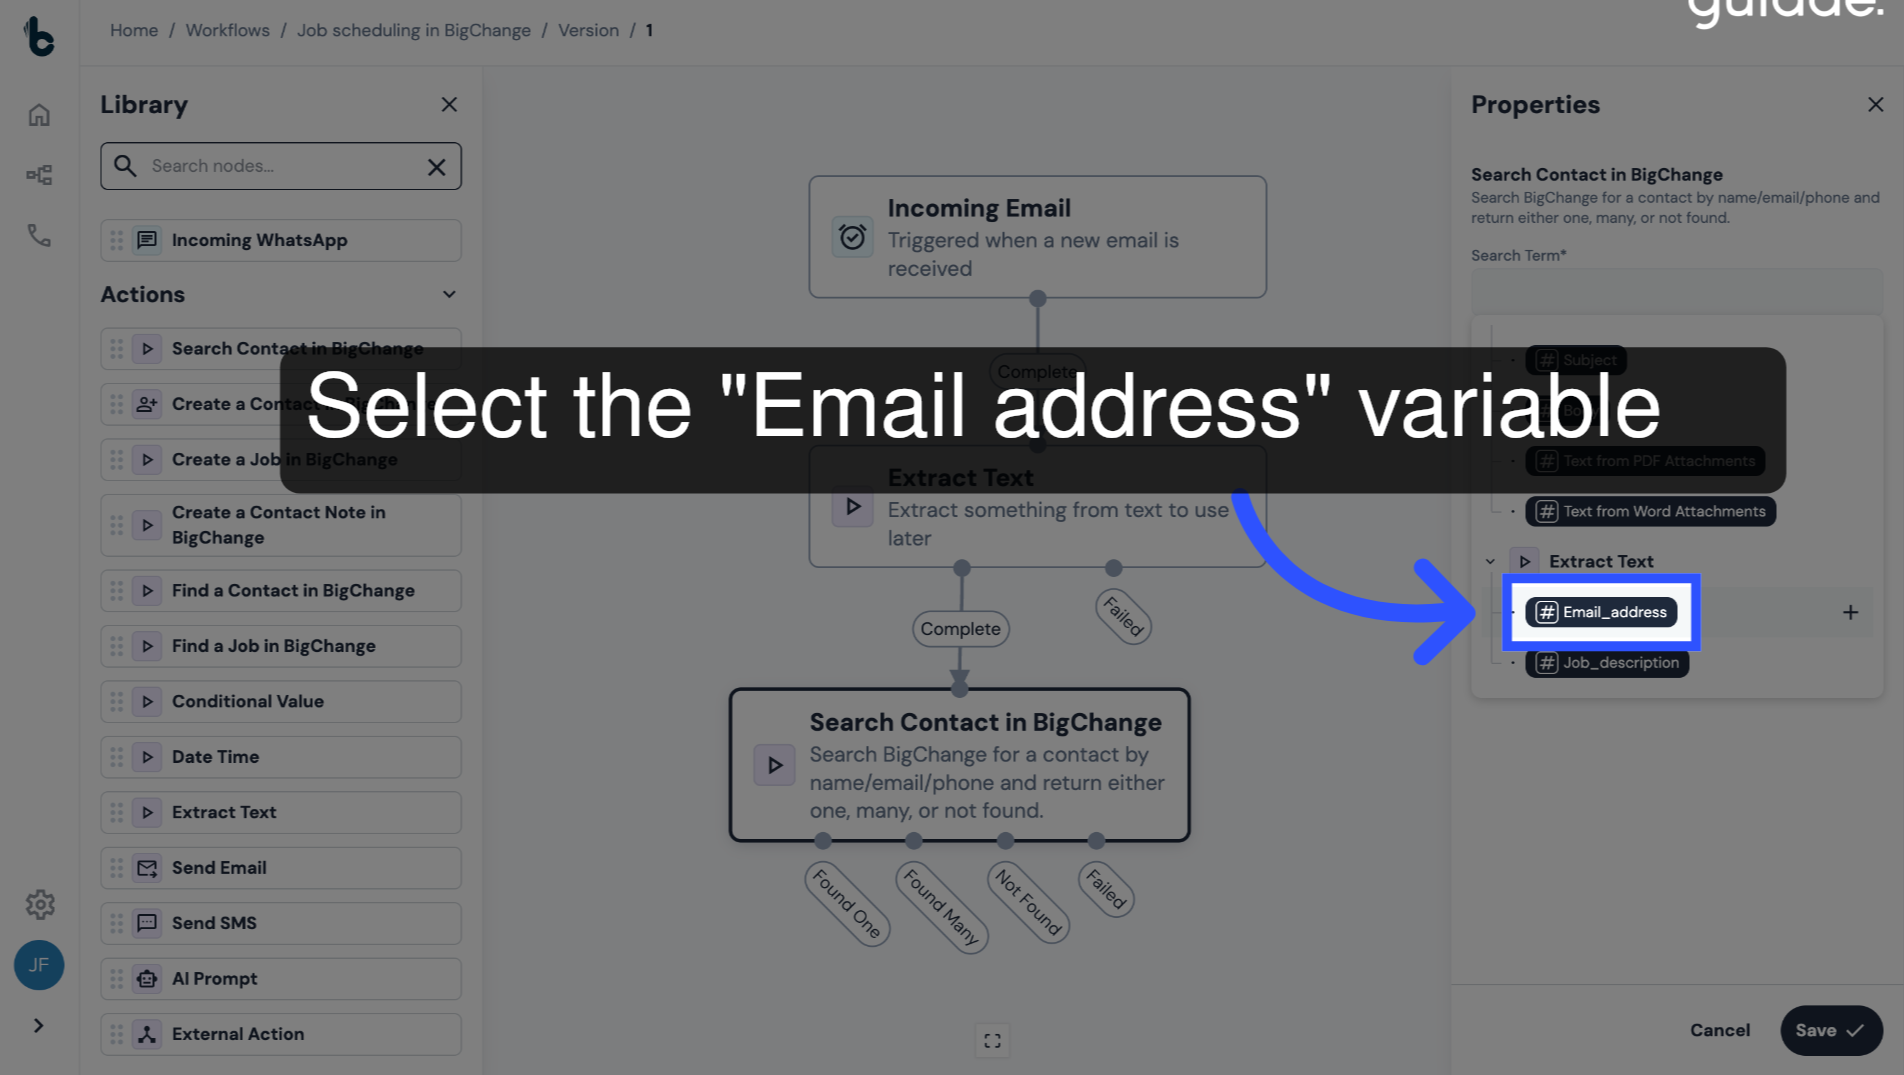
37. Select the Email Address variable
Select Email_address to map the extracted email address as the Search Term.
38. Save the configuration
Click Save.

39. 📚 Learn more
Learn more about the Search Contact in BigChange node in this guide.
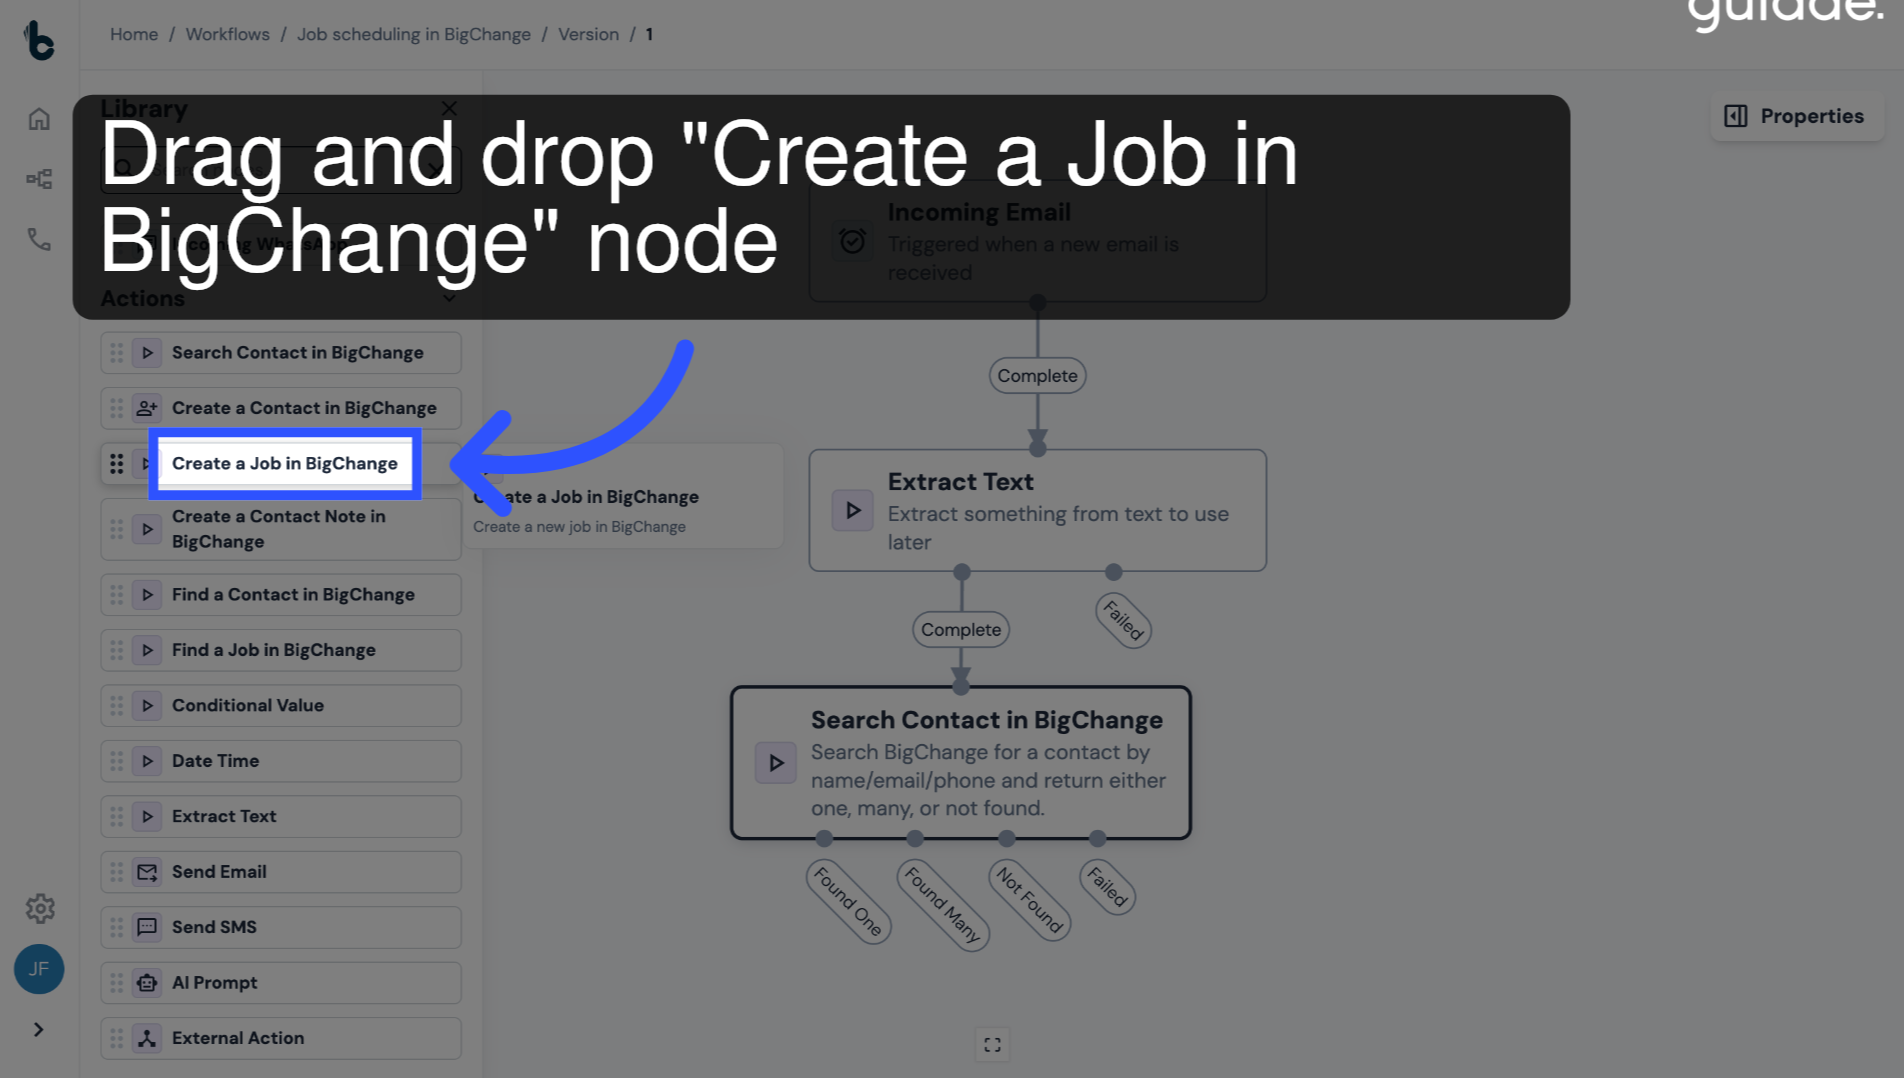
40. Add a Create Job in BigChange node
Finally, drag and drop the Create Job in BigChange node into the editor.
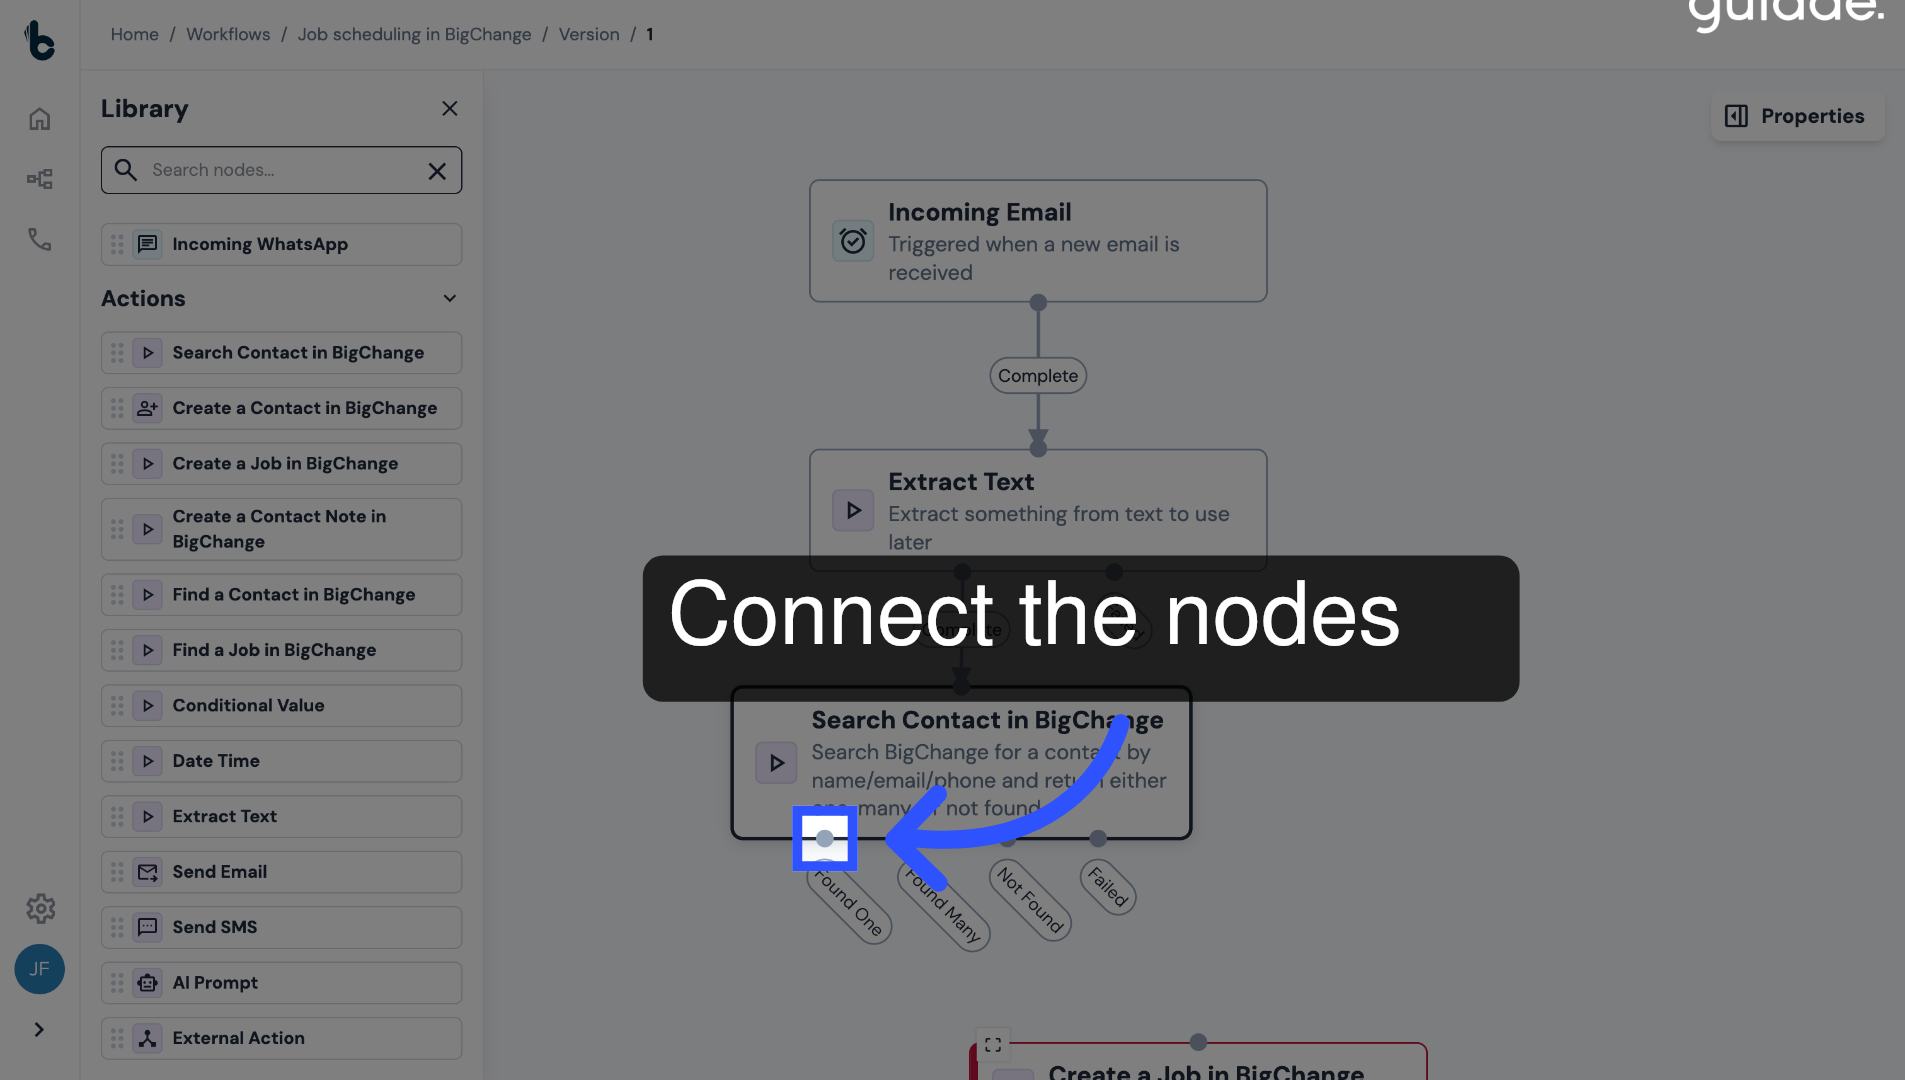
41. Connect the nodes
Connect it to the Found One branch of the Search Contact in BigChange node.
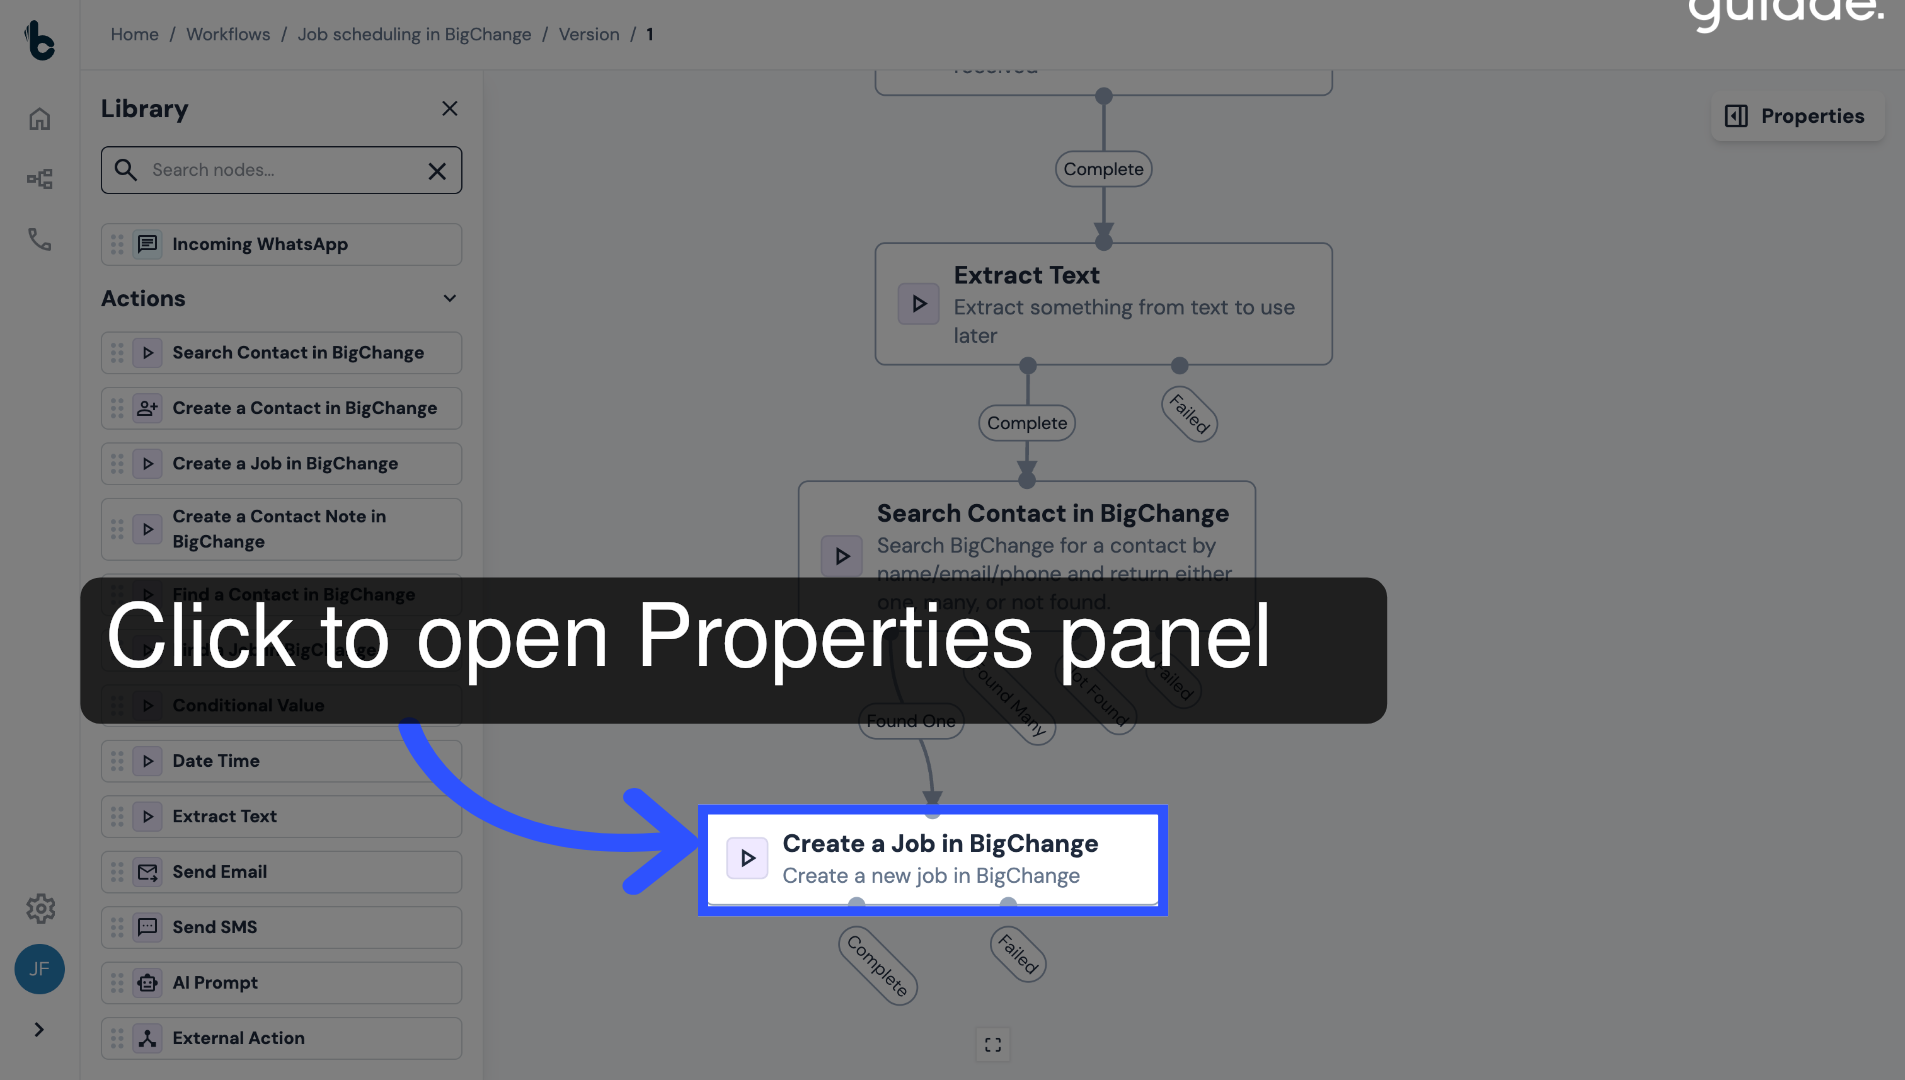
42. Open the Properties panel
Click on the node to open the Properties panel to configure it.
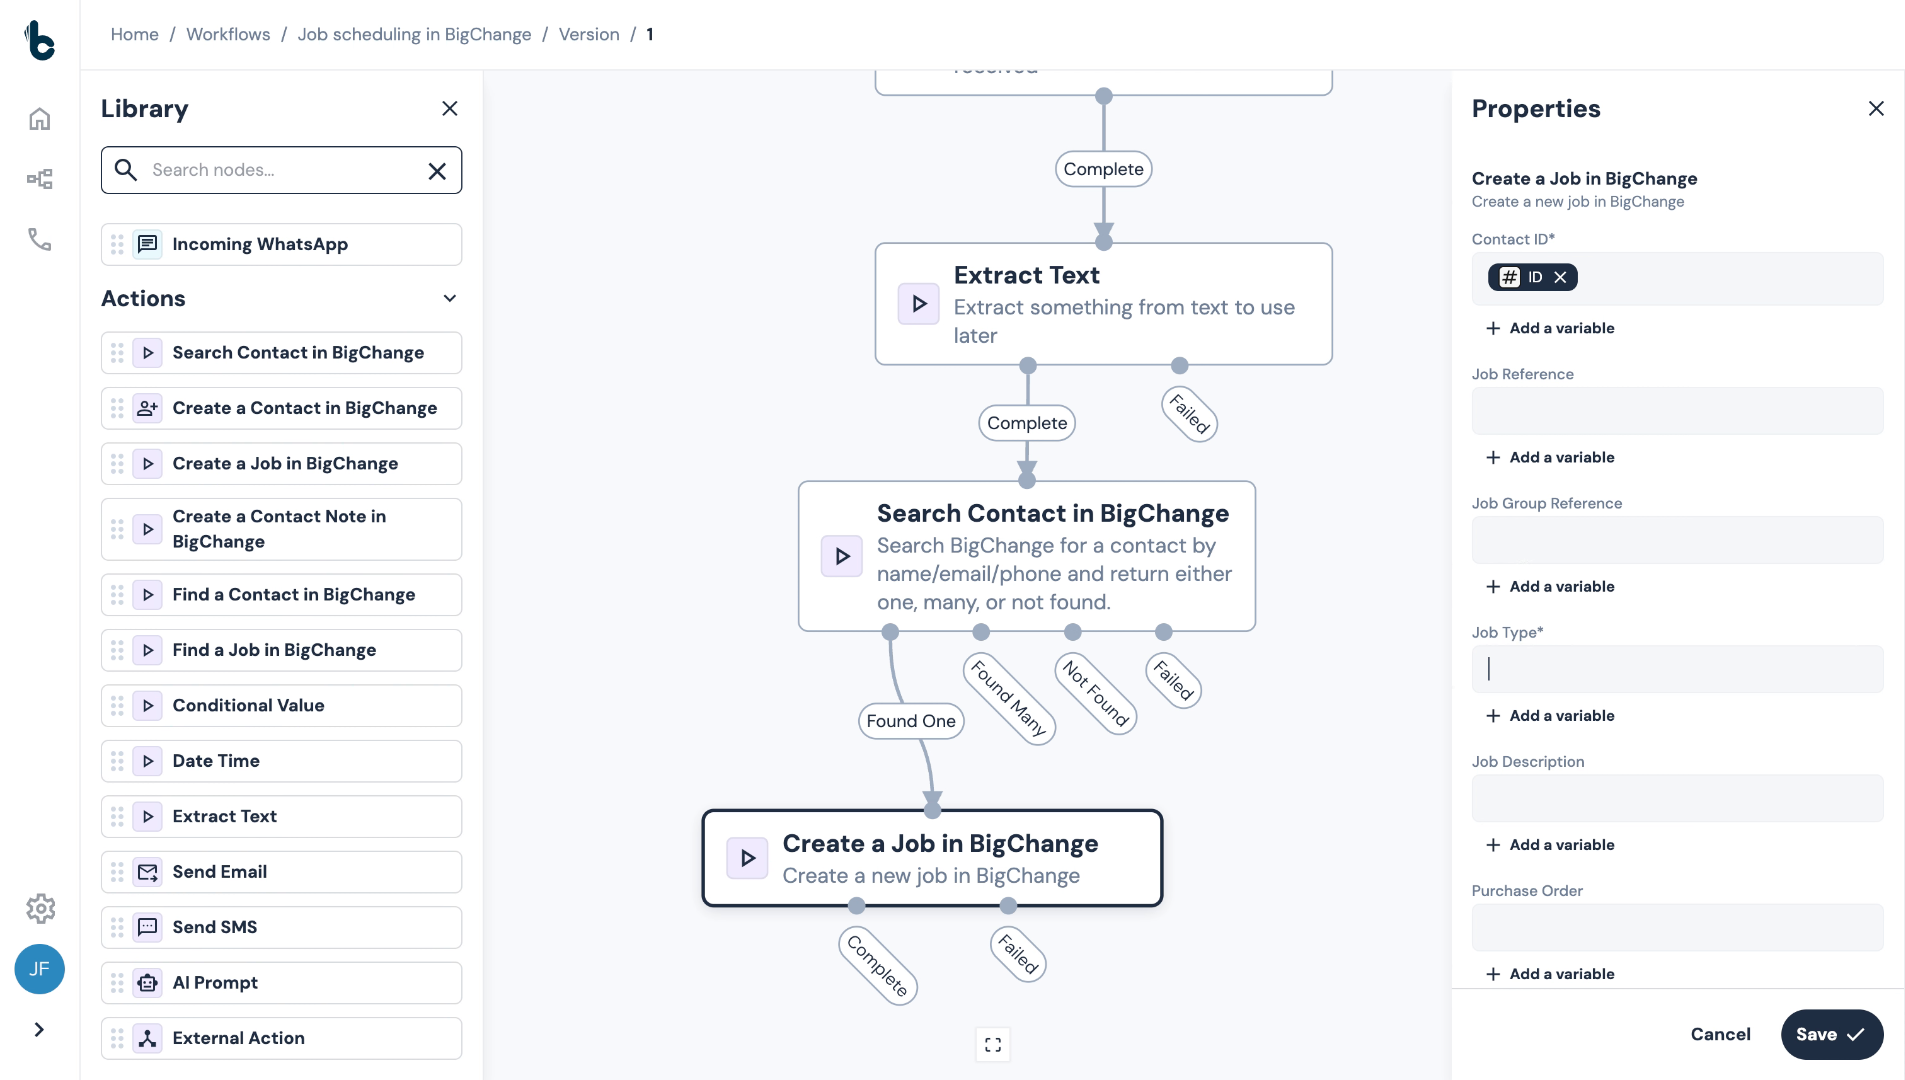
43. Configure Contact ID field
Under the Contact ID field, click on + Add a Variable.
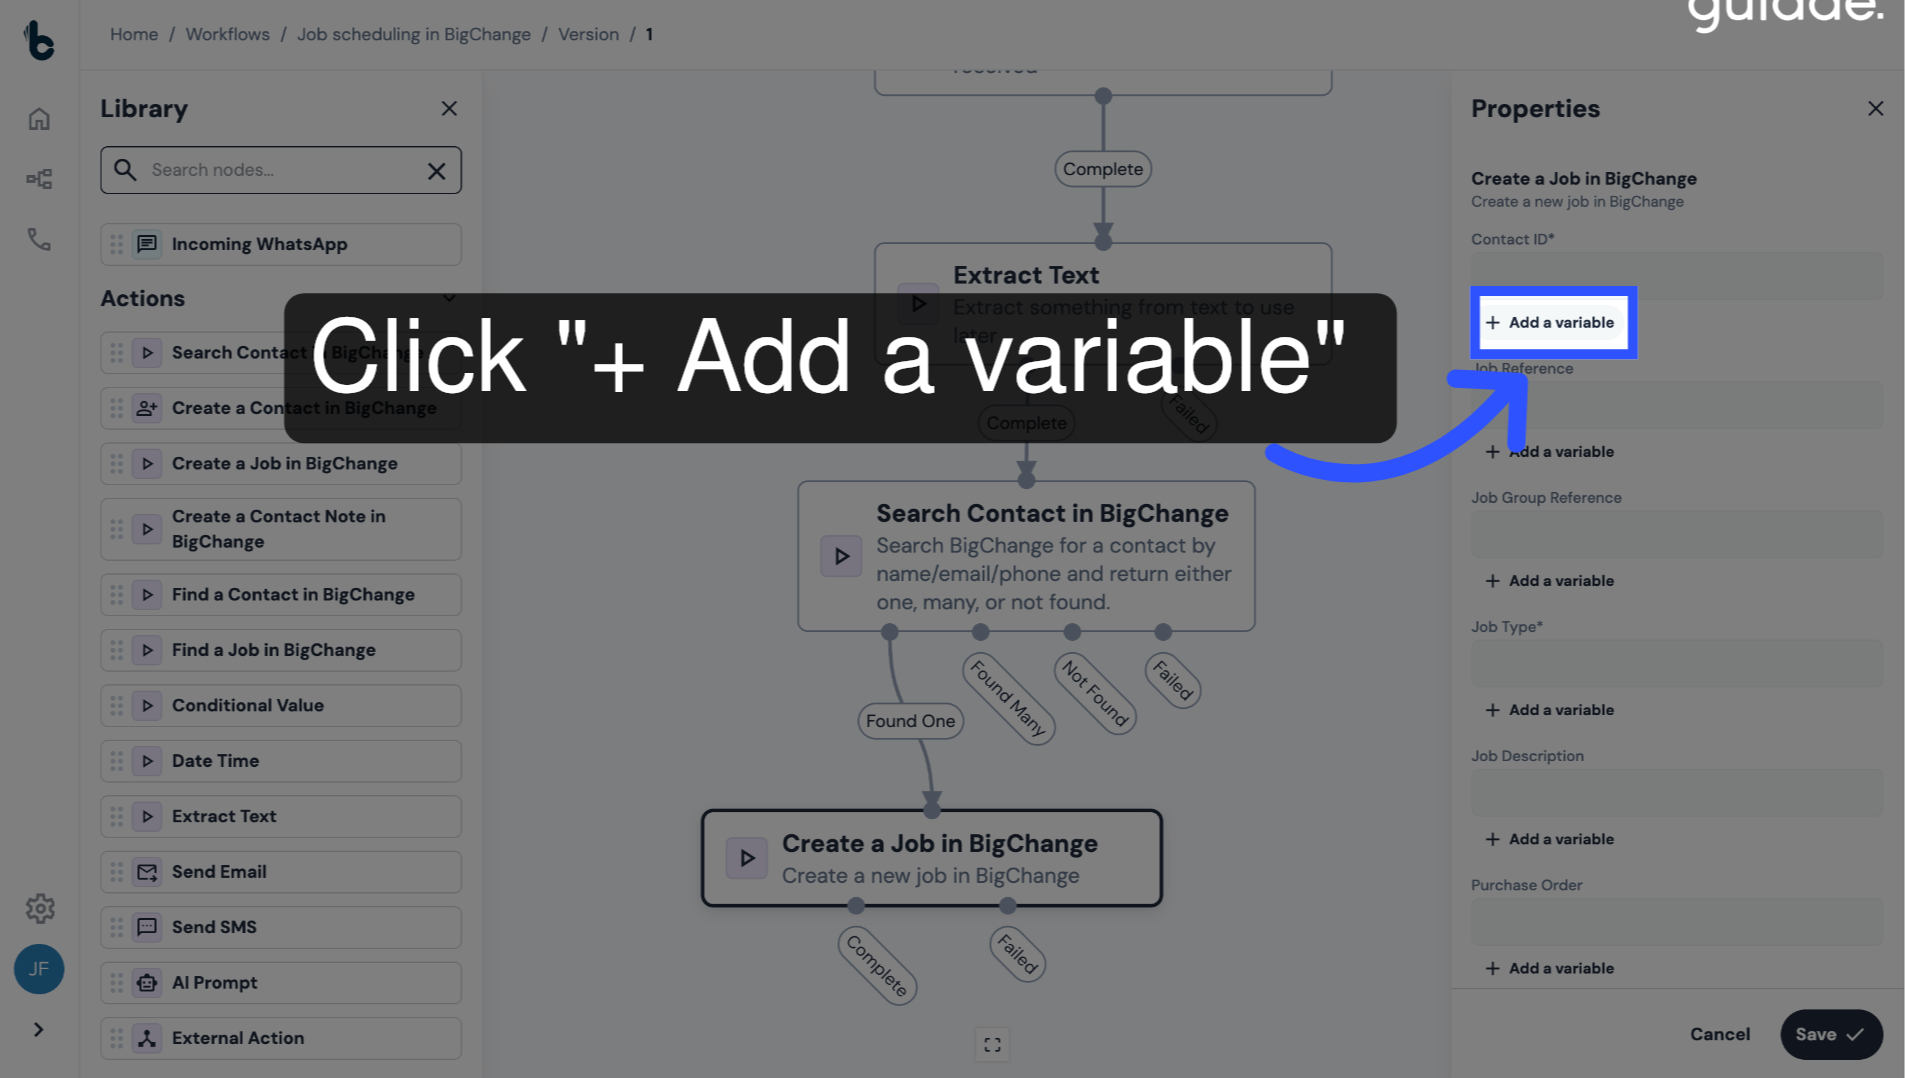
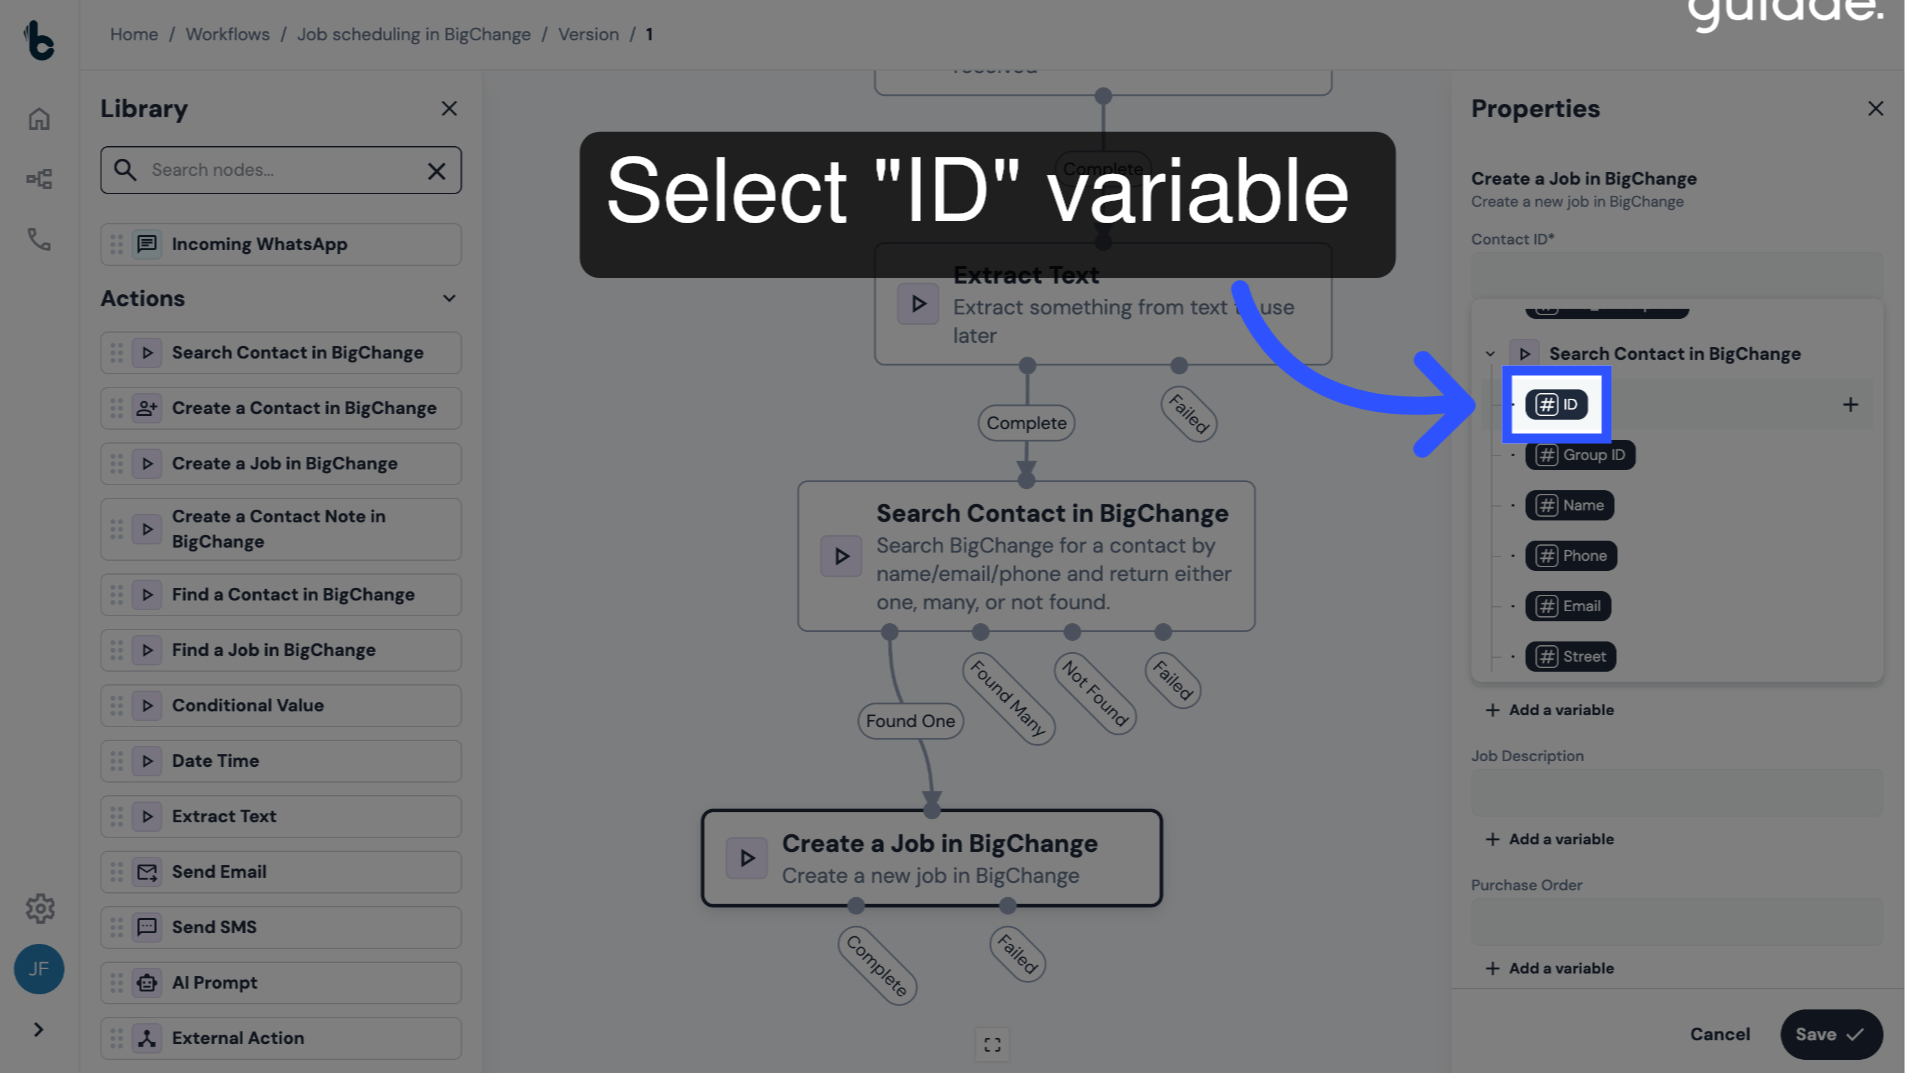
44. Select the Contact ID variable
Choose the ID variable from the drop-down.
This value is a default output when one contact is found by the Search Contact in BigChange node.
45. Manually enter Job Type
The Job Type field is also mandatory. If you only have one Job Type in BigChange, the name can be added manually.
46. ⚠️ Note
If you enter a Job Type manually, it should be copied exactly as it appears in BigChange or the workflow will not run successfully.
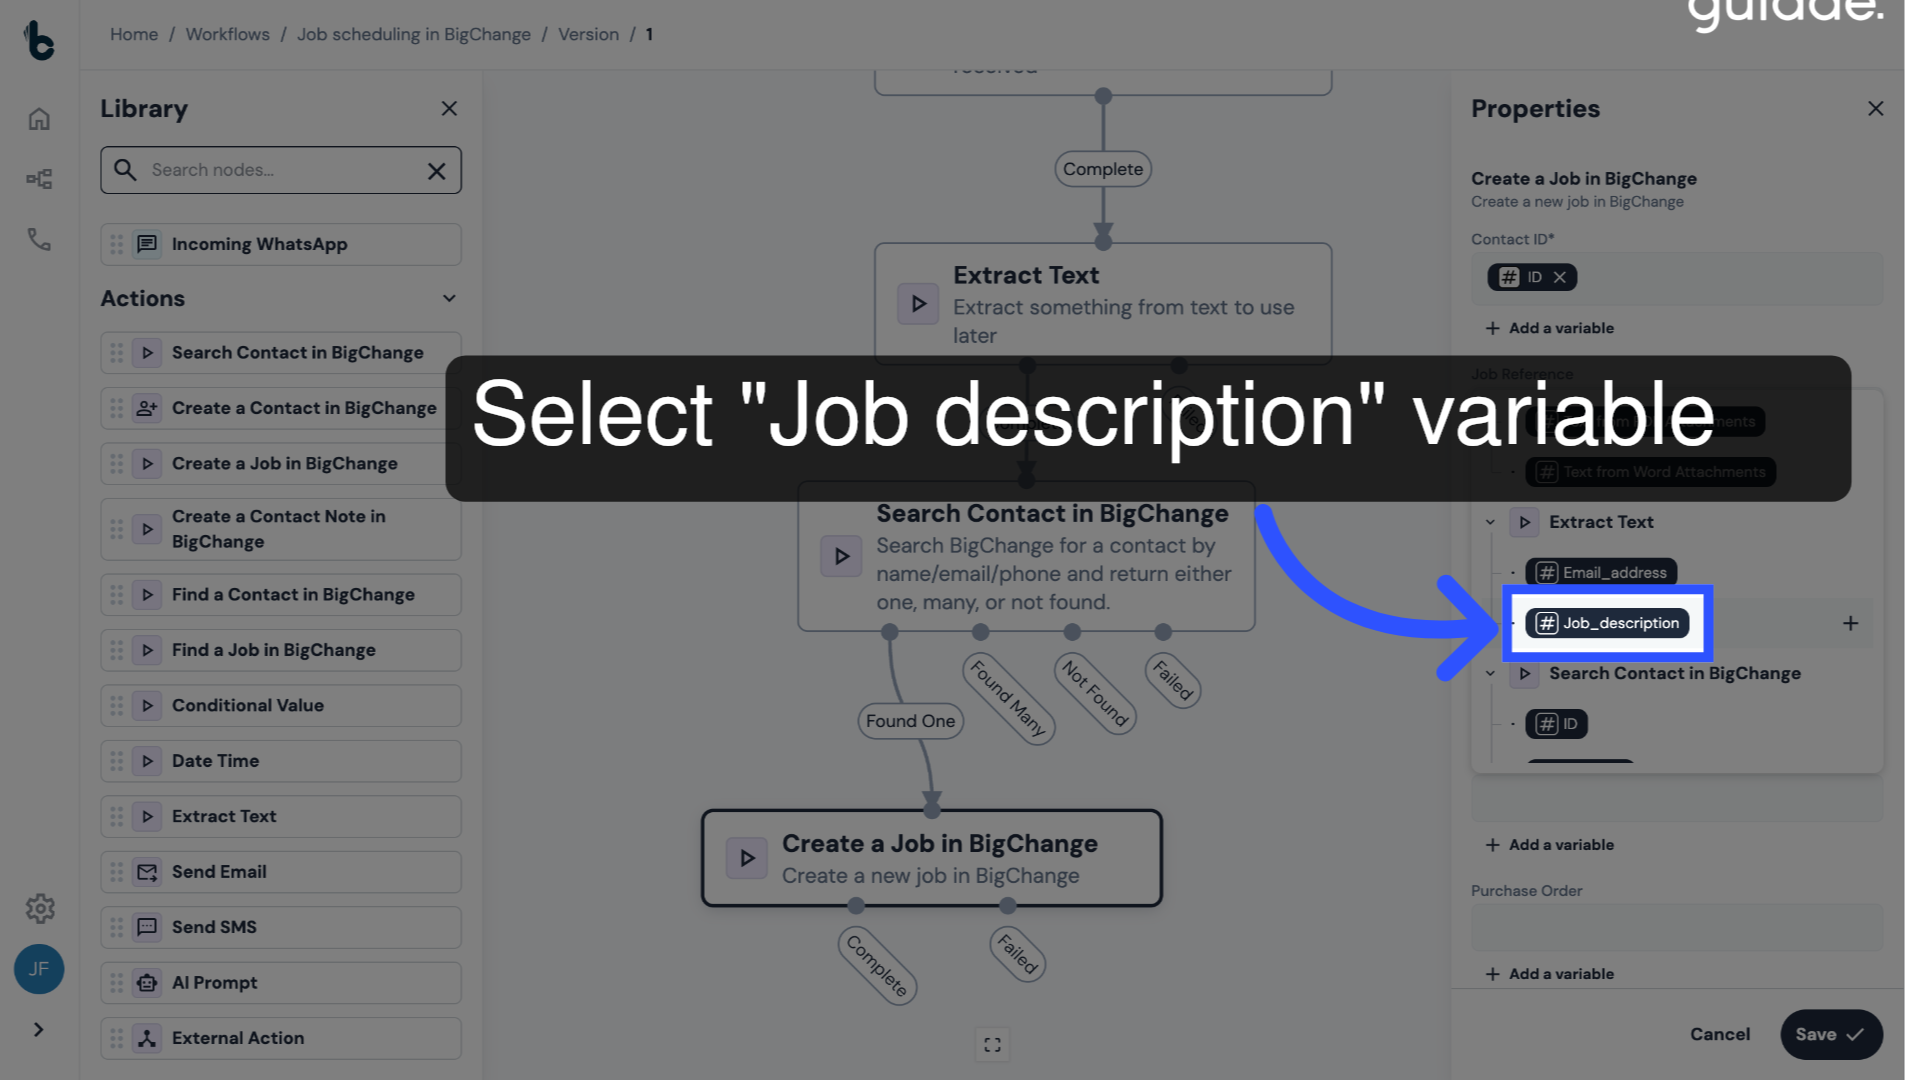
47. Configure the Job Description field
Click + Add a variable.
Select the Job description variable that was extracted and created using the Extract Text node.
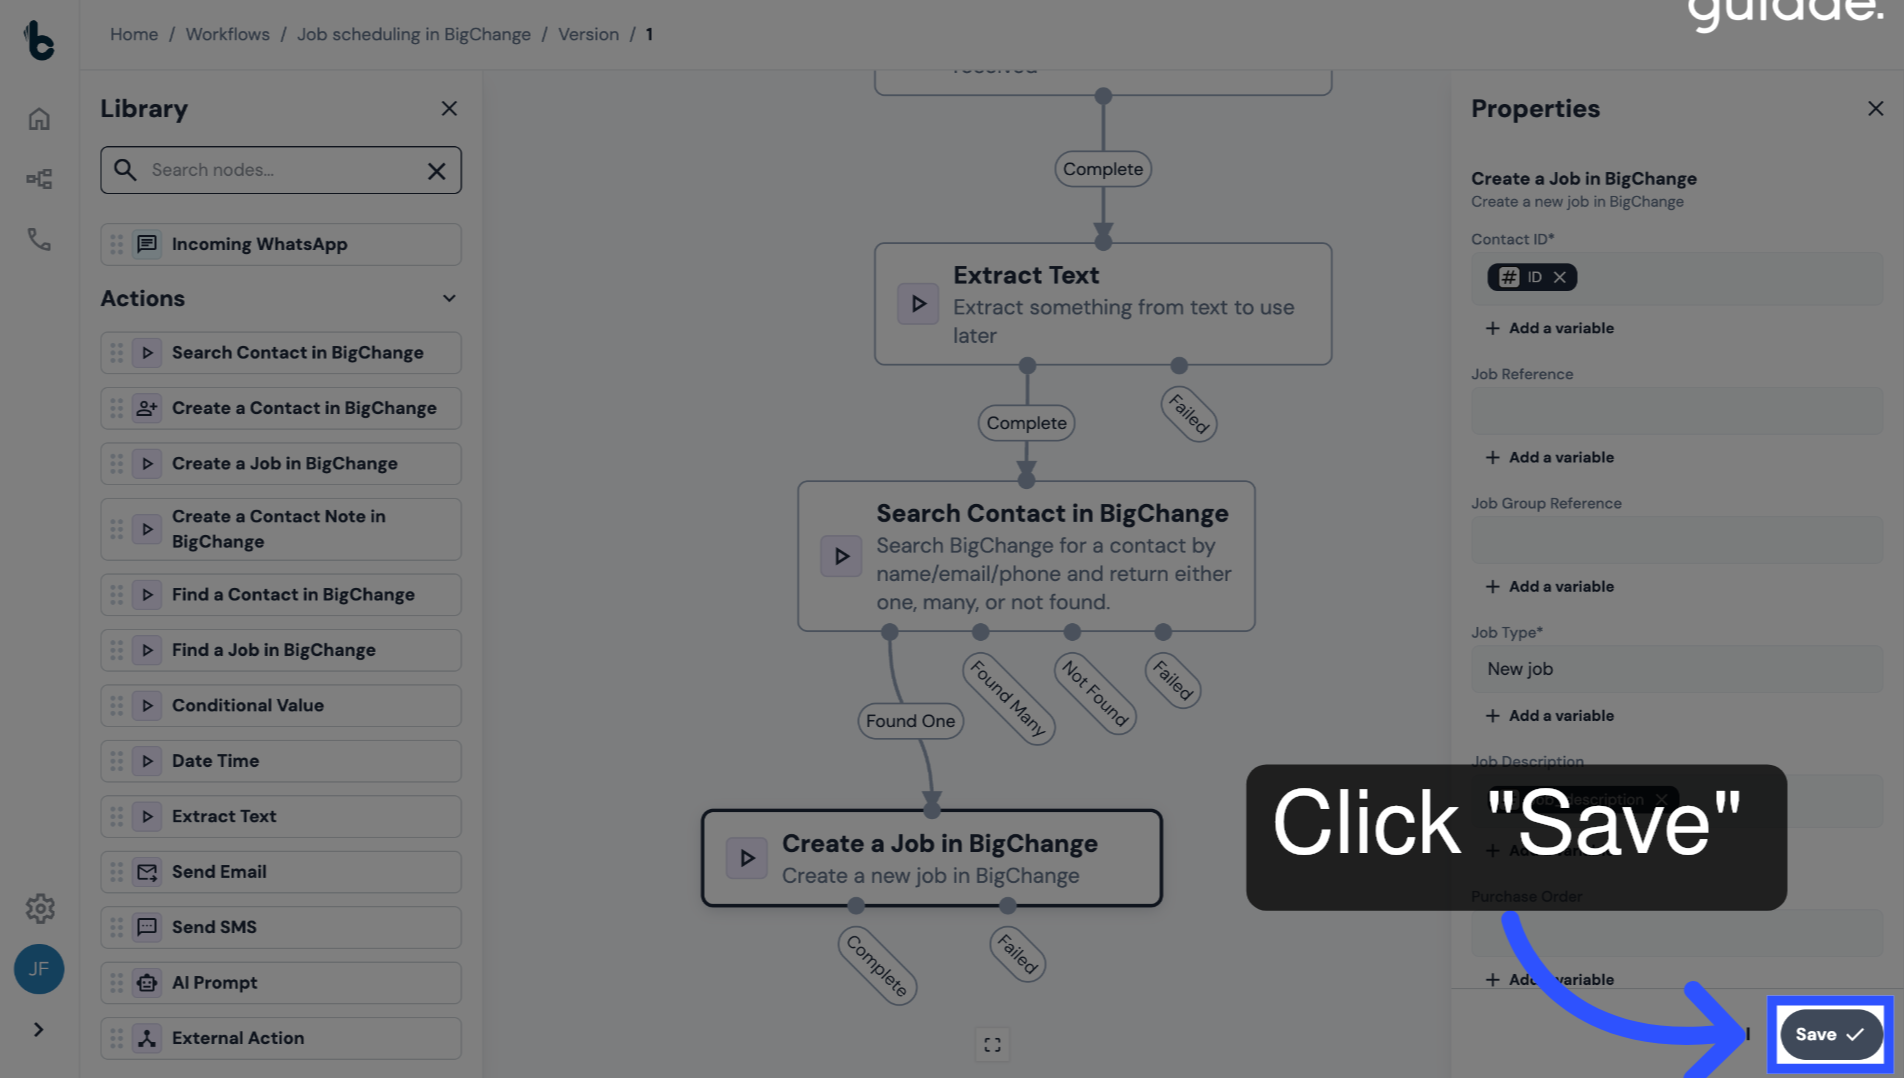
48. Save the configuration
Click Save.
49. 📚 Learn more
You can learn more about the Create Job in BigChange node in the guide entitled Create Job in BigChange action.
50. Recap
Your workflow will now run automatically in the background to create jobs in BigChange from the incoming requests.
To summarise:
Each time a customer submits a new job request via the form, an email is sent with the details, which kicks off the workflow in Build Concierge;
The relevant contact in BigChange is automatically located; and
A job with the relevant details is automatically created against the contact.
Now it's your turn! Let Build Concierge handle job creation so your team can focus on what really matters.