
The Workflow Builder is an all-in-one, no-code visual tool designed to automate and simplify your business processes. With its intuitive drag-and-drop interface, you can easily map out complex workflows by connecting triggers and actions, without the need for technical skills.
Workflows are triggered by real events, whether it’s an email, phone call, WhatsApp message, manual input, or leads from platforms like Checkatrade. With advanced AI built right in, your workflows can automatically analyze incoming data, like extracting key details from customer emails to instantly create job bookings.
Key capabilities of the Workflow Builder
- Visual Process Mapping: Design and customize your workflows effortlessly with a user-friendly drag-and-drop interface, accessible to everyone on your team.
- Multi-Channel Triggers: Trigger workflows from a variety of sources: emails, calls, messaging apps, manual inputs, or third-party lead platforms.
- AI-Driven Automation: Harness artificial intelligence to analyze incoming data, extract essential information, and enable smart, data-driven decisions within your workflows.
- Conditional Logic: Create dynamic, branching workflows that adapt in real time, ensuring the right actions happen based on your business rules and data.
- System Integration: Connect seamlessly with CRMs, job management tools, and other essential business systems using pre-built connectors and APIs.
- Monitoring and Analytics: Gain real-time insights with comprehensive logs and reports to monitor performance and continuously optimize your workflows.
- Collaboration and Reusability: Collaborate on workflow design, leverage templates, and reuse components to speed up deployment and maintain consistency across your processes.
Let’s dive in!
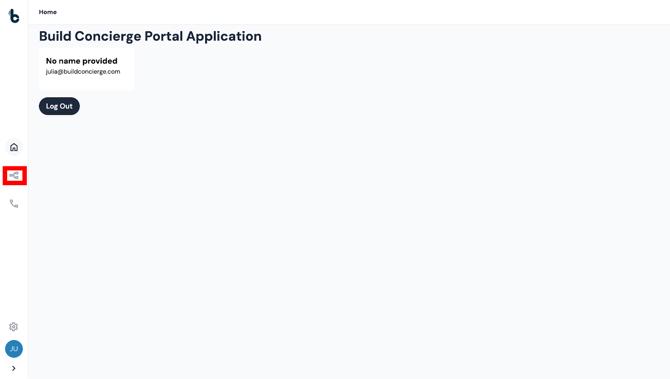
Accessing the Workflow Builder
To open the Workflow Builder:
- Log in to your Build Concierge portal
- Click the Workflow Builder icon in the left pane.
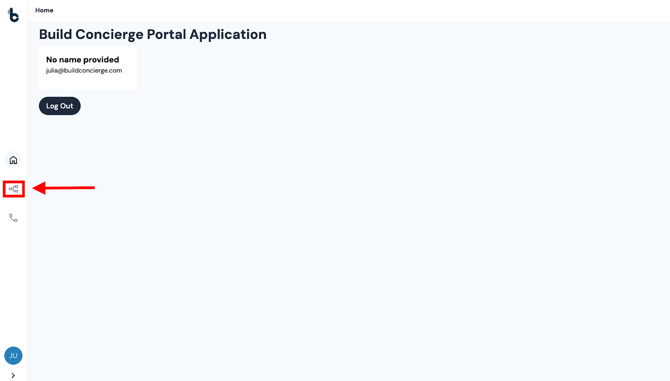
This will take you to the Workflow Library.
📝 Note
The Workflow Library will appear empty until you have created your first workflow.
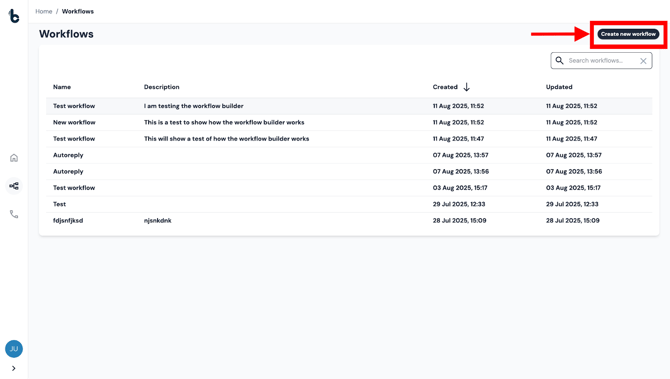
Creating a Workflow
To create a workflow:
- Click the Create new workflow button in the top-right corner of the Workflow Library.
- In the pop-up window:
- Add a Workflow name (required)
-
- Add a Description to explain the process you're automating (optional)
💡 Tip
Choosing a clear, descriptive name will make it easier to identify the workflow later, especially as your list of workflows grows.
Click Create to start building the workflow in the Workflow Editor.
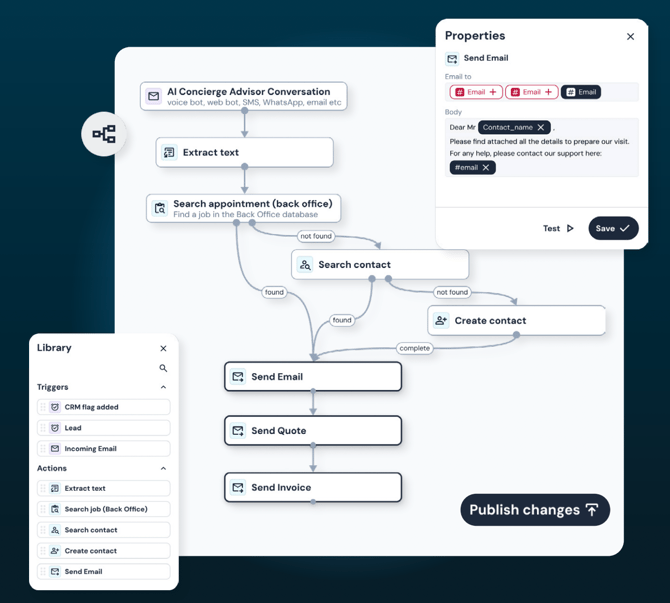
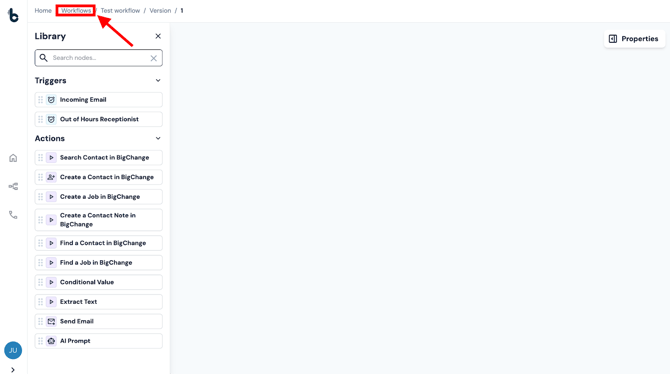
The Workflow Editor
- You will build your workflows in the Workflow Editor.
- On the left-hand side of the Workflow Editor, you’ll find the Library, organised into Starting Actions and Actions.
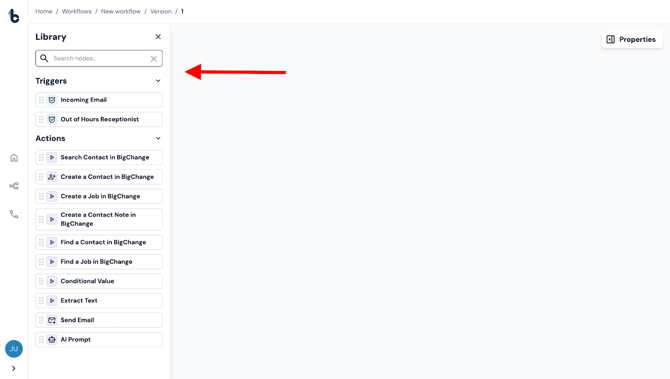
To build a workflow:
- Drag and drop a Starting action node to the empty space
- Drag and drop your first Action node to the empty space
- Connect the outcome branch of the Starting action to the Action
- Clicking on the nodes will open the Properties panel on the right where you can set up the correct configuration for your workflow.
- Continue adding Action nodes, connecting and configuring the nodes until your workflow is built.
📚 Learn about best practices for how to define and build workflows using the Workflow Builder, in this guide. You can also learn more about building workflows in this article.
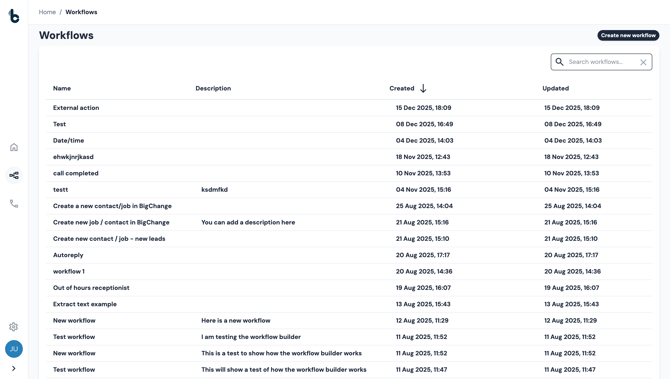
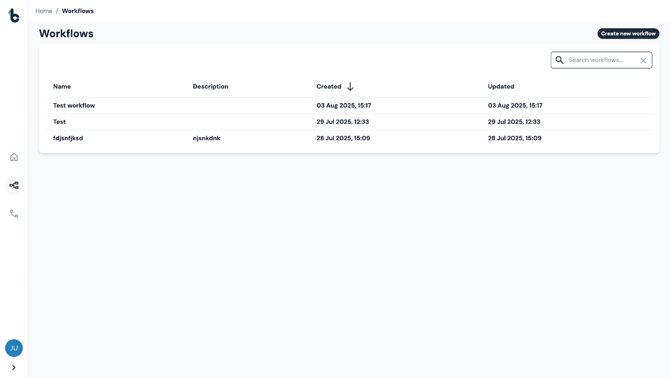
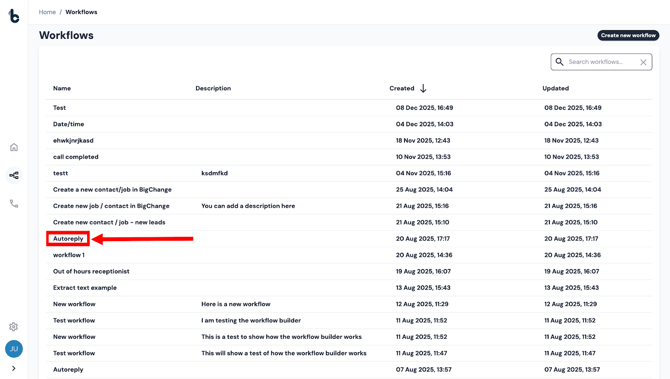
The Workflow Library
Once you’ve created a few workflows, they’ll all appear in your Workflow Library, along with the following key details:
- Name
- Description
- Date/time created
- Date/time last updated
You can access the Workflow Library anytime by:
- Clicking the Workflow Builder icon on the left pane
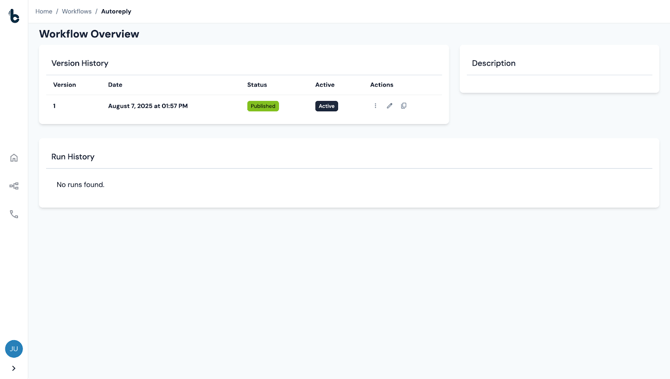
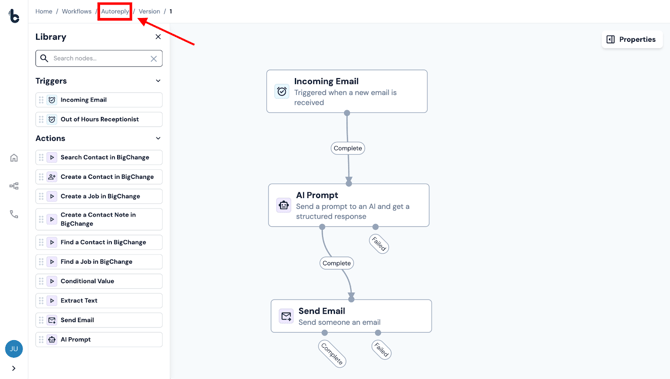
The Workflow Overview Page
Every workflow has its own Overview page, where you can:
- View version history
- Check run history
- Access editing options
To open it:
Click on the workflow’s name in the Workflow Library.
- Or navigate via the breadcrumbs by clicking the workflow name while editing a workflow.
Searching for a Workflow
To quickly find a workflow, search for the name of the workflow using the Search bar in the top-right corner of the Workflow Library. This will be helpful as your list of workflows grows!
Version History
The top half of the Workflow Overview page is called Version History. This is where you will be able to view previous versions of a workflow, which is useful for monitoring changes or rolling back when needed.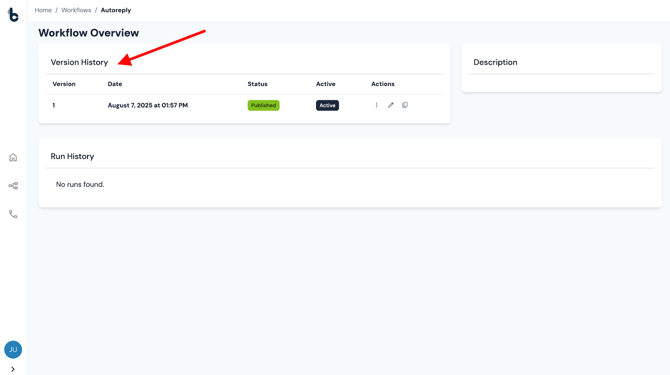
You will see the following information about each version:
- Version number
- Date created
- Version status (e.g. Published, Draft, Archived)
- Whether the version is currently active
- Actions section which includes:
- Edit workflow (pencil icon)
- Copy button (coming soon)
- 3 dots menu (additional actions coming soon)
⏳ Coming soon
The full Version History, including the ability to revert to a previous version, is still in development.
Editing a Workflow
To edit an existing workflow:
- Open the Workflow Overview page for that workflow
- Under Version History, click the pencil icon to open the Workflow Editor
- Start making changes!
.gif?width=670&height=380&name=chrome-capture-2025-08-11%20(1).gif)
⚠️ Note
You can currently only edit the latest version of a workflow. To edit an earlier version, make a copy of it first, make it the latest version and then edit.
⏳ Run History
At the bottom of each Workflow Overview page, you’ll find the Run History. This section shows a list of all past workflow runs and some key information about each run:
- Date/time the run was triggered
- Status (complete/failed)
- Version of the workflow it relates to
- Duration
💡 Tip
If your workflow didn’t behave as expected, check the Run History to get insights into what went wrong.
👉 Next up: Now that you’re familiar with the layout and core components of the Workflow Builder, read this article to continue learning.