
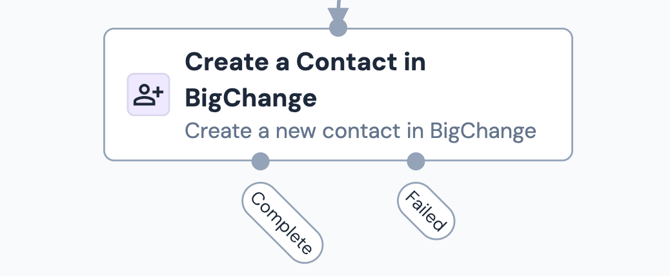
The Create Contact in BigChange action allows your workflow to automatically create a new contact in your BigChange account, saving time and ensuring consistency across systems.
This is especially useful when dealing with new leads or customers who aren’t yet in your CRM.
Instead of manually entering contact details, your workflow can capture key information (like name, email, and phone number) from earlier steps in your workflow, and use it to create the contact automatically.
This action ensures your contact list stays up to date without manual input, and helps prepare your records for further automation, such as job creation or communication flows.
📚 Learn more about creating a contact in BigChange in this article.
Configuration
To set up the Create Contact in BigChange node:
- Add the node to your workflow, ensuring it is connected to a starting action or another action node.
- Click on the node to open the Properties panel.
Mandatory fields
To successfully create a contact in BigChange, the following fields must be configured:
- Name
- Contact Group
- Address
- Postcode
The Name, Address and Postcode fields will commonly be mapped with variables using data captured earlier in your workflow.
📚 Learn more about working with variables here.

⚠️ Note
BigChange requires every contact to be assigned to a Contact Group.
There are two ways to do this:
- Static assignment: If all contacts in this workflow go to the same group, manually enter the Contact Group name in the Contact Group field. (Note: the name is case-sensitive.)
- Dynamic assignment: If the Contact Group depends on earlier workflow data, use a Conditional Value node to route contacts to the appropriate group using conditions.
📚 Learn more about the Conditional Value node here.
Optional fields
You can optionally configure these fields to enrich your contact record:
- Reference
- Phone
Custom fields
If you use Custom fields in your BigChange contact records, you can populate these too.
📚 Learn more about adding custom fields to your BigChange contacts in this article.
To include custom fields whenever a new contact is automatically created in BigChange by Build Concierge:
- Click + Add under the Custom Fields section.
- Copy and paste the field name of your custom field exactly as it appears in your BigChange account.
- Define the value with a static assignment or map it using a variable.
⚠️ Note
Be sure to match the field name exactly as it appears in your BigChange settings, including spaces and casing, to ensure proper mapping.
An example of a custom field you might use when creating contacts in BigChange is where each new contact should be assigned to a particular Sales Manager. You might want to add this custom field so it is already populated whenever a new contact is created.
Outputs
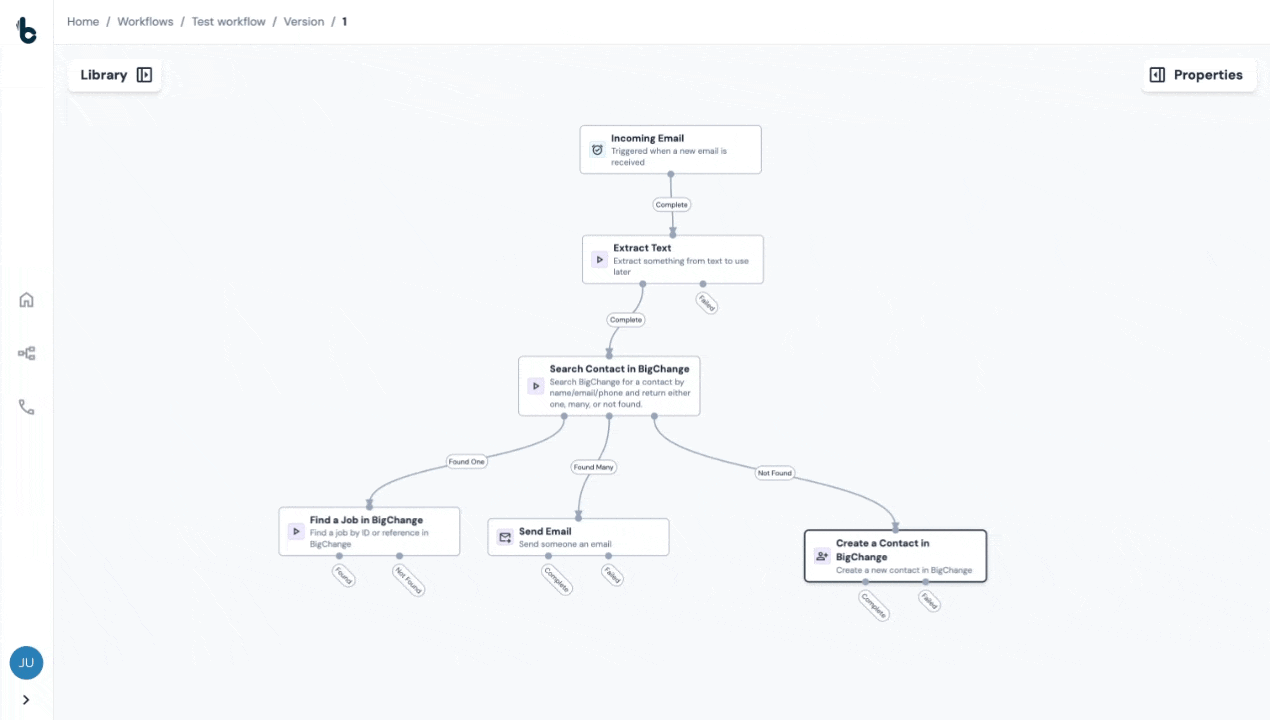
Once the Create Contact in BigChange node runs, it will return one of two possible outcomes:
- Complete – The contact was successfully created in BigChange. The workflow will continue to the next connected step.
- Failed – The contact could not be created, usually due to incorrect configuration.
💡 Tip
For error-handling purposes, to understand why a contact could not be created, connect the Failed branch to a Send Email node. Then, configure the node so that the Reason for Failure variable is included in the Email Body field.
Default variables
There is only one variable which is available for use further down the workflow coming from the Create contact in BigChange node. That is:
Contact ID - The ID given to the contact that was created in BigChange.
This can then be used further down the workflow, e.g. to map the Contact ID field in the Create Job in BigChange action node.